Hotel Review – Disney’s Coronado Springs

For our Thanksgiving trip to Disney World, we’d originally booked a room at Pop Century Resort, one we’ve stayed at in the past, but a few weeks out from this trip, we were able to move the reservation to Coronado Springs for a relatively small increase. Having never stayed there, we decided to give it a try.

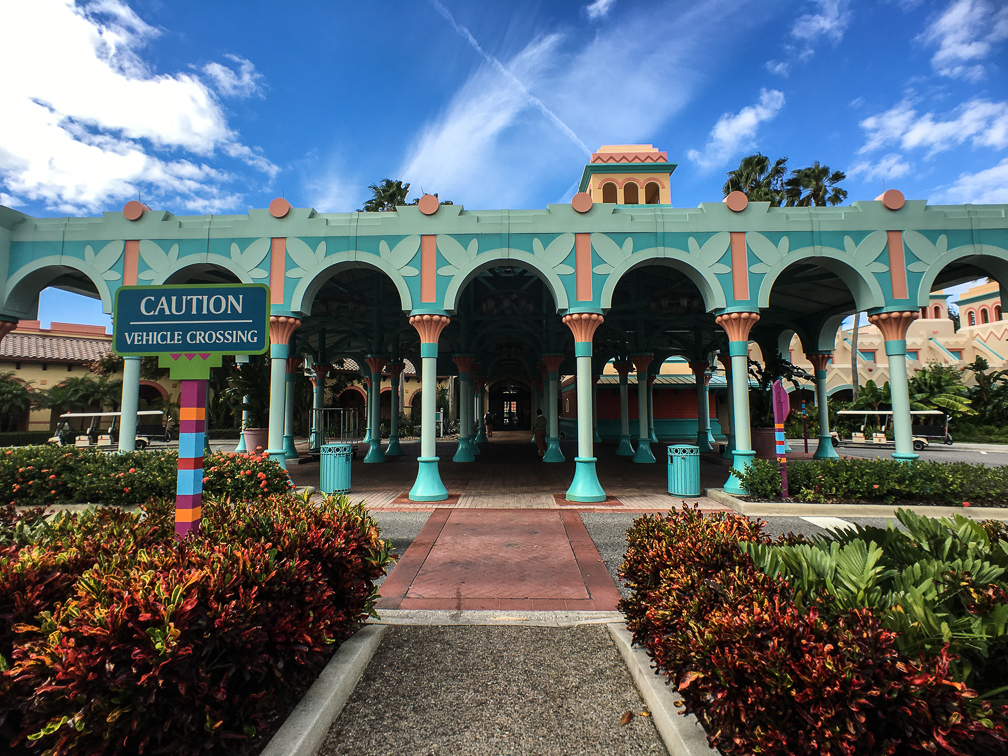
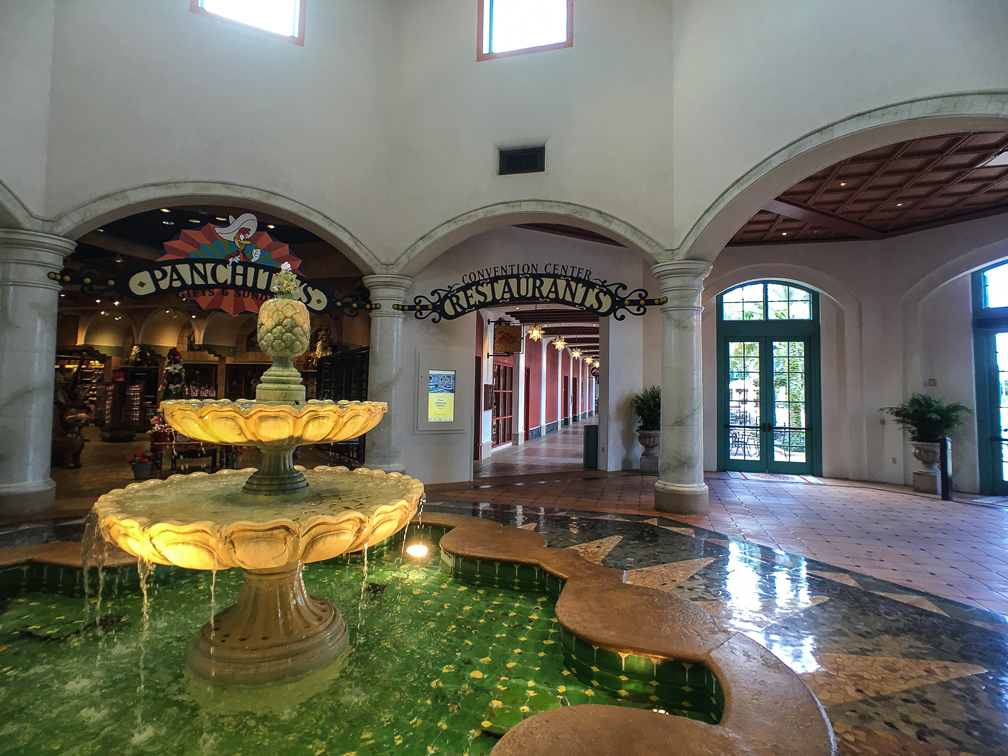
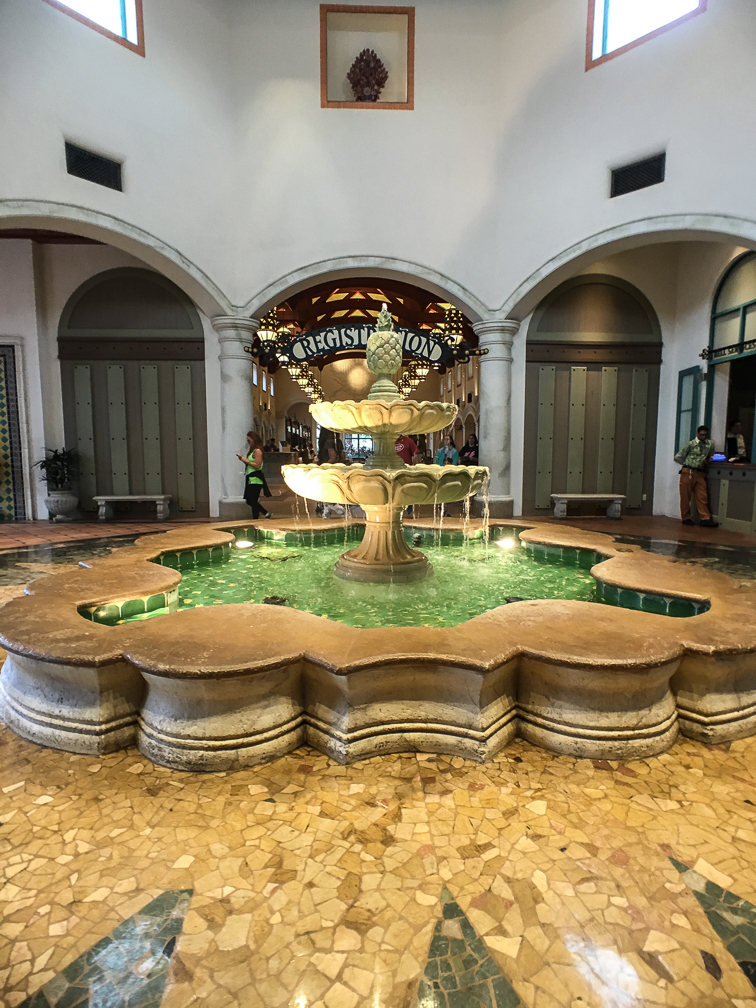
Check in was pretty easy here. I’d actually checked in online the day before, and just before noon on our scheduled day of arrival, I got a text letting me know our room was ready for us. Upon arrival, we hit the registration counter, got our keys and some basic information. While the main building lookd fine, one thing that stood out were the lack of Christmas decorations. Jen and I ate dinner at Beaches and Cream that night, and seeing both Beach Club and Yacht Club pretty well saturated in Christmas, were a bit surprised that Coronado Springs had yet to get any love in this area, or maybe it was just so subtle we didn’t’ see them.

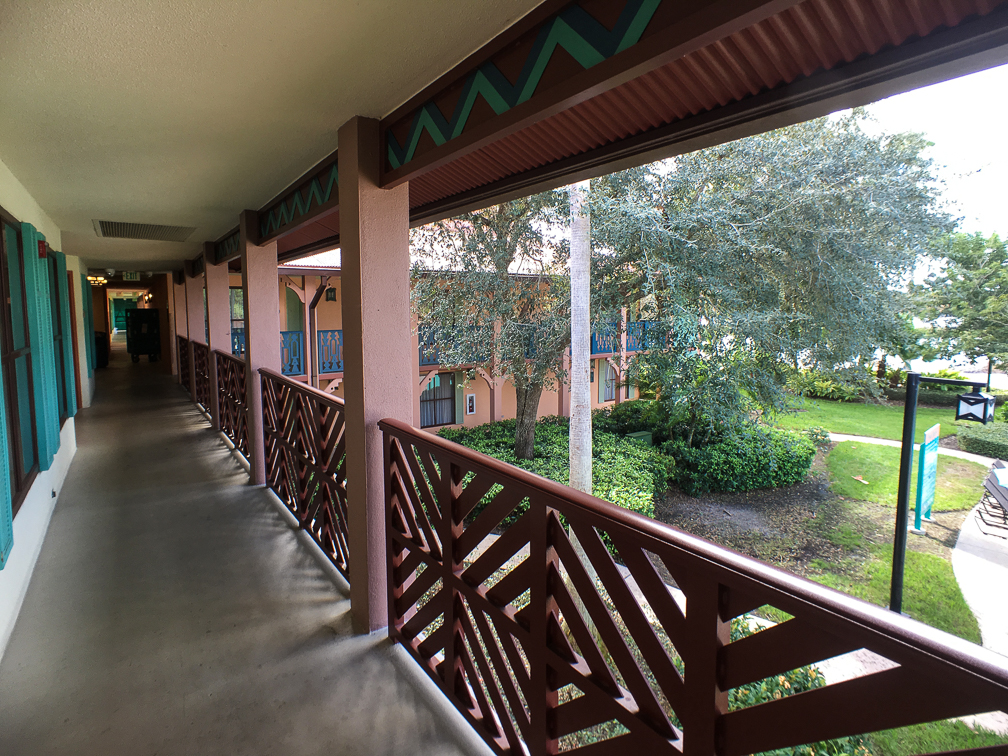
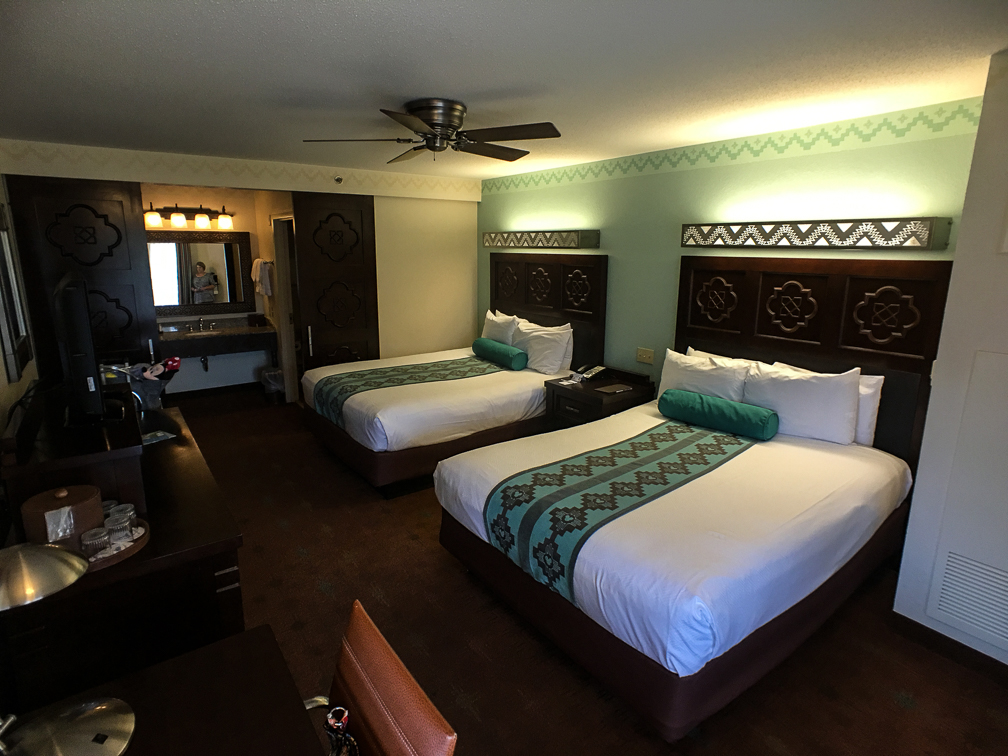
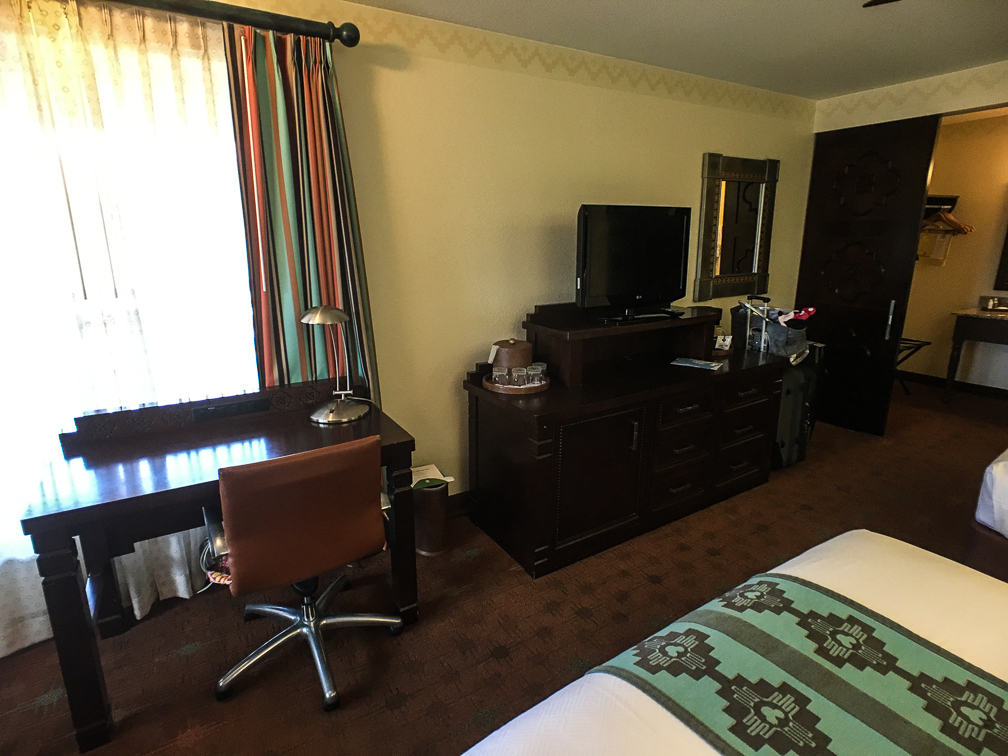
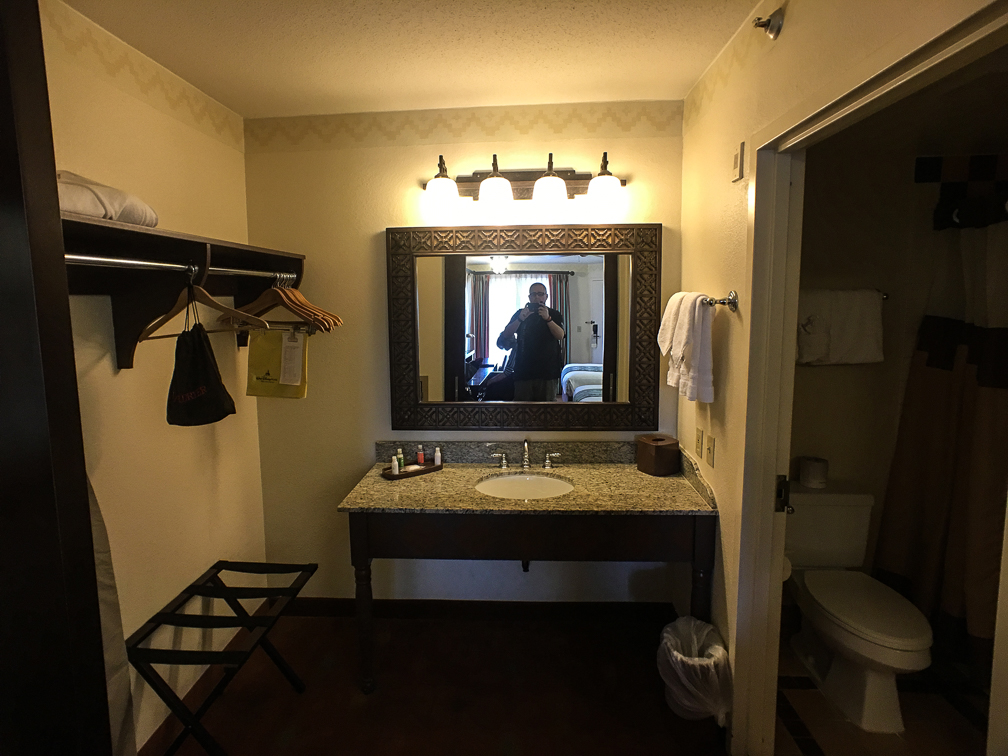
After checking in, we headed over to our room, located in the Cabanas section (building 9A, specifically). We’d requested a water view, and got just that, as we had a corner room overlooking the Cabanas village pool. Our room itself was pretty disappointing, especially for a hotel classified as a moderate. Disney really needs to gut these rooms and start over, as they feel like they haven’t been touched in 20 years. We never had an issue with it being clean, it just felt worn and dated. Additionally, one thing we really liked about French Quarter back in May was that there were two sinks, allowing us to get ready faster in the morning. Not so here, as shown in the room pics.

IMG_2681 IMG_2682 IMG_2683IMG_2684IMG_2685IMG_1496

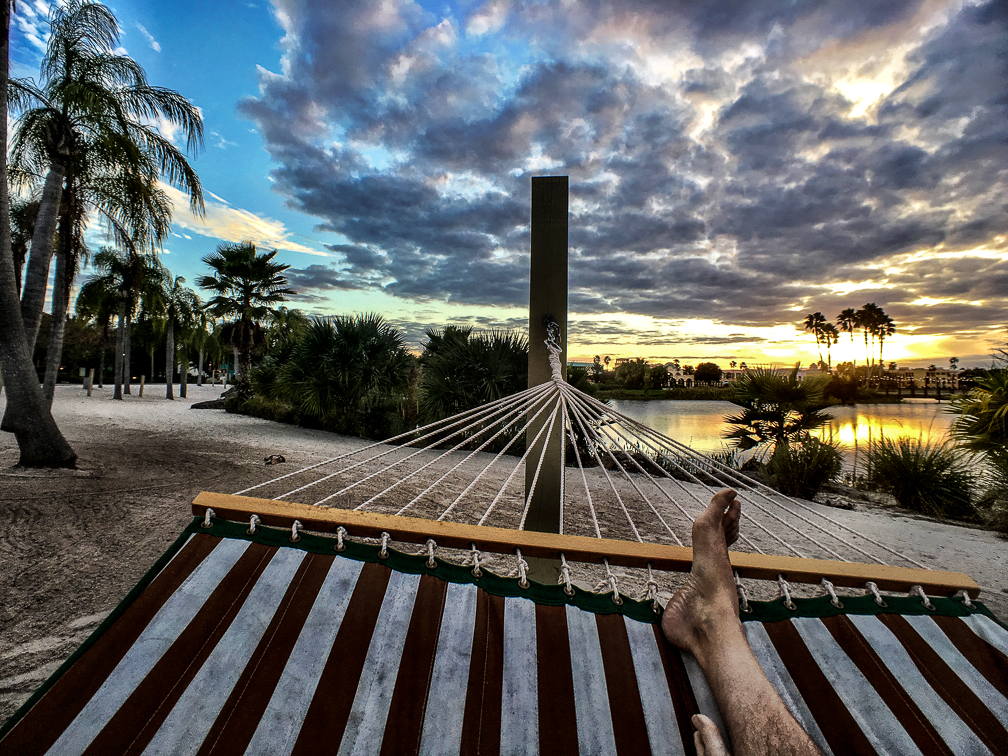
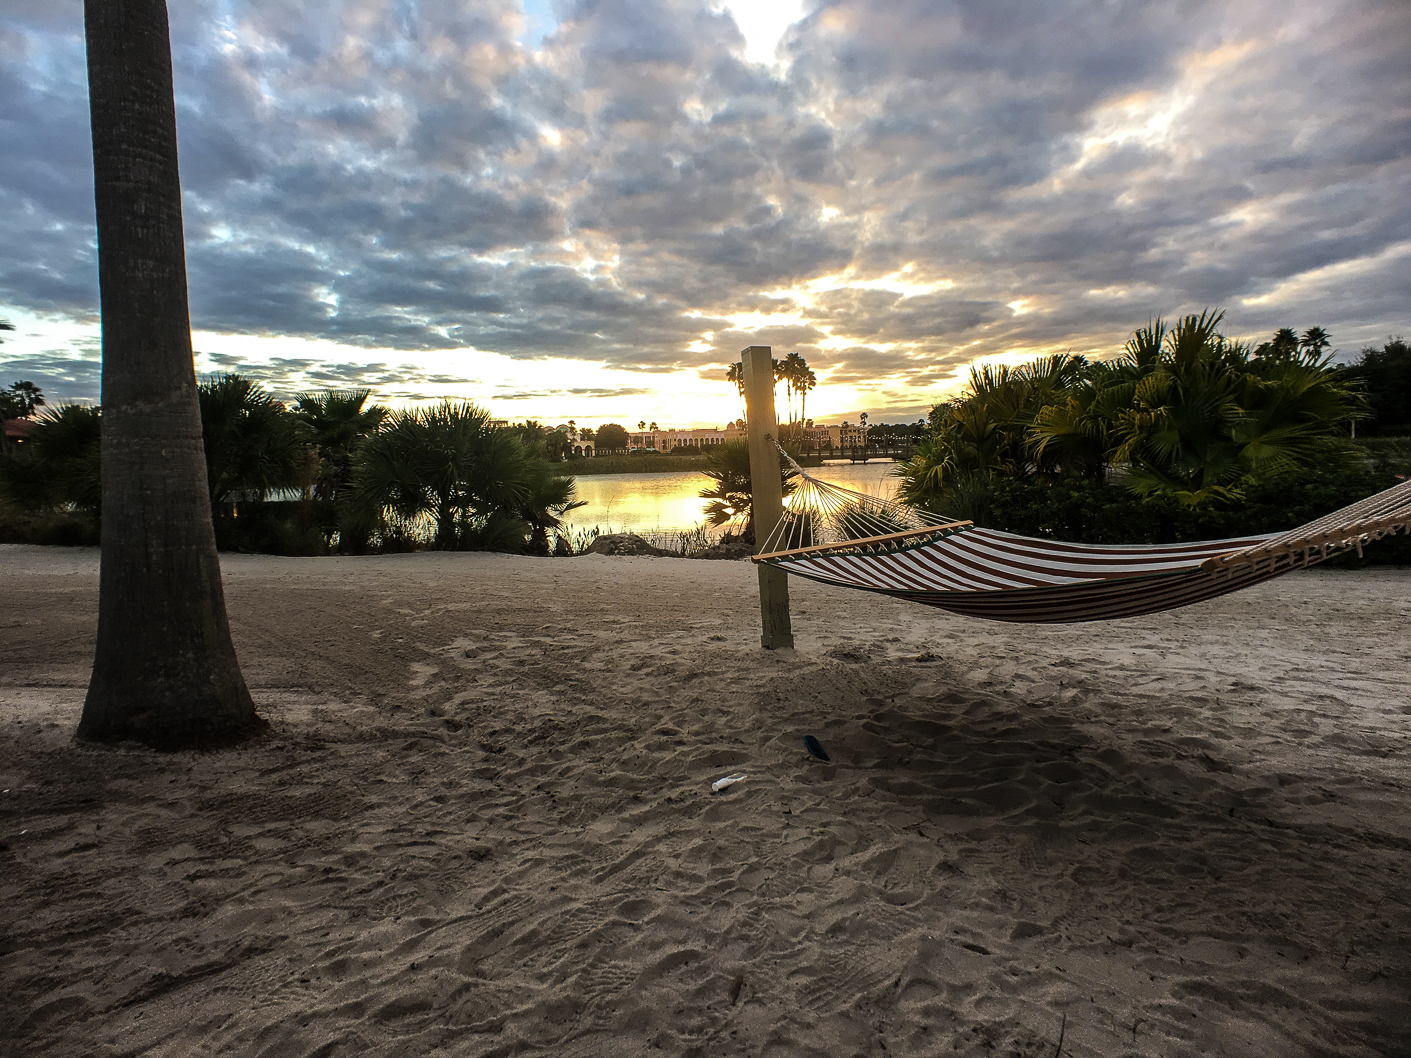
The Cabanas section does have a little beach with a few hammocks hung, which was kinda cool:

IMG_2704 IMG_1513 IMG_2705

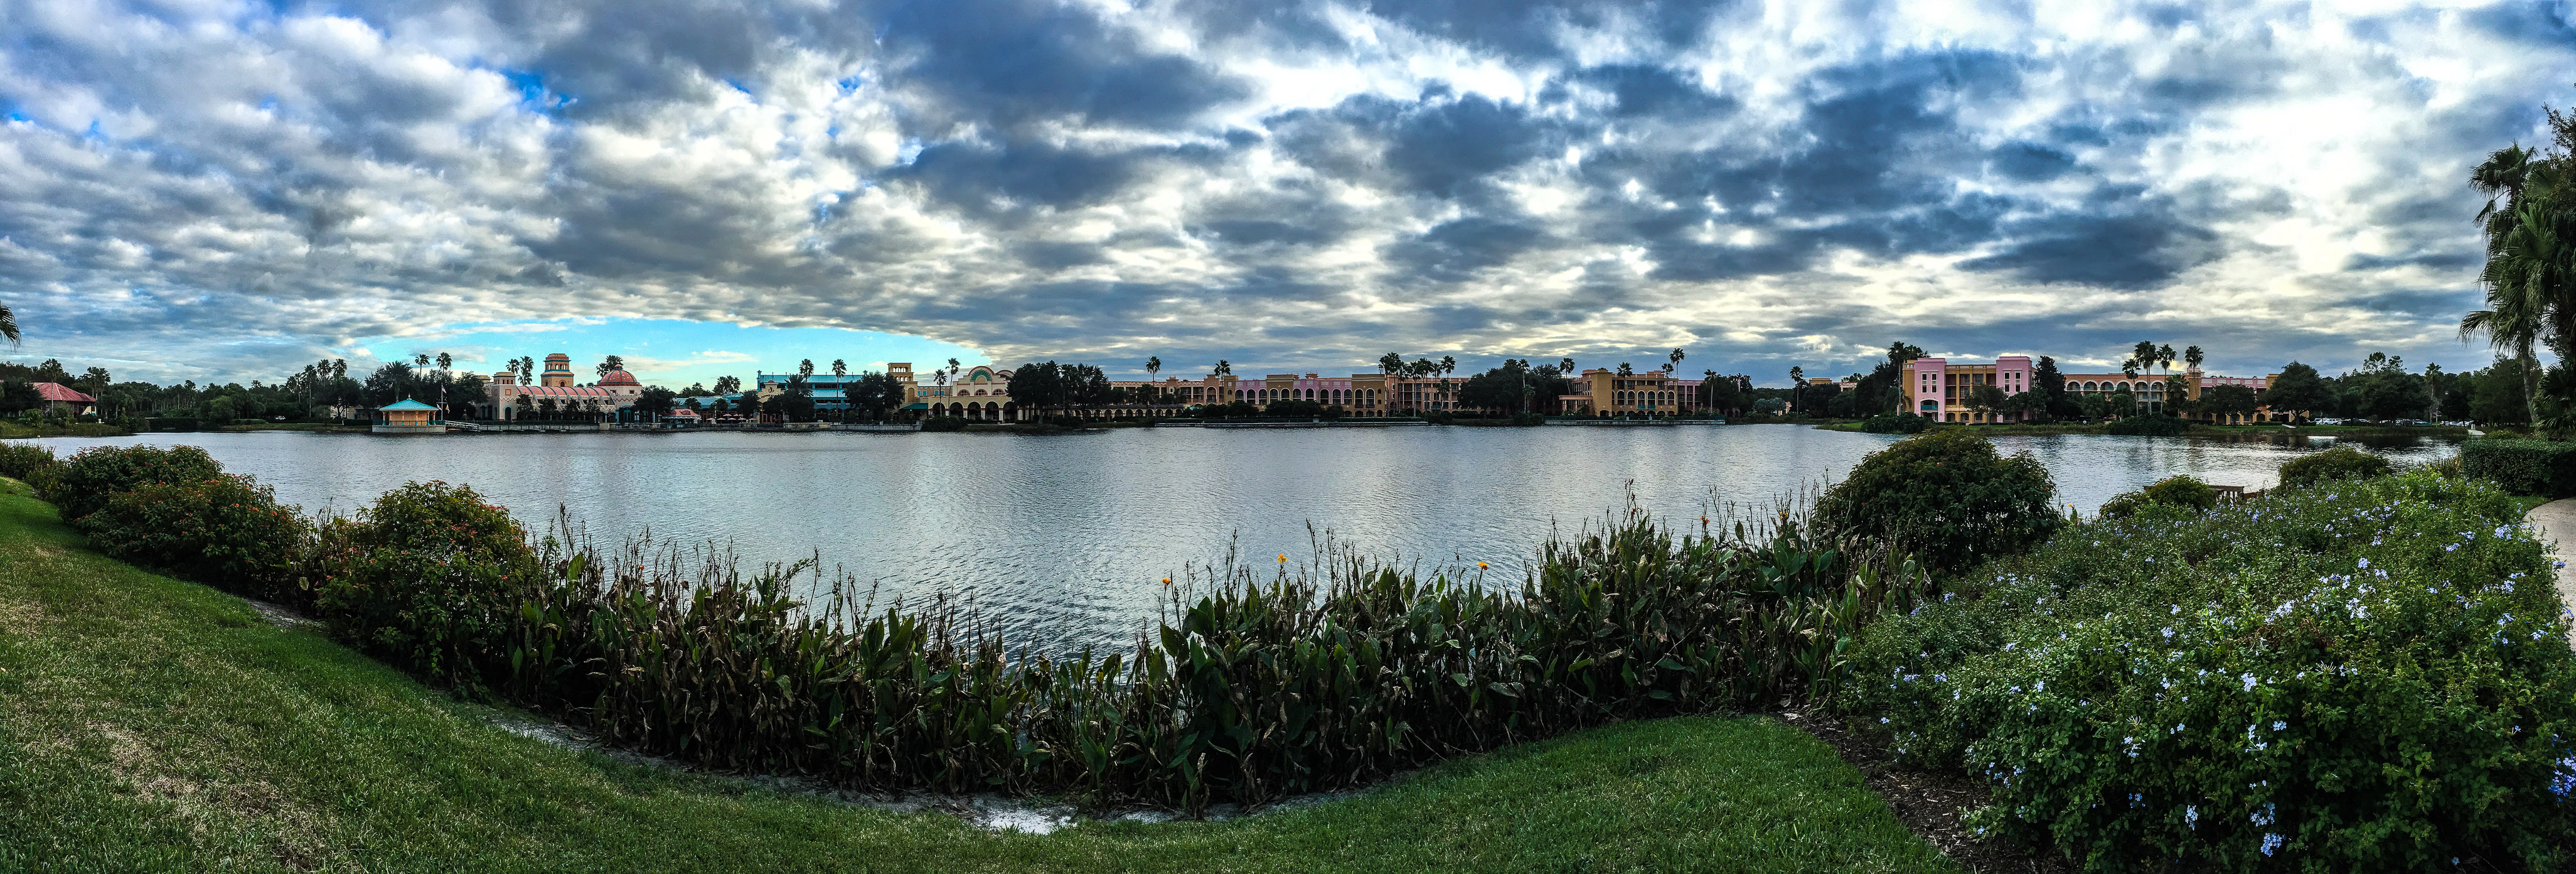
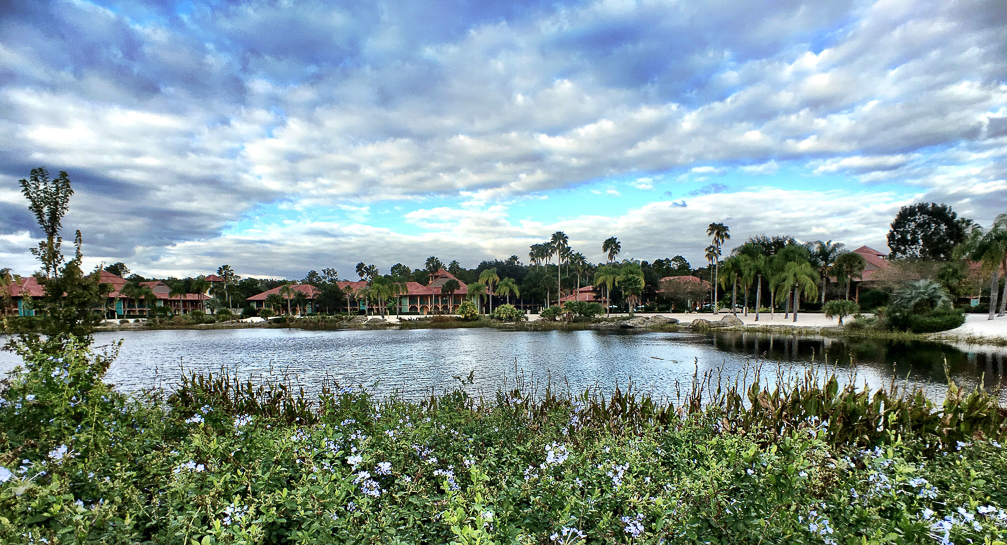
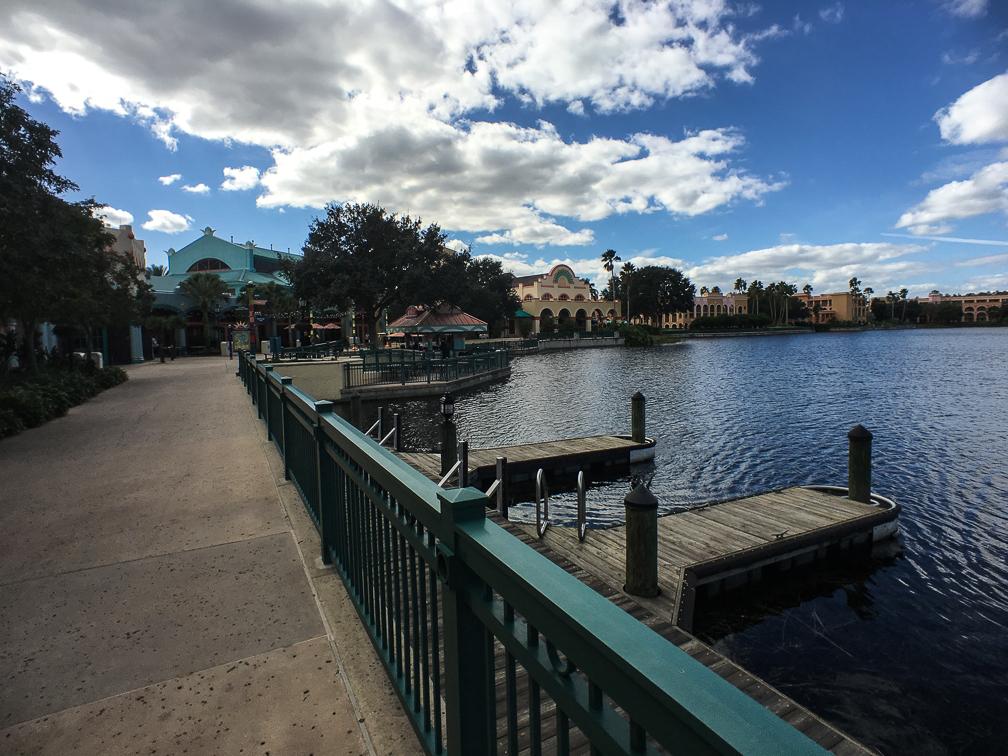
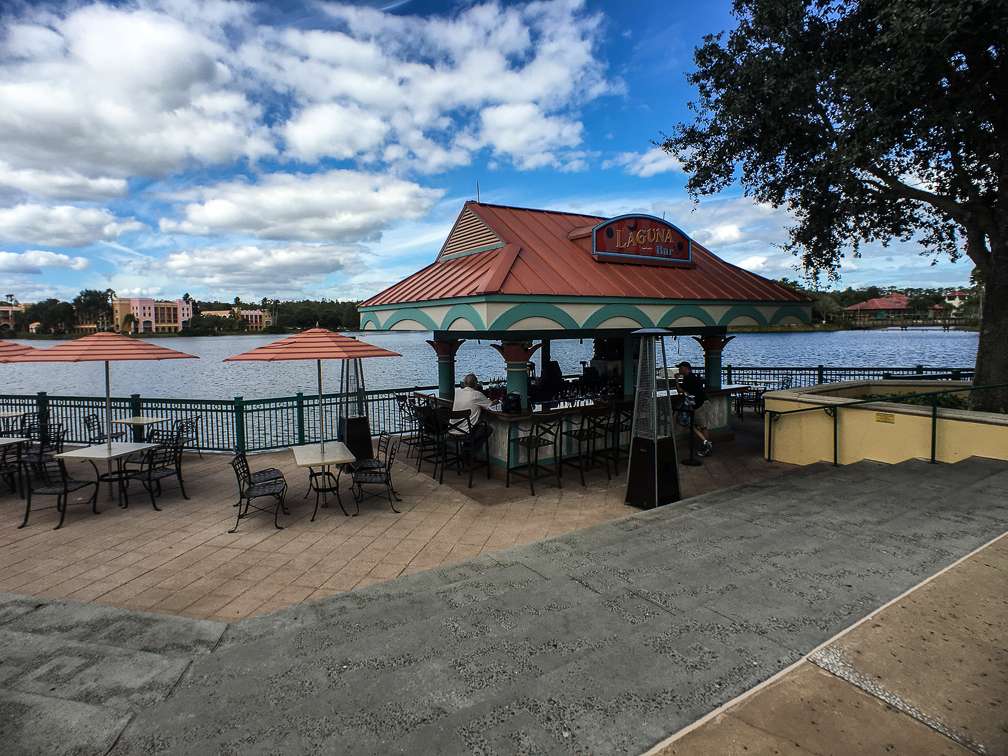
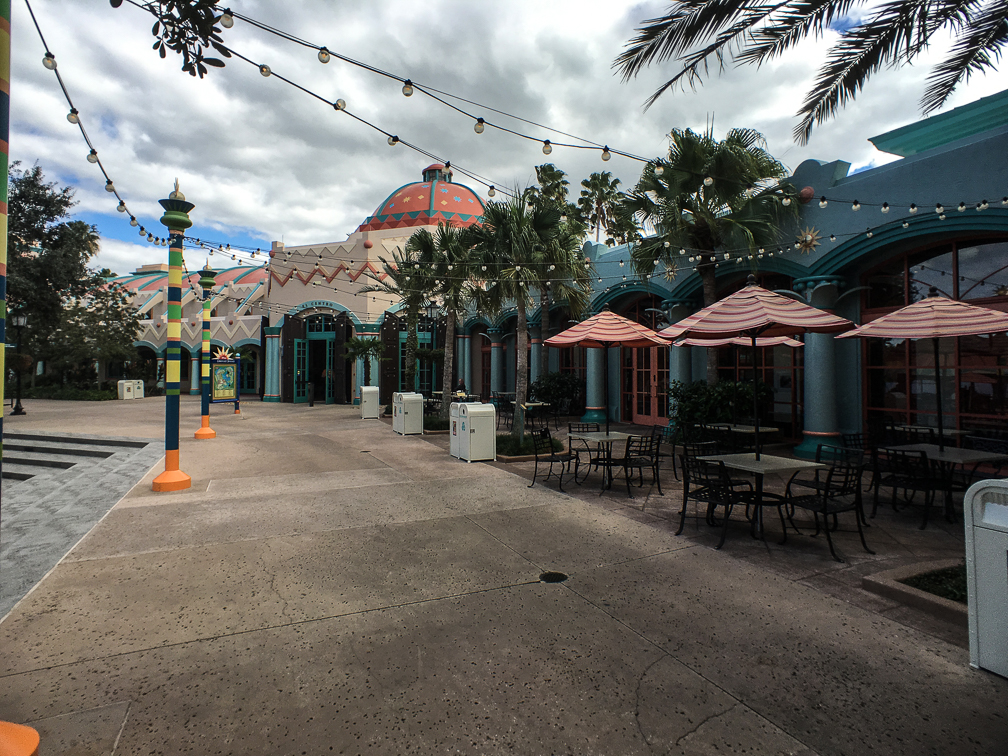
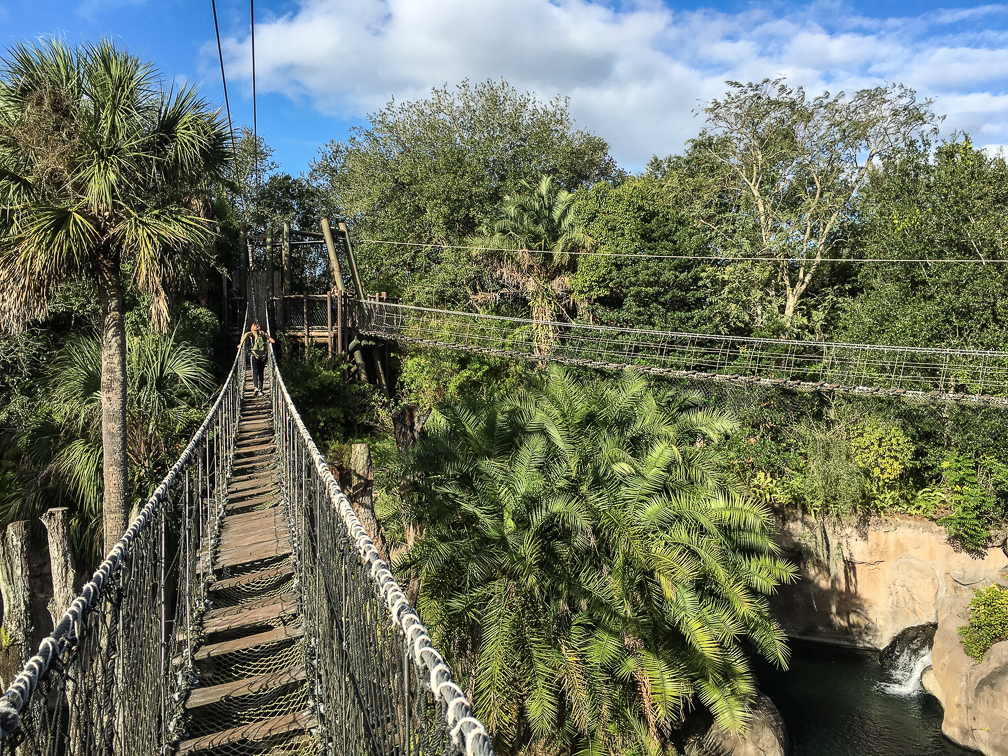
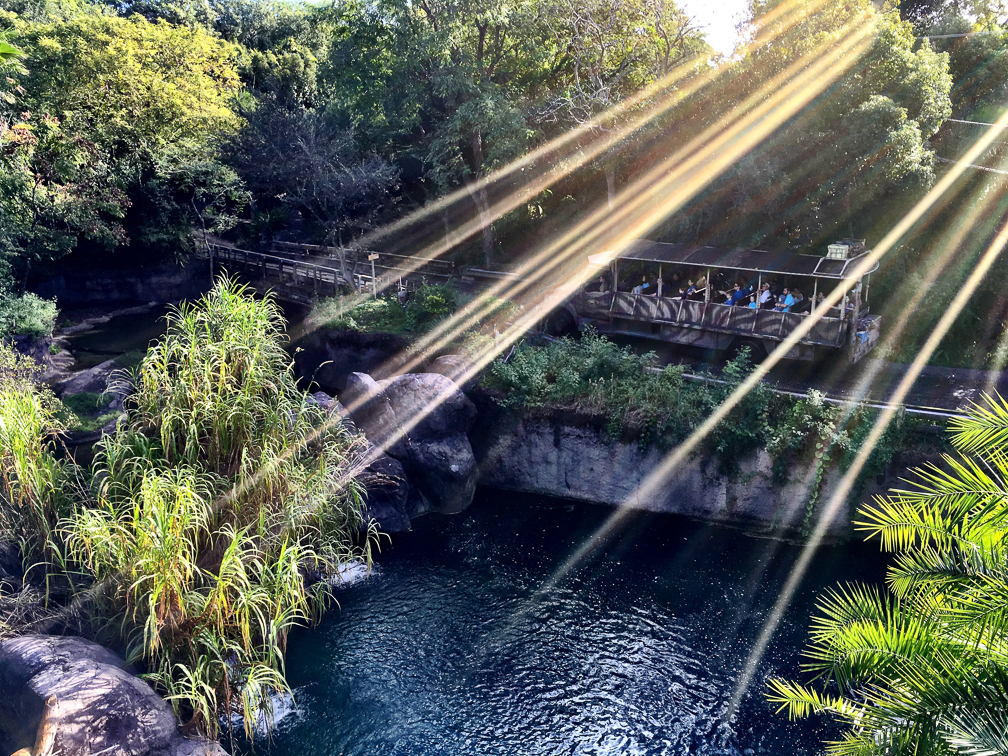
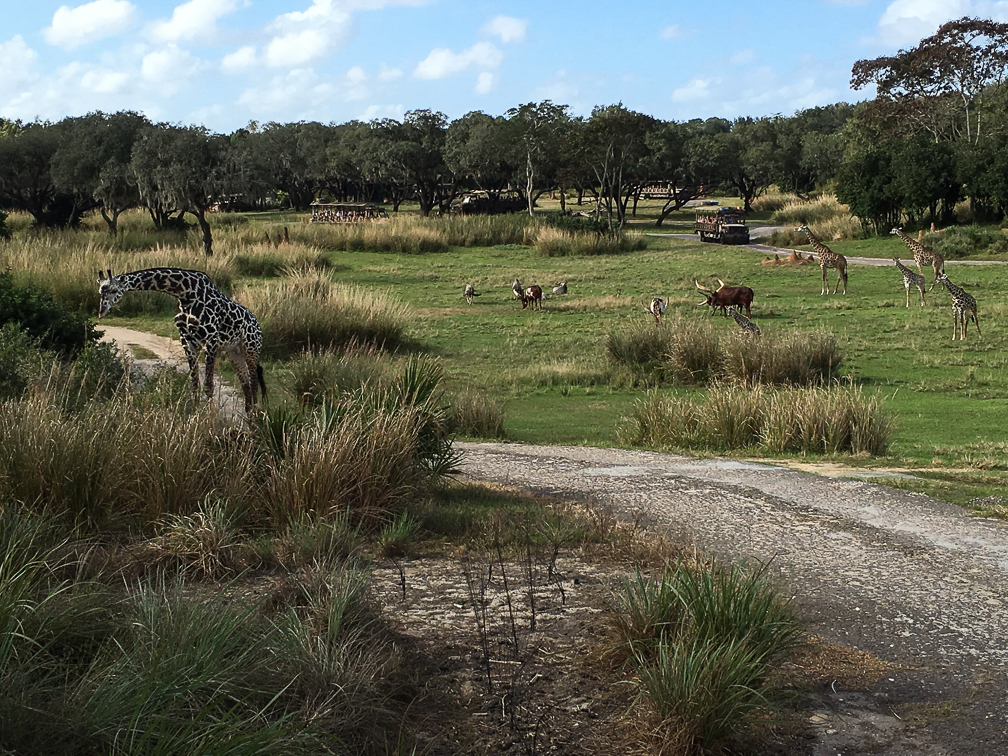
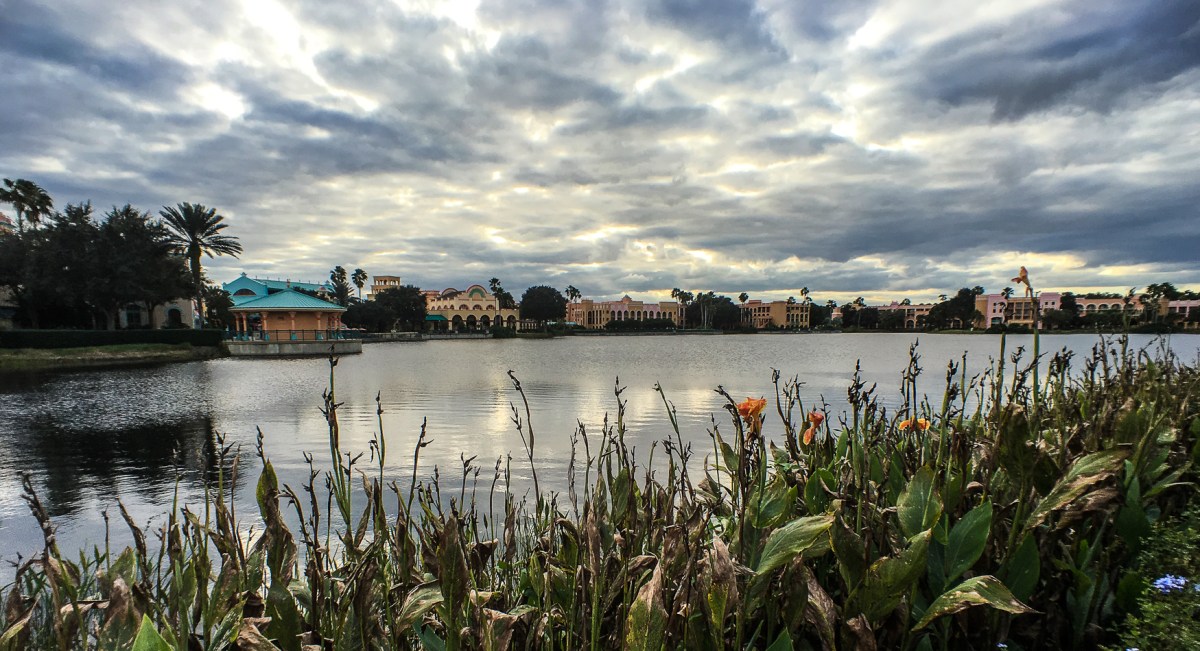
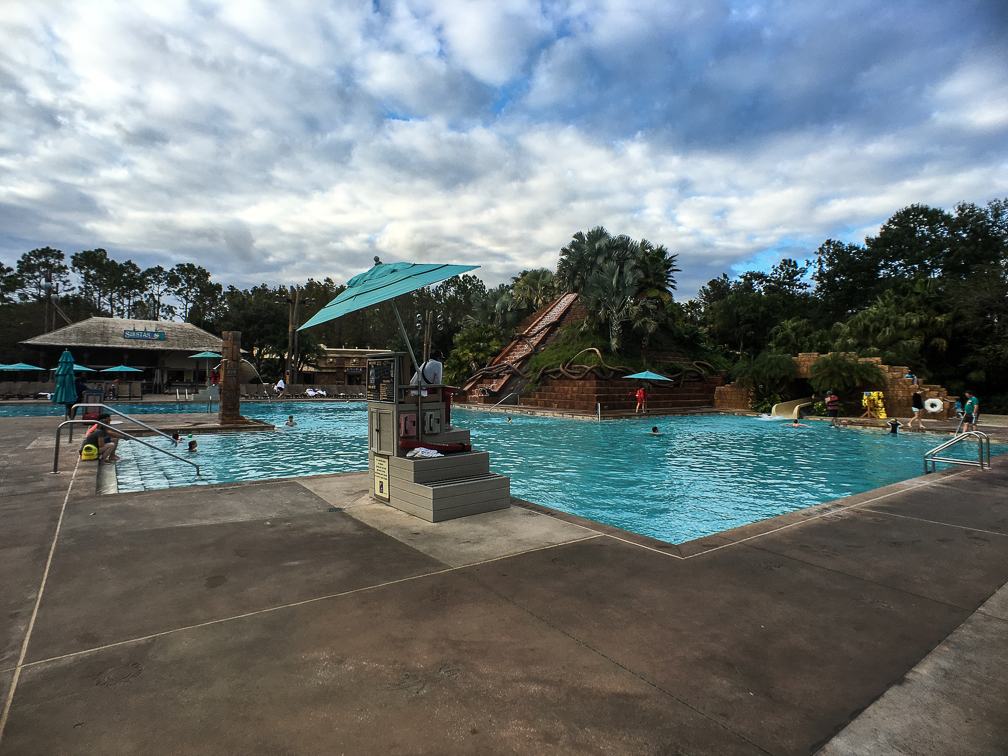
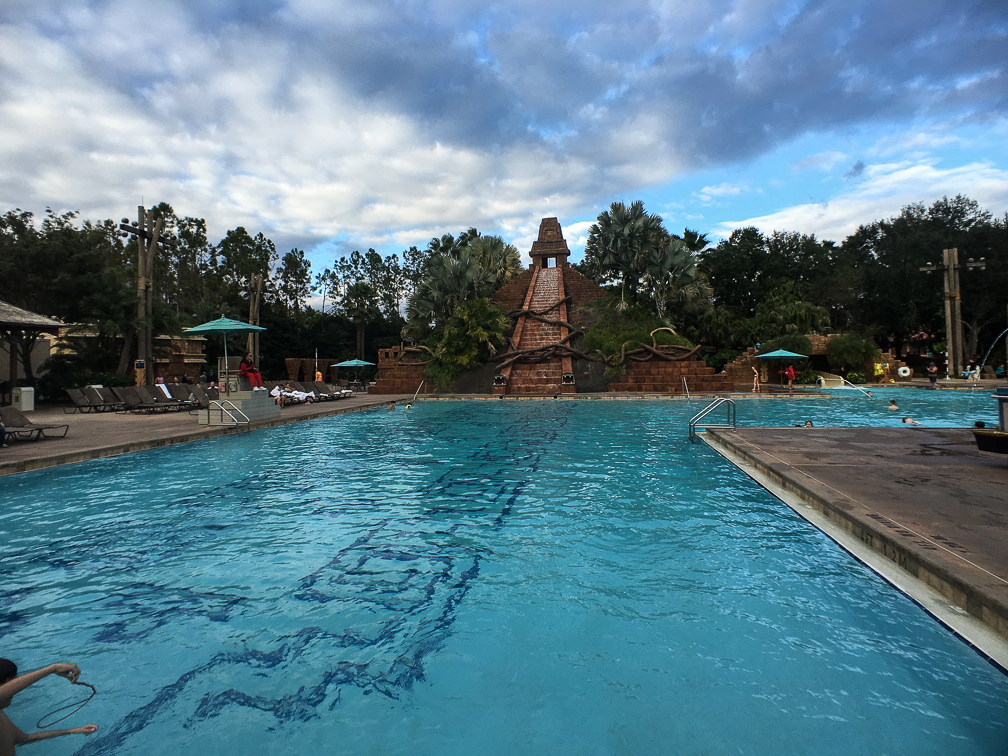
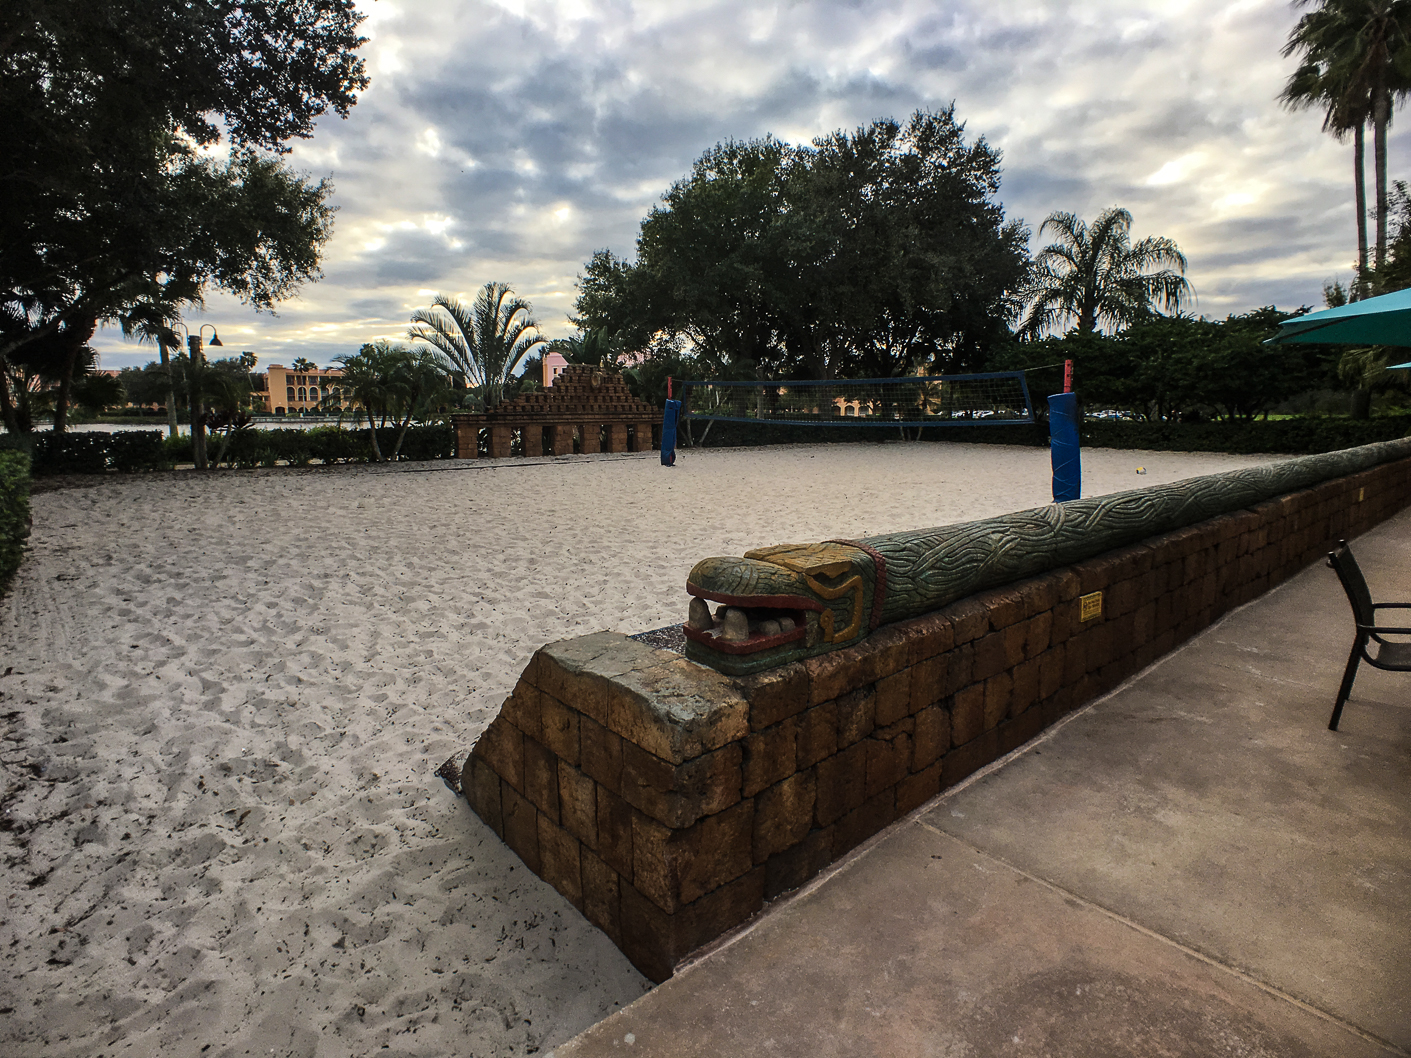
After getting settled, we spent some time walking the grounds. There are some cool views here, but if you’re out in one of the farther building groups, like Ranchos (property map), it could be a bit of a hike to get to the main building. Ours wasn’t too bad, but I’d say that we definitely didn’t fill our soda mugs up nearly as often due to the added distance from the main building (vs French Quarter). In addition to the main building, there’s also a large pool area in the middle of the property, referred to as the “Dig Site”. This is actually kinda cool, with a Mayan theme to it, and it’s complete with a pool, play area, sand volleyball court, and cantina.

IMG_2696IMG_2697IMG_2698IMG_2699IMG_2700

Back on the Christmas decorations, we did notice a tree and some wreaths in the lobby on one of our last nights there, so either we just didn’t see them initially, or they didn’t decorate the place until after the higher-end hotels were done. We’d visited a couple more properties as part of our Disney Dining plan dinners, and all of those were pretty heavily decorated, so it kinda felt like Coronado Springs was an afterthought in this regard. Frankly, it seemed like a number of areas of this resort were worn and needed attention. Case in point, there are automatic gates on the road that surrounds the property. As you turn in to Coronado Springs, you can turn left or right to get to guest areas before you get to the main gate. Our building was to the right, with one of the automatic gates right there. In our case, the gate in was never working while we were there, it was stuck in the up position. Fear not, however, the “out” gate was working fine, just to be sure that no riff-raff were able to escape the property without a short delay to wait for the arm to raise. We did see someone working on the gate on day 2 or 3, but he wasn’t able to fix it, as the “in” gate remained up the rest of our stay.

Overall, if we were presented with the same choice in the future, I’d probably opt to save my money and keep the Pop Century reservation. The added cost for this being a moderate just didn’t feel warranted in my opinion. Disney knows they’re going to get guests staying here since it’s got a convention center, and as such, may not be concerned about renovating it. Maybe I’m wrong, but this just didn’t live up to ‘moderate’ standards for me.

Here’s a quick rundown of the good/bad, along with a few more pictures of the property:

(Note – I can’t speak to any of the restaurants here, as we didn’t try any)

Pros

  • Easy and quick check-in, room was ready 3 hours ahead of time
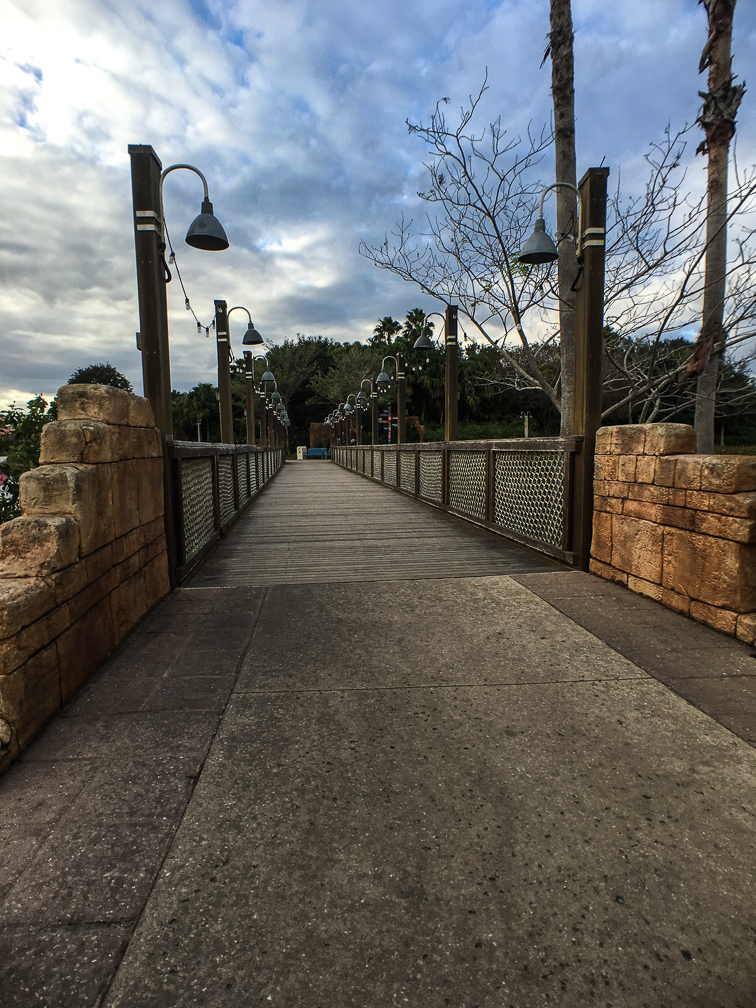
  • Some great views around the property
  • Our housekeeper took good care of our room
  • The Dig Site’s a great place for families to hang out when not at parks
  • Queen sized beds, a “moderate standard” (also mentioned in the cons list)
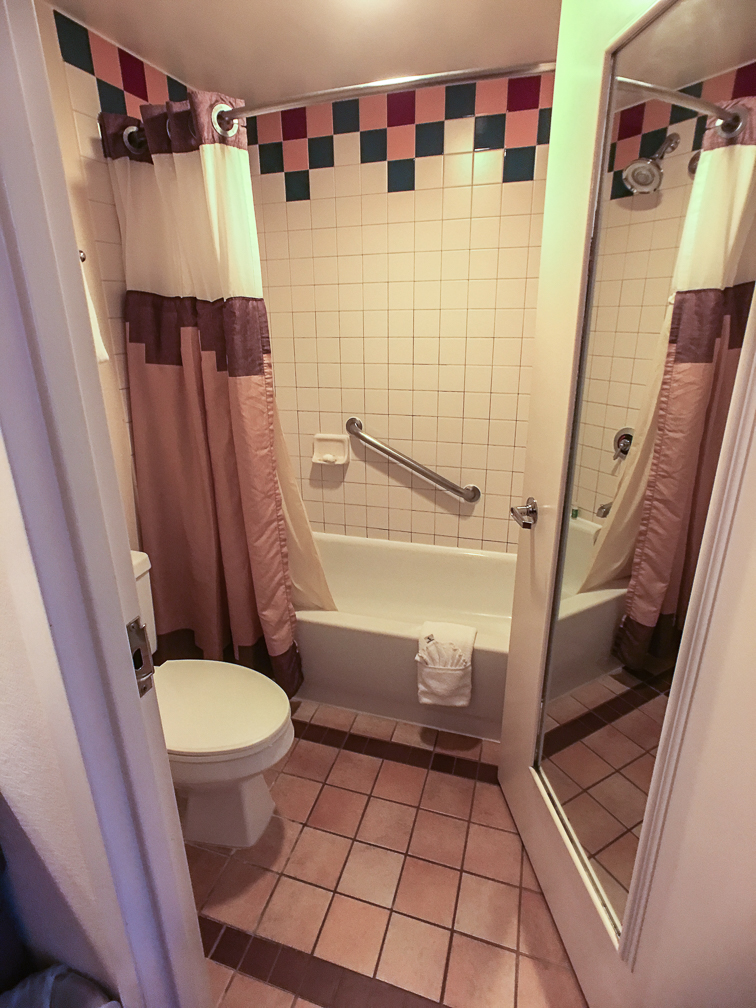
  • Had close-able doors between the beds and bathroom area so people could get ready without bothering those still sleeping
  • Bus transportation was pretty good, and the hotel is pretty close to all parks
  • Pretty good gift shop in the main building
  • Landscaping well done and kept up nicely

Cons

  • The rooms need a lot of TLC. They look like they haven’t been renovated in a looooong time.
  • The beds weren’t comfortable at all to me. Felt like someone grabbed a bunch of random worn-out padding and jammed it in a queen bed shell.
  • Some of the other buildings could make guests feel disconnected from the rest of the resort due to distance from the main building, but that holds true at other hotels on property, too.
  • I can see where it could get really busy when the convention center is full utilized

And of course, a few more pics:

IMG_2679IMG_2678IMG_2665IMG_2702

IMG_1502

IMG_1508IMG_2687 IMG_2680 IMG_2676 IMG_2673 IMG_2672IMG_2666IMG_2668

Animal Kingdom: Wild Africa Trek

This adventure was part of our Thanksgiving trip to Disney World, and I can honestly say it’s one of the coolest things I’ve ever done at any theme park. We were on the 8am tour on Thanksgiving day, which meant meeting at the entrance to Animal Kingdom before the park opened. Being that it was my birthday present, Jen did an outstanding job of keeping it a secret, even from Bayley. As we arrived at the park, all we knew was that whatever my present was, it was happening that morning, and it would mean getting in to the park prior to the actual opening time. It wasn’t until we walked into the Wild Africa Trek area that either of us began to figure out what we were about to do.

On arrival to the park, we were instructed to wait off to the side until our guides arrived. Once they did, we were led through the park just prior to opening, so just like our Magic Kingdom breakfast at Be Our Guest the day before, we got to enjoy an empty park as we walked to the staging area for the trek.

IMG_1607 IMG_1625 IMG_2873 IMG_2878 IMG_2884 IMG_2886IMG_1627IMG_1609

Once you arrive at the starting point to the trek (right next to the Kilimanjaro Safari entrance), you go through some instruction from your guides, and get suited up for the trek. Things to note here:

  • No sandals.  Closed-toed shoes only.
  • The tour cost does not include park admission, you still must have a ticket for Animal Kingdom.
  • Kids must be at least 8 years old, and 48″ tall. No unaccompanied minors, either.
  • If your health doesn’t allow for long periods of walking over some potentially rough terrain, don’t go.
  • No loose cameras, including phones. If your camera or phone can’t be strapped to the gear you’ll be wearing, you have to put it in your locker.

Those are the basics, but be sure to check the “know before you go” section of their site for all requirements. That last one is a big one that several people in our group, including us, didn’t know going in. I’m pretty sure I was the only one allowed to take my phone, because I had two straps on it that I could use to strap to my gear. If you don’t get to take your camera, it’s not the end of the world, as they take a lot of pictures along the way, all of which are included in the cost. They give you a web site address you can download all pictures from a day or so later.

After they get everyone into their harnesses, go through some basic safety instructions, test out the wireless headsets your guides talk to you on, they give you a short description of what’s going to happen, and you’re off! The tour starts with a walk down the same Pangani Trail all the other guests can access, and you’ll end up getting some funny looks from other guests along the way who have no idea why you have all that gear on. Along the way, one guide is giving you information on the animals you see as you walk, while the other one is shooting pictures of the group. They switch off roles a couple of times along the tour too, so you get to hear from both guides assigned to your trek. Once you get close to the end of the Pangani Trail, you take a little side exit that dumps you off on a closed trail. You then hike along this trail for a while, with your guide talking to you about the area and animals, until you arrive at the hippopotamus pool.

IMG_2919 IMG_2926


Once here, they strap your harness into a support railing so you can safely walk along a ledge overlooking the pool. While here, you’re given a talk by their resident hippo expert while enjoying the view, and while having your picture taken by the guide with the camera.

IMG_2920 IMG_1805

Once complete, you trek a little farther to the start of the ropes course. This is one of the highlights of the trip, as you get to walk over two rope bridges. If you’ve experienced the Kilimanjaro Safari ride before, you’ve driven under the first of the two bridges, and like us, may never have even noticed it. When you get to the first bridge, you’re strapped in one by one, and cross over to the platform between the two bridges. The guide currently shooting pictures actually crosses first, so he/she can get pictures of each person as they cross. The shots of us on the bridge face-first were shot by our guide, and the others were taken by me.

IMG_2942IMG_1637 IMG_1638 IMG_1628IMG_1807 IMG_1808

Once you’re across to the first platform, they stop each group for a quick photo:

IMG_1806

After that, you make your way across the second bridge one by one, and pass over the crocodiles. The bridges are pretty easy to walk across in my opinion, but they can get a little bouncy when more than one person is on. They also don’t mind if you make a quick stop while walking to take a pic or two if you have your camera on you, just don’t stop for long periods and hold everyone else up.

IMG_2957IMG_2959IMG_1648 IMG_2967

Disney’s attention to detail is quite evident on the bridges, too. Even though the bridges are perfectly secure, and there’s no danger of falling, they make the planks along the way look worn and brittle. Nice touch 🙂

Once across, you walk to a ledge overlooking the crocodile pit and strap in to another support railing while listening to the croc expert and having your picture taken with them.

Wild Africa Trek 108

After you finish up here, you shed your harness, as you no longer need it, and hop into a safari truck for the next part of the expedition. Your truck joins the same path the regular Kilimanjaro Safari trucks are on, with the occasional deviation on to side paths the regular trucks don’t take. These side paths allow your group additional time to see some of the animals, and in some cases, allow you to get closer to animals than the regular path does, depending on where the animals are that day. When the trucks stop for these closer views, you can also stand up to get better shots. We got lucky with the giraffes, with several of them congregating right next to one of these side paths. Our truck pulled up next to them, and while our guides gave us good information on them and answered questions, we got to be pretty close and get some great shots.

IMG_1682

Once we finished up there, the truck headed up to a building sitting on the savannah. We’d seen this on past safari trips, but until now had no idea what the purpose was. For the trek, it actually gets used as a 30 minute rest stop, giving you time to relax and enjoy some food specially prepared by the chefs at Tusker House. All this as you enjoy some spectacular views, complete with binoculars to use. While there, the guides will also take pictures of you in various poses, and you obviously have the opportunity to take some of your own pictures.

IMG_1684IMG_1683IMG_1636 IMG_1809 IMG_1810Wild Africa Trek 175 IMG_1811 IMG_3048

There were also a coupe of short rain showers during our stop, which caused some of the animals to run for cover. I can’t say I’ve ever seen giraffes running so fast!

Once your time at the camp is up, you load back in to the truck for the ride back to the drop off point, which is the same platform the regular Kilimanjaro Safari trucks drop off at. You then follow your guide back to the Wild Africa Trek entrance where you pick up whatever you placed in the lockers before heading out into the park to enjoy the rest of your day.

The whole trek is about 3 hours, and it’s worth the time and money in my opinion. Getting to see things from a more behind-the-scenes perspective in a small group setting, while getting a ton of useful information was a blast. The rope bridges and brunch at the private safari camp are icing on the cake, and totally justify the cost, in my opinion. Our guides were great, too, we can’t thank them enough for an outstanding morning!

Wild Africa Trek 199

Enjoy a few more pictures from our trek, and when at Animal Kingdom, consider giving this a try!

IMG_1613 IMG_1813 IMG_1814 IMG_2897 IMG_2934 IMG_2951 IMG_2991 Wild Africa Trek 001 Wild Africa Trek 100 Wild Africa Trek 101 Wild Africa Trek 102 Wild Africa Trek 104 Wild Africa Trek 168

Disney Dining – Round 2

With everything going on the past couple of months, I haven’t had time to cover our Thanksgiving trip to Disney World, so it’s time to fix that. First up, our experience with the Plus Dining Plan, which gives each person on the plan 1 table service meal, 1 quick service meal, and 1 snack for each night of your stay.

This is our second time using the dining plan, but the first using one that included table service. As mentioned in my June post, I was iffy on getting the dining plan again, as I felt that I ended up eating a lot more unhealthy food than I would have without the plan, but the decision was made to go with the higher level plan this time around to see what we could get out of the table service meals.

We did a lot of planning for this, and I mean a lot. Jen was on the dining site nightly for several weeks trying to get our table service schedule just right, and in the end it paid off. We ended up with several character meals, including one for Thanksgiving dinner! Here’s a quick look at where we used the table service credits:

Be Our Guest: This was actually done as a quick service meal, but it was so much better than the first time that I wanted to include it. We were scheduled for an 8:00am breakfast here on our first day, the same time the Magic Kingdom opened. The nice thing about making dining reservations for that early is that you end up in the park before everyone else. There’s a separate line for those with dining reservations, and if I recall, we got in to the park about 7:50am to make our way back to the restaurant. They do have cast members along the way keeping an eye to be sure no one’s headed in a direction they shouldn’t be, but getting in the park that early is awesome. Here are a few shots of the (mostly) empty park I took along the way to the restaurant:

IMG_1564IMG_2734IMG_2739IMG_2741IMG_1578IMG_2744

Additionally, we were second in line at BoG, so we got through ordering pretty quick and were able to easily get a table in the West Wing near the rose. The food was decent, too. I had the croissant doughnut, which was very tasty.

IMG_1541IMG_2758IMG_2760 IMG_2762IMG_2763IMG_1549    IMG_2766

Donald’s Dining Safari Thanksgiving Lunch at Tusker House Restaurant: This was (obviously) our Thanksgiving lunch, scheduled for 2:45pm. We’d had an awesome day already at Animal Kingdom, having done the Wild Africa Trek first thing that morning (I’ll cover that in my next post). We got to Tusker House around 2:30 and checked in, and maybe waited 5-10 minutes to be seated. The buffet itself did have some changes to it, with traditional Thanksgiving items laid out in addition to some of the normal menu items. One note here: the dessert table isn’t well placed, as it always seemed to have a line, and that line runs in front of the table that holds things like the South African preserves, Tabbouleh, and Hummus, which my wife was disappointed to discover only after she was full since she never saw those items until she went for dessert. Still, it was a fun Thanksgiving lunch, complete with Donald Duck and Friends!

IMG_1650IMG_1665

Fairytale Dining Breakfast at Cinderella’s Royal Table: Yea we did, and you should too! This isn’t an easy reservation to get, but Jen’s perseverance with the Disney Dining site paid off. Also note that this counts as two table service credits per person. We had a 9:05am reservation, and checked in slightly before that. After a short wait outside, were taken in to the lower waiting area where you meet and have your picture taken with Cinderella. After another wait for your name to be called, you’re taken upstairs to your table. The entire place is well done, with attention to detail in every aspect of it. Just like every other character meal, as you eat, the various princesses make their way around the dining area and stop at each table for pictures and autographs.

IMG_3146 IMG_3167 IMG_3176 IMG_3183IMG_1706

Cinderella’s Happily Ever After Dinner at 1900 Park Fare: We did this the same day we did Cinderella’s Royal Table, so it was a princess-heavy day. We were second in line at 1900 Park Fare when it opened for dinner, and for those with little ones, I highly recommend being there for the dinner opening. The little girl in front of us got to help them open the doors. Here, that means saying the magic words, and having Cinderella and Prince Charming open the doors, welcome her in, and lead her and her family to their table. I can only imagine how much that meant to her, so for other parents who want a shot at this for their kids, opt for the 4pm reservation and be there early!

Food-wise, it was the best buffet we had. The meat on the carving station was perfectly cooked, and everything else I had, including the mashed potatoes, was excellent. As we ate, Cinderella, Prince Charming, the step sisters, and the wicked stepmother made their way around. The sisters and mother were hilarious, too, as they were perfectly sarcastic to everyone they talked to. Case in point: when the red-headed step sister came over, she took one look at Bayley’s red hair and said: “Look at your hair color, it’s like we’re better than everyone else!”. At one point, one of the step sisters passed a crying baby a couple of tables over and loudly said: “Stop crying, you’re fine!”. Really funny stuff, everyone we saw was eating it up!

IMG_3306 IMG_3307IMG_1726

Princess Storybook Dining Lunch at Akershus Royal Banquet HallOkay, maybe we went a bit overboard on the princess-themed character dining, but we really wanted to try Akershus. It’s similar to Cinderella’s Royal Table in that after you check in and have your name called, you have your picture taken with a princess, which in this case was Belle. After being seated, it’s the typical “eat while characters come by” setup. The food was pretty good, too. The appetizer portion of the menu is buffet style, with it being a “Taste of Norway” setup with meats, cheeses and seafood, among other items. There are two sides to the buffet table, with both sides being identical. This isn’t clear at first, and results in people walking the whole thing, slowing down the line as they cut in to see what’s on the opposite end. Somewhat annoying, but oh well. From the entree menu, I had the Traditional Kjøttkake, which is Norwegian meatballs on mashed potatoes. D-e-licious!

IMG_3419IMG_1771

All of the table service meals were great, as was the Be Our Guest breakfast using quick service credits. Our other quick service meals were at places we ate last time, including Wolfgang Puck Express at Disney Springs (still the best value for quick service, imo), Pizza Planet, and Contempo Cafe. All good stuff, I just didn’t feel the need to cover them again. We were disappointed in the specialty cupcake selection this time, as Pizza Planet only had a Thanksgiving-themed pumpkin spice cupcake (left pic), which was just okay. Contempo did have a few more options, including the creme filled cupcake I got (the chocolate one below). Mmmmmm.

IMG_1790 IMG_1591

In the end, I felt the same way about this dining plan as I did in May with the Quick Service plan, that it’s not something I feel it necessary for us, but it may very well be a good option for a larger family. After everything was calculated, we’d saved close to $300 total by getting the dining plan (vs paying for each place we went outright), but then again, it’s highly unlikely we’d have done this many character and quick service meals, or even gotten as many snacks as the plan offers, so who knows if we would have even spent as much on food as the dining plan cost. I’d say that in both cases, the dining plans just “enabled” us to eat at more of the park options than we would have otherwise. I did enjoy it more this time, due in large part to the table service choices we made.

Travel Photography – What’s In My Bag?

With travel season approaching, I’ve been working on changes to the photo and video gear I carry with me. There was a time when I would carry my Nikon DSLR and all of my lenses with me on vacation, but over the past few years I’ve gotten to the point where I wanted to go as light as possible and not have to carry a full camera bag around with me. It started with our Thanksgiving cruise in 2012, where I found myself shooting around 60% of our pictures with my Nokia Lumia 920 vs 40% with my Nikon, slowly edging up to the point where I was shooting 90% of our vacation shots with my Lumia 1020.

There are exceptions, as I enjoy shooting auto racing when I get the chance, and I have yet to see anything below a DSLR and a set of good lenses that can handle the speed and low-light requirements, but for everything else, the lighter I can go, the happier I am. So with a cruise on tap in a week aboard the Norwegian Escape, followed by Thanksgiving at Disney World, I figured I’d post a quick walk-through of the gear I’ve settled on.

Photo Gear

For the first time in a long time, I’m not taking a DSLR with me, even as a backup. I will have two alternate devices with me, however:

  • My Lumia 1020 with camera grip: This may be a bit long in the tooth, and might be a little slow on a per-shot basis, but nothing in the phone space beats the PureView imaging system. This thing has been a favorite of mine for shooting since the day I bought it, and that’s why this is going to be my main back-up camera.
  • Sony DSC-WX350: I picked this up on the cheap as an open box item at Best Buy a few months ago to use as a business camera  for things like ship/resort tours, so we’d have something either of us could just pick up and shoot with at the drop of a hat. The results are pretty good for a P&S, in my opinion.

I really don’t expect to have to use either unless something happens to my primary. So what is my primary? Well, it’s my iPhone 6s Plus, equipped with a few extras. A quick shot of my gear (including the backups and tripod):

Primary gearBackup gear

Of the main gear in the left hand shot, the case is a CamKix medium GoPro case with the CamKix customizable magic foam. What am I carrying inside the case? Well, a few things:

  • Shoulderpod S1 Professional Smartphone Grip: I needed a way to mount the iPhone to my Gorillapod if the situation arose. After a little searching, I knew I had to have this. The reviews aren’t wrong, the handle’s solid and really helps stabilize both still and video scenarios.
  • Moment wide angle and telephoto lenses: I spent a lot of time comparing specs, reviews and sample shots of the various iPhone lenses. I’ve used cheap lenses from other companies before, and this is definitely a category where you get what you pay for. I wanted high quality glass, and I definitely feel I got it with the Moment lenses!
  • Spigen Neo Hybrid Carbon case: Normally I keep the Spigen Slim Armor Volt on my phone (wireless charging FTW!), but it’s too thick to allow mounting of my lenses, so for the duration of the trip I’ll be using this case.

I’m looking forward to putting this gear through its paces over the next 2-3 weeks. Feel free to follow us on Facebook and/or Instagram to see how the lenses perform on our trips!

Video Gear

For land trips, I generally just use my phone for any video I take, but when we go on cruises I also bring along a GoPro to handle any situations where the camera may get dirty, wet, or may need to be mounted to me in some way. This trip will be no exception, as I want to be sure I get plenty of video from the excursion we’re doing on my birthday in St Thomas, the BOSS Underwater Adventure.  I’ll likely end up doing some snorkeling at the other two ports, Tortola and Nassau, so it’ll get plenty of use this trip. Here’s my video setup:

Video gear

The case is a Shineda Water Resistant Large GoPro Case, which fits just about all of my GoPro gear. The main items in the case that I plan to use this trip:

  • GoPro Hero4 Silver plus extra battery: I bought this a while back as a replacement for my Hero2, which I gave to my daughter to use while at college. I’m looking forward to having the LCD to frame my shots vs hoping I’m getting what I think I’m aiming at :).
  • GoPole Bobber Floating Handgrip: This is my first trip with it, so I’ll be interested to see how I like it versus the regular wrist strap I’ve used for snorkeling in the past.
  • Head strap: This isn’t the official GoPro one, my daughter took that one with her when I gave her my Hero2. This is a knockoff my wife ran across at Five Below for $5, and frankly I can’t tell the difference.
  • Random mounts: Not sure I’ll use any of them, but since the case can hold them all, I figured I’d throw them in.

Okay, so maybe I’ve failed the whole “carry less gear” goal, but at least it’ll be lighter. Regardless, I’m very much looking forward to putting the new stuff to work! After we get back, I’ll post my impressions of how the Moment lenses performed in real-world use.

Random Disney Thoughts

I’m a bit late getting this done, but I wanted to get one last post in from our trip to talk about some of the things we hadn’t done on previous visits to Disney. The entire trip was a blast as usual, but a couple of the items below really helped make it even more memorable.

The 10-Day Pass

This is the first time we’ve done more than 5 consecutive days at Disney, and going in I was sure I was going to be sick of the parks half way through the trip, but can admit now that I was dead wrong. Normally we feel like we have to get everything done at whichever park we’re visiting the day we choose to be there, but having so many days on our hands, there was never any pressure to rush through the parks like we normally would. We went with a much more relaxed schedule where we’d head to a park whenever everyone work up, ride some rides, maybe head back to the hotel for a while, and later on either head back to that park, another one, or in a couple of cases to Downtown Disney for the rest of the evening. We had a general idea of which park(s) we wanted to visit every day based on the crowd calendar at EasyWDW.com, which we found to be pretty accurate. We did deviate from our plan a few times, but that was the nice thing about having so many days, as we felt like we had more flexibility in the schedule. If we had the time and extra money, it’s a pass we’d buy again.

We did make use of the ‘water parks fun & more’ option on our tickets, too, using them to gain entrance into DisneyQuest for a few hours the last Saturday we were there, before heading back to Hollywood Studios for one last park stint. For a Saturday, DisneyQuest seemed empty. I ended up sitting and relaxing most of the time we were there, as I wasn’t feeling that great (the heat was finally getting to me), but the kids had a blast.

Star Wars Weekends at Hollywood Studios

Star Wars Weekends are something they only do from mid-May through mid-June if I recall, and it was kinda cool. In addition to the existing Star Wars stuff they have at DHS (Star Tours, Jedi Academy, etc), they have a lot of characters on hand for autographs and pictures, and even some special celebrity appearances. We didn’t partake in the celebrity appearances, so I can’t really comment on what it entails, or how you get access to it. The characters were aplenty, though. Just about everywhere we went there were lines for various characters. Chewbacca, Luke, Lea, Boba Fett, Stormtroopers, and many, many more. It wasn’t just the kids who were in line either, there were plenty of adults, in some cases sporting Star Wars shirts, replica helmets they wanted signed, and a lot more. No judgement here, I have no leg to stand on, as I’m known to frequent autograph lines at races we attend :). Bayley got in on it too, taking pictures with a couple of characters. She was all too happy to wait 45min to get a shot with Chewbacca:

WP_20150517_19_09_26_Pro WP_20150517_19_09_32_Pro

One of the coolest things about Star Wars Weekends were the fireworks. They have a special ‘Symphony in the Stars’ fireworks show at 9:45pm each night of Star Wars Weekends with the fireworks shooting off to music from the movies. It was one of the best fireworks shows I’ve ever seen, to be honest. I have a few clips of it, but they’re nowhere near as good as the multi-angle video of the show that the WDWMagic guys have on their site. If you’re a fan, I highly recommend sitting through the whole 6+ minutes. Better than the nightly fireworks at Magic Kingdom, in my opinion.

Magic Kingdom 24-hour event

On May 22nd, the Magic Kingdom was open from 6am Friday to 6am Saturday to kick off the summer, using a Frozen-based theme of ‘Coolest Summer Ever’. We’d initially planned to be heading home that day, but once my wife saw this was happening, we pushed our 7 days at Port Orleans back to accommodate. We really didn’t see much in the way of promotion anywhere for this, as Disney seemed to be more interested in publicizing the 24 hour event going on at the same time at Disneyland, since that park was kicking off its diamond celebration with the 24 hour event. That lack of promotion was quite evident when we arrived on Friday morning for the opening of the park, too. We got there around 5:40am to be there and see the rope drop, and had no problems finding a good spot to watch the festivities.

Once the rope dropped, we headed into the park. We initially headed for the Snow White mine train ride, but seeing that a long line had already formed there, we headed to Tomorrowland. The lack of crowd that early in the morning was evident here, as we were able to ride Buzz Lightyear a couple of times right away with no wait while the kids did Space Mountain twice, followed by a couple of rides in Adventureland, all before 7am. The park really didn’t start to fill up until 9ish, the normal opening time. The place really did fill up, too, with Friday being the busiest day we saw at any park during our trip. An employee we talked to the next day at Hollywood Studios said he heard Magic Kingdom hit a peak of 84,000 visitors at some point during the event. In a couple of the shots below you’ll see quite the crowd at different points in the day. Sorry a couple are blurry, I wasn’t going to stop in front of a large crowd and get run down 🙂

I’ll be honest, we didn’t stay the whole time. About 4pm Friday afternoon we headed back to the hotel to rest for a bit and freshen up. After that, we headed over to the Contemporary early in the evening for dinner before heading back in to the park. I expected we’d see people start to trickle out of the park after the evening fireworks show, but even with the normal mass-exodus that clogged up main street after that, the park was still pretty full all night.

Side note here – we got stuck in the main street crowd after the fireworks show (not the first time we’ve made that mistake), and saw some pretty sad behavior out of the supposed grown-ups. I get that people were tired and didn’t want to be stuck there, but intentionally slamming motorized scooters and strollers into people to try and make them move out of your way when they have no where to go is a pretty poor example to be setting. I even heard more than one spouse tell their significant other they were going to do it. Someone near us mentioned witnessing fights breaking out between parents, too. Truly pathetic.

Back on topic, once we were back in, we stayed until about 4am, riding various rides and watching the 1am electric light parade. For our last ride, we finally sucked it up and waited in line for the Snow White mine train. At 70 minutes it was the longest line we stood in all week, but we were glad we waited, as it was a really fun ride. All in all, the 24 hour celebration event was a blast, definitely something we’d do again! Here are a few random shots from our time at the park that day.

WP_20150522_05_52_14_Pro WP_20150522_06_02_02_Pro WP_20150522_06_04_15_Pro WP_20150522_06_42_03_Pro WP_20150522_07_52_13_Pro WP_20150522_08_16_03_Pro WP_20150522_08_35_09_Pro WP_20150522_09_43_13_Pro WP_20150522_14_12_26_Pro WP_20150522_15_35_01_Pro WP_20150522_22_51_56_Pro WP_20150523_01_04_00_Pro WP_20150523_02_46_08_Pro 1 WP_20150523_03_05_59_Pro


%d bloggers like this: