Animal Kingdom: Wild Africa Trek

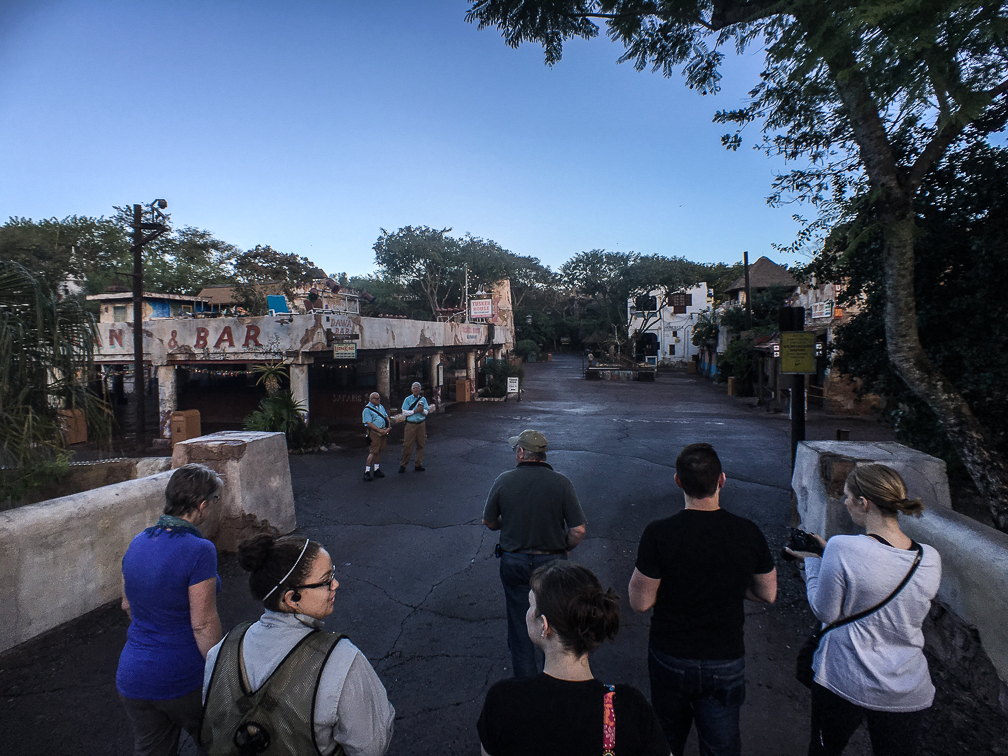
This adventure was part of our Thanksgiving trip to Disney World, and I can honestly say it’s one of the coolest things I’ve ever done at any theme park. We were on the 8am tour on Thanksgiving day, which meant meeting at the entrance to Animal Kingdom before the park opened. Being that it was my birthday present, Jen did an outstanding job of keeping it a secret, even from Bayley. As we arrived at the park, all we knew was that whatever my present was, it was happening that morning, and it would mean getting in to the park prior to the actual opening time. It wasn’t until we walked into the Wild Africa Trek area that either of us began to figure out what we were about to do.

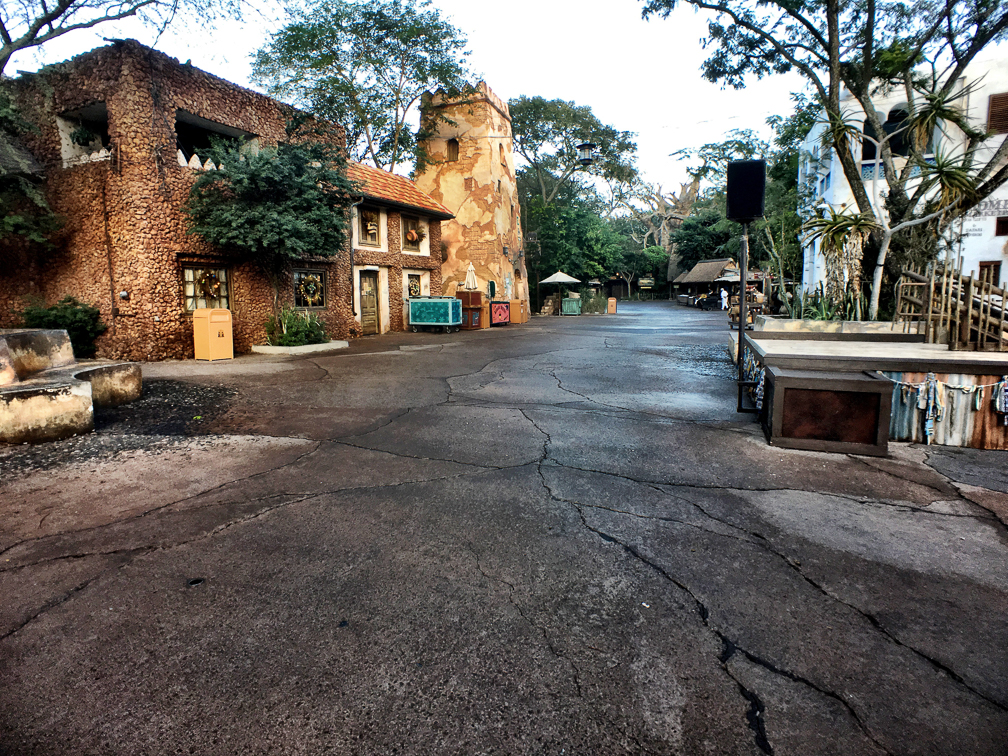
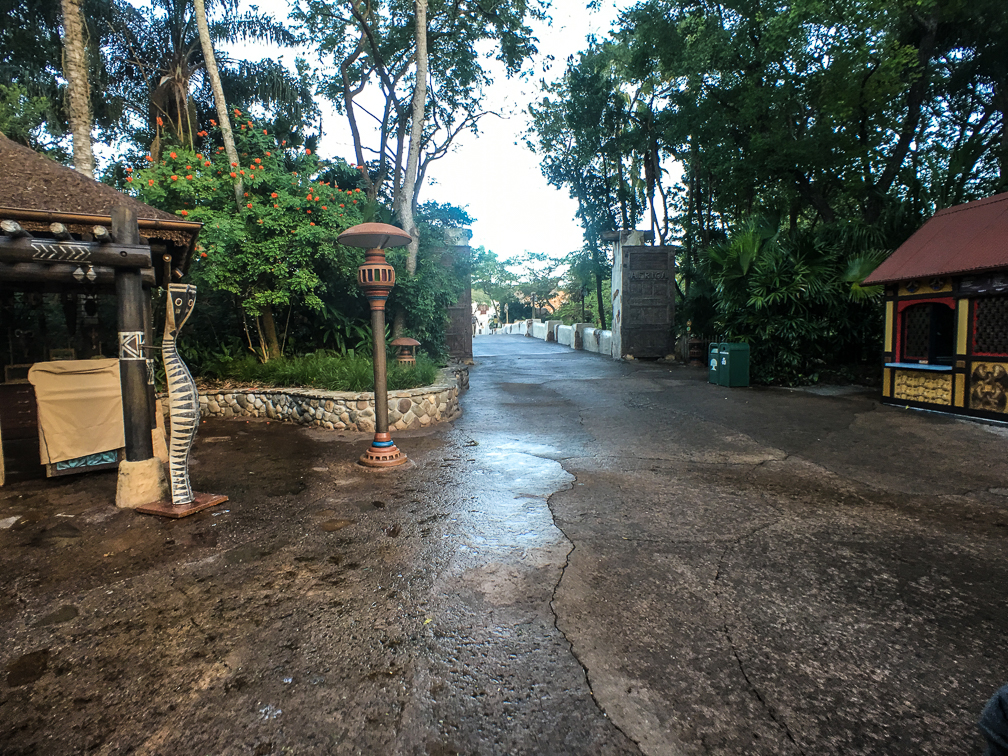
On arrival to the park, we were instructed to wait off to the side until our guides arrived. Once they did, we were led through the park just prior to opening, so just like our Magic Kingdom breakfast at Be Our Guest the day before, we got to enjoy an empty park as we walked to the staging area for the trek.

IMG_1607 IMG_1625 IMG_2873 IMG_2878 IMG_2884 IMG_2886IMG_1627IMG_1609

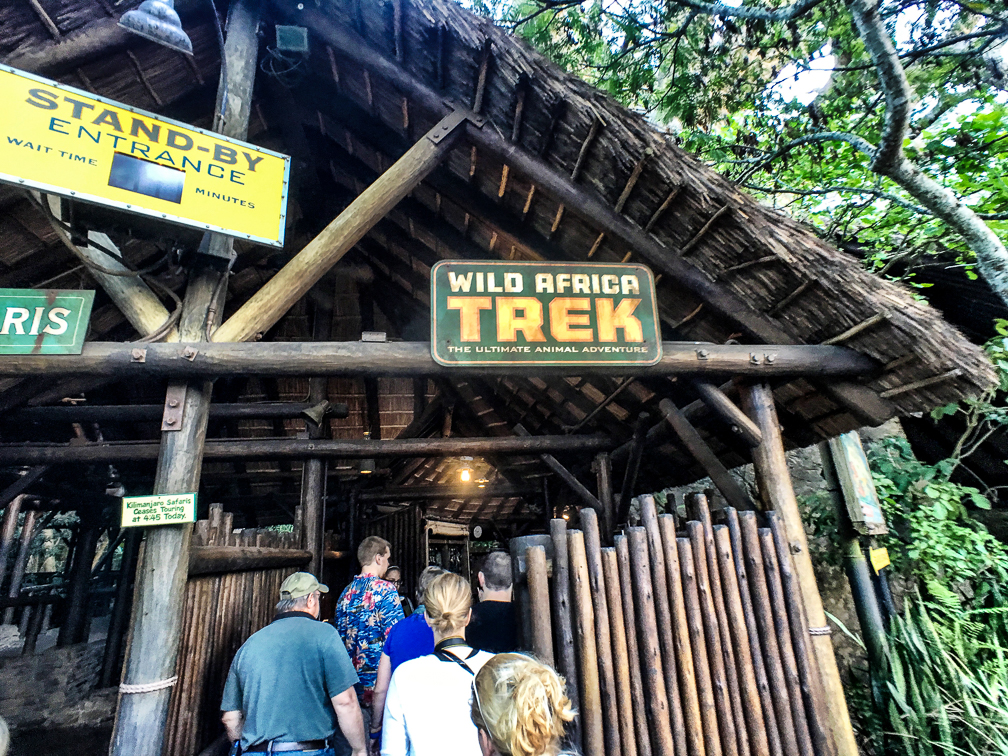
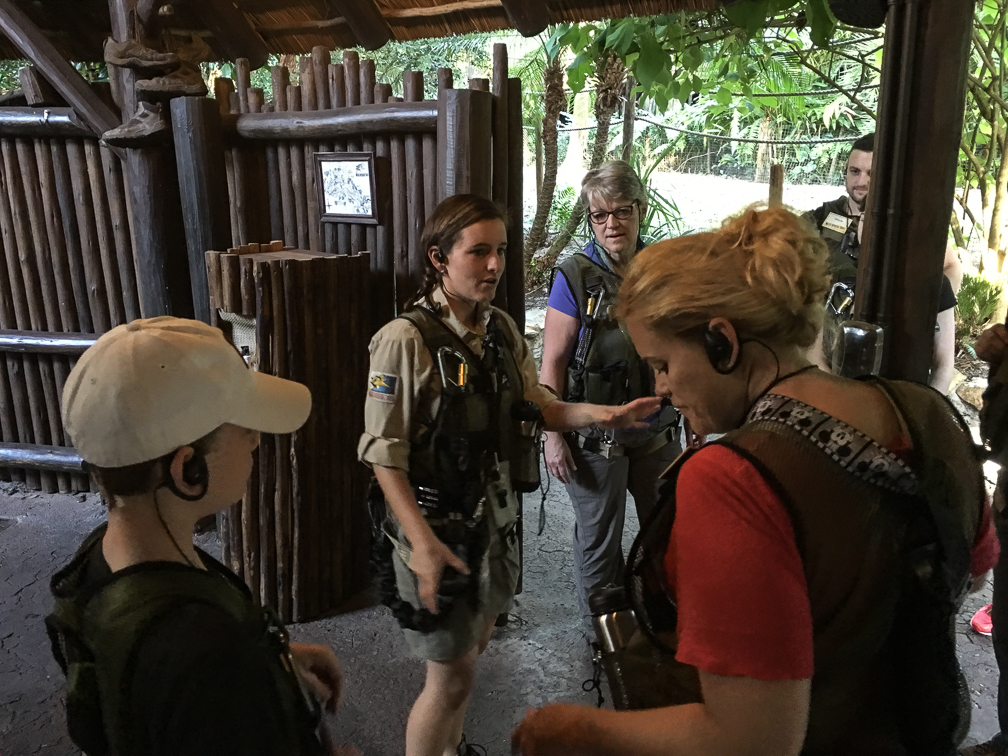
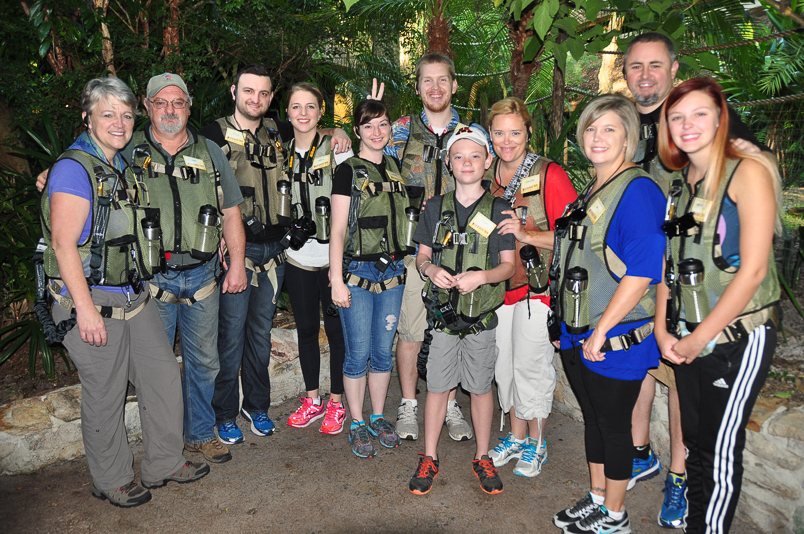
Once you arrive at the starting point to the trek (right next to the Kilimanjaro Safari entrance), you go through some instruction from your guides, and get suited up for the trek. Things to note here:

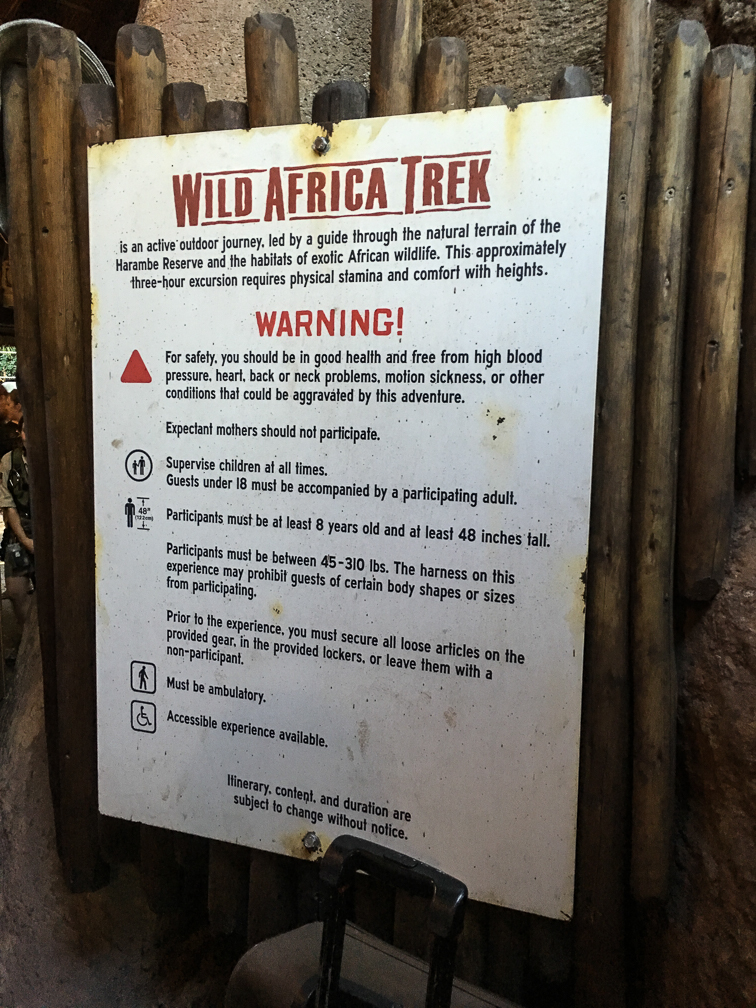
  • No sandals.  Closed-toed shoes only.
  • The tour cost does not include park admission, you still must have a ticket for Animal Kingdom.
  • Kids must be at least 8 years old, and 48″ tall. No unaccompanied minors, either.
  • If your health doesn’t allow for long periods of walking over some potentially rough terrain, don’t go.
  • No loose cameras, including phones. If your camera or phone can’t be strapped to the gear you’ll be wearing, you have to put it in your locker.

Those are the basics, but be sure to check the “know before you go” section of their site for all requirements. That last one is a big one that several people in our group, including us, didn’t know going in. I’m pretty sure I was the only one allowed to take my phone, because I had two straps on it that I could use to strap to my gear. If you don’t get to take your camera, it’s not the end of the world, as they take a lot of pictures along the way, all of which are included in the cost. They give you a web site address you can download all pictures from a day or so later.

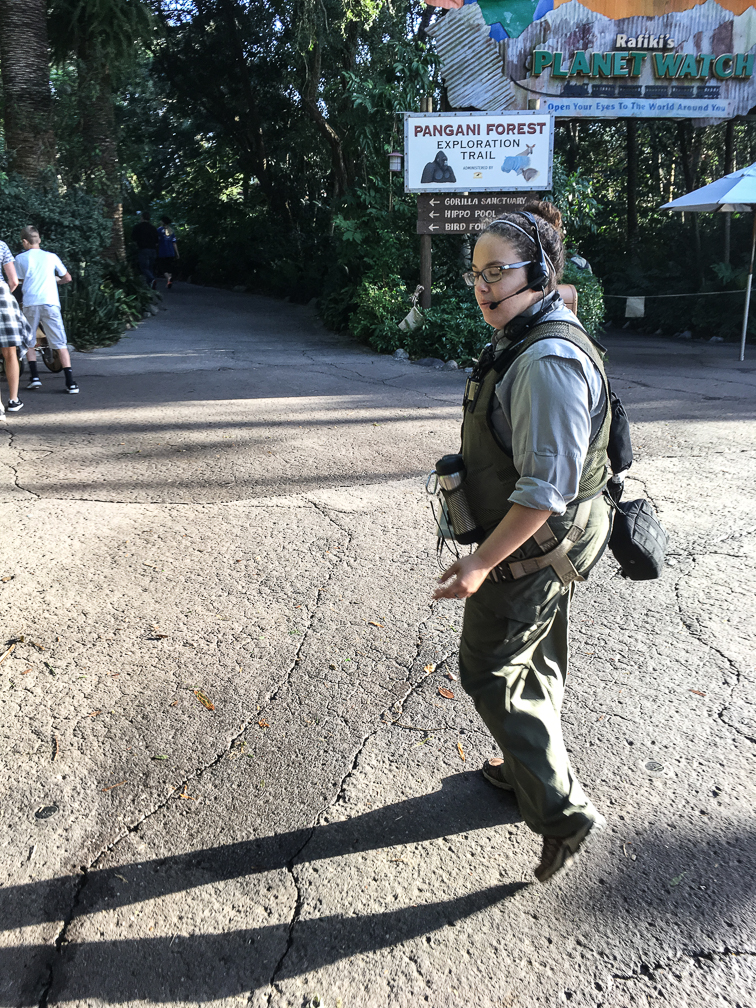
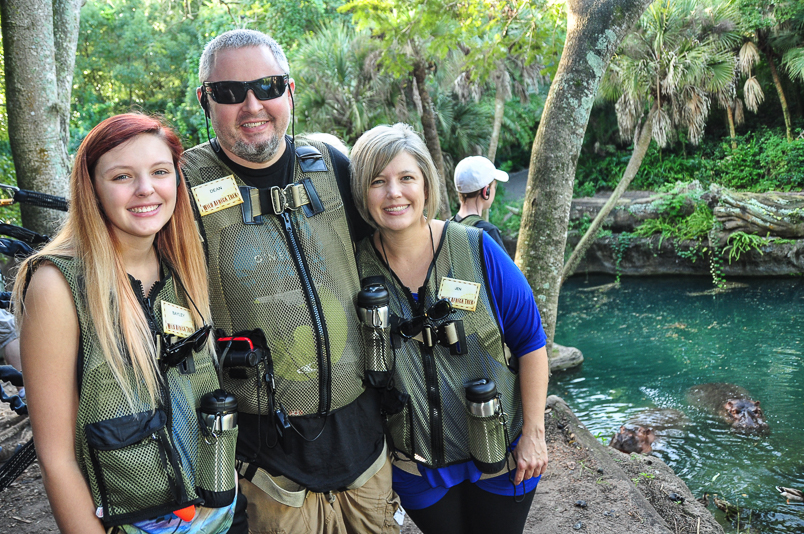
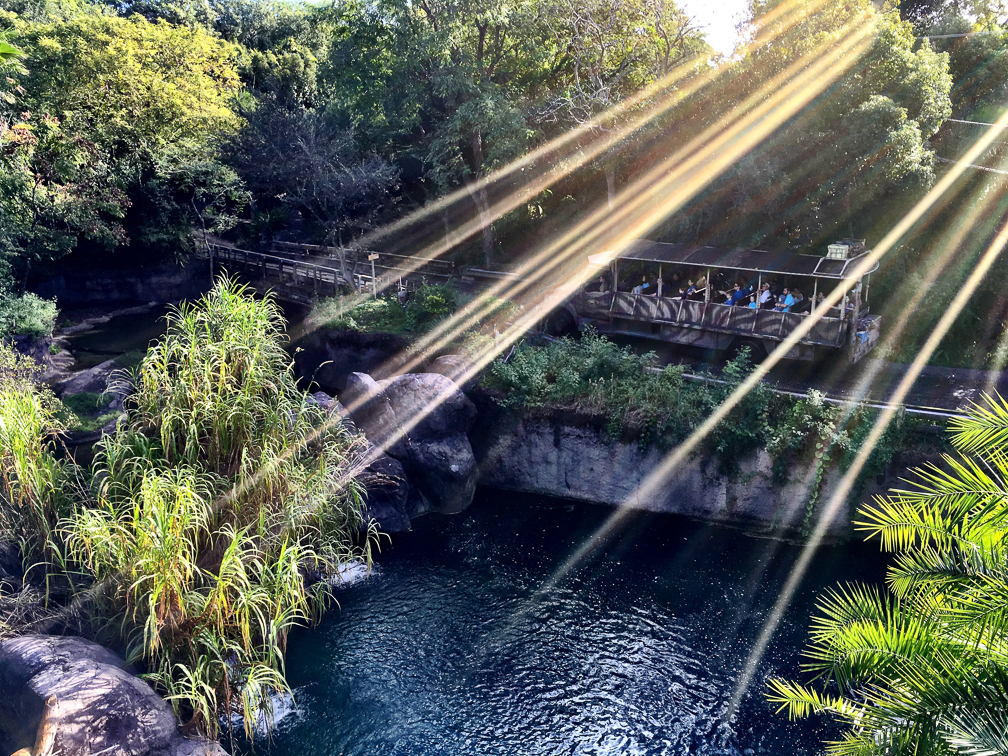
After they get everyone into their harnesses, go through some basic safety instructions, test out the wireless headsets your guides talk to you on, they give you a short description of what’s going to happen, and you’re off! The tour starts with a walk down the same Pangani Trail all the other guests can access, and you’ll end up getting some funny looks from other guests along the way who have no idea why you have all that gear on. Along the way, one guide is giving you information on the animals you see as you walk, while the other one is shooting pictures of the group. They switch off roles a couple of times along the tour too, so you get to hear from both guides assigned to your trek. Once you get close to the end of the Pangani Trail, you take a little side exit that dumps you off on a closed trail. You then hike along this trail for a while, with your guide talking to you about the area and animals, until you arrive at the hippopotamus pool.

IMG_2919 IMG_2926


Once here, they strap your harness into a support railing so you can safely walk along a ledge overlooking the pool. While here, you’re given a talk by their resident hippo expert while enjoying the view, and while having your picture taken by the guide with the camera.

IMG_2920 IMG_1805

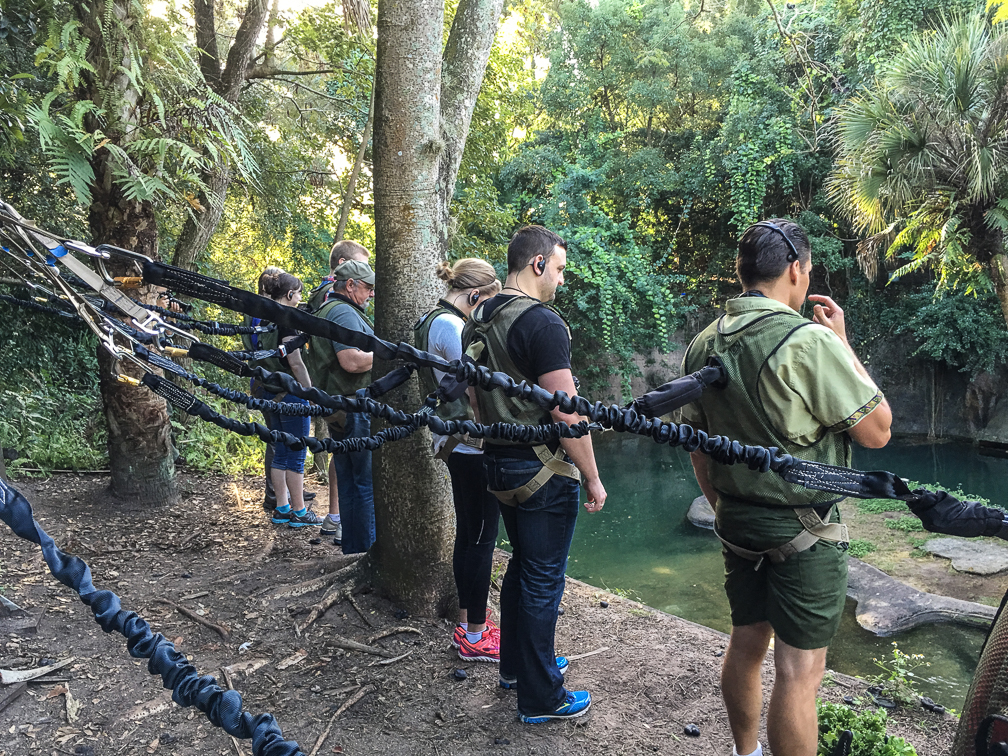
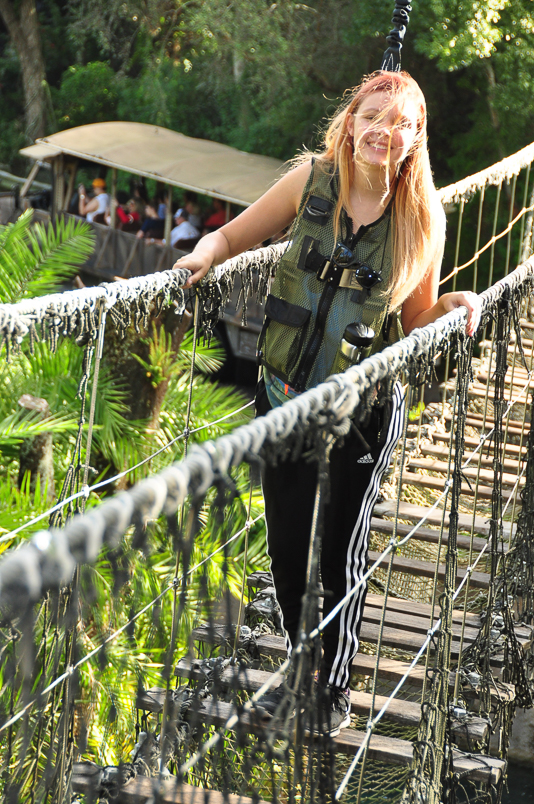
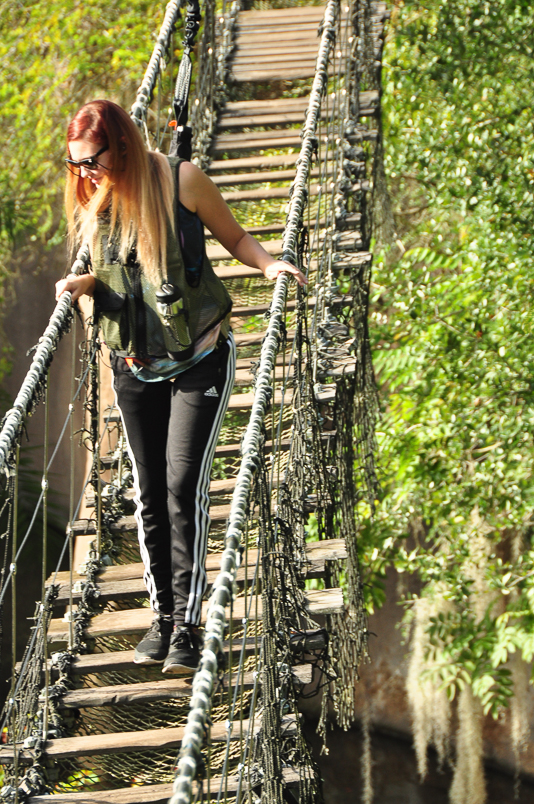
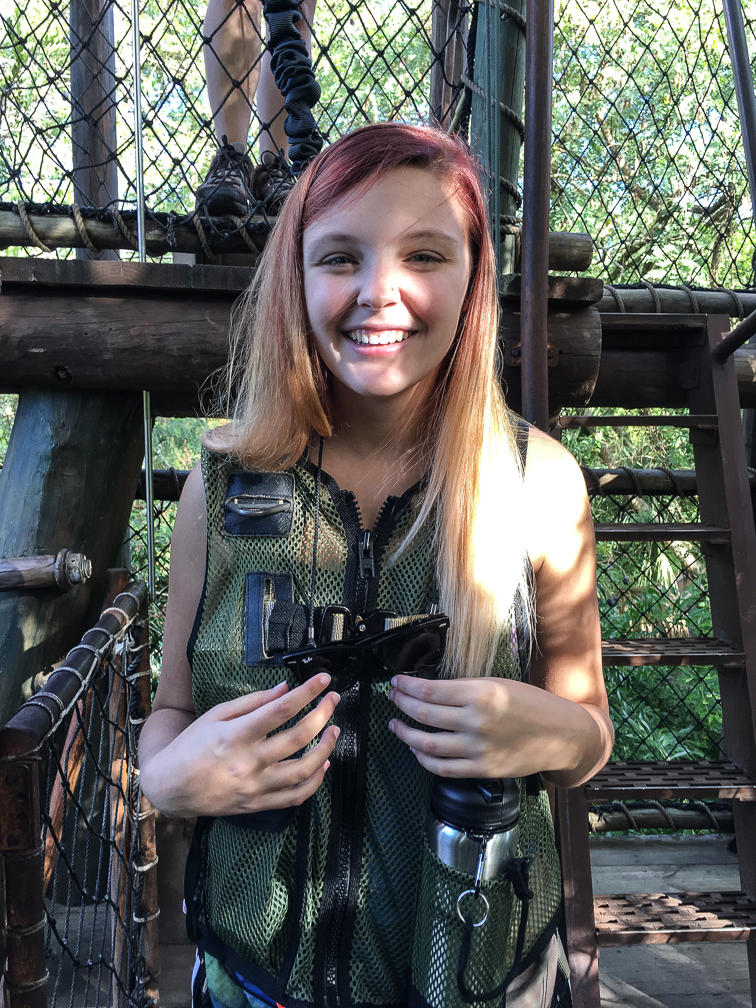
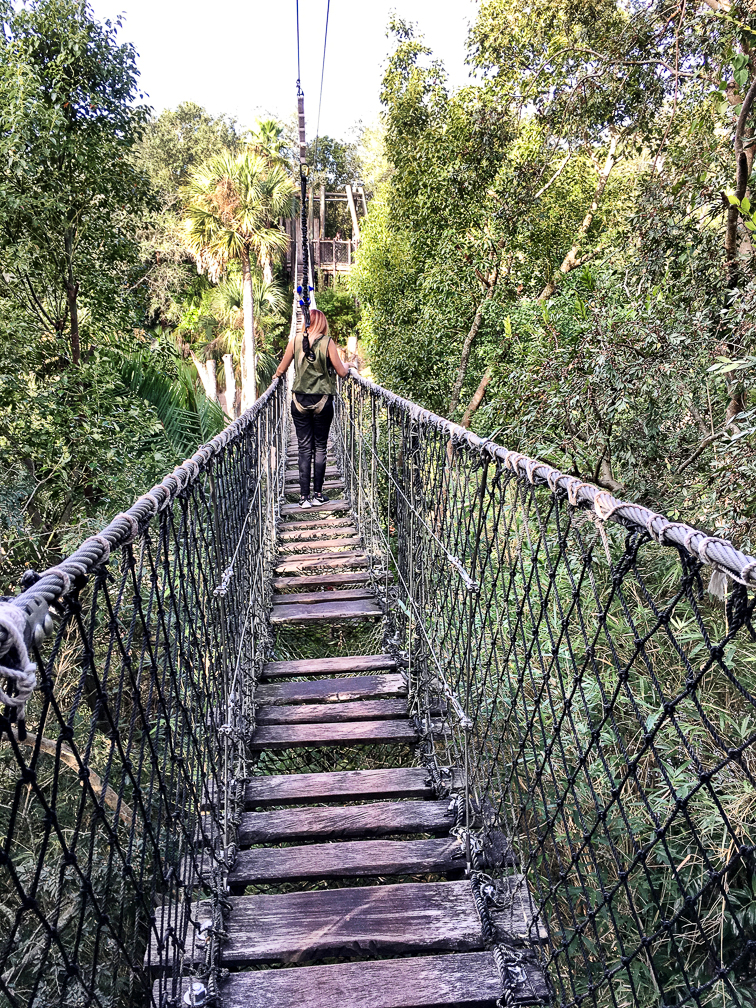
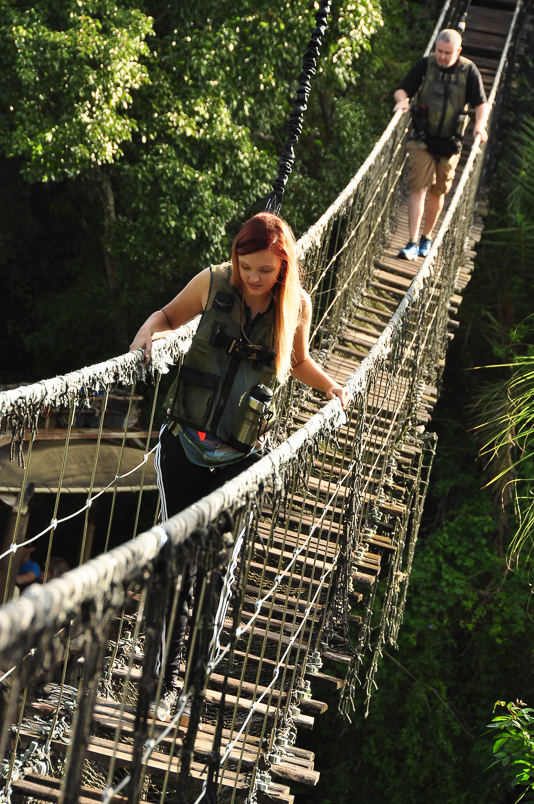
Once complete, you trek a little farther to the start of the ropes course. This is one of the highlights of the trip, as you get to walk over two rope bridges. If you’ve experienced the Kilimanjaro Safari ride before, you’ve driven under the first of the two bridges, and like us, may never have even noticed it. When you get to the first bridge, you’re strapped in one by one, and cross over to the platform between the two bridges. The guide currently shooting pictures actually crosses first, so he/she can get pictures of each person as they cross. The shots of us on the bridge face-first were shot by our guide, and the others were taken by me.

IMG_2942IMG_1637 IMG_1638 IMG_1628IMG_1807 IMG_1808

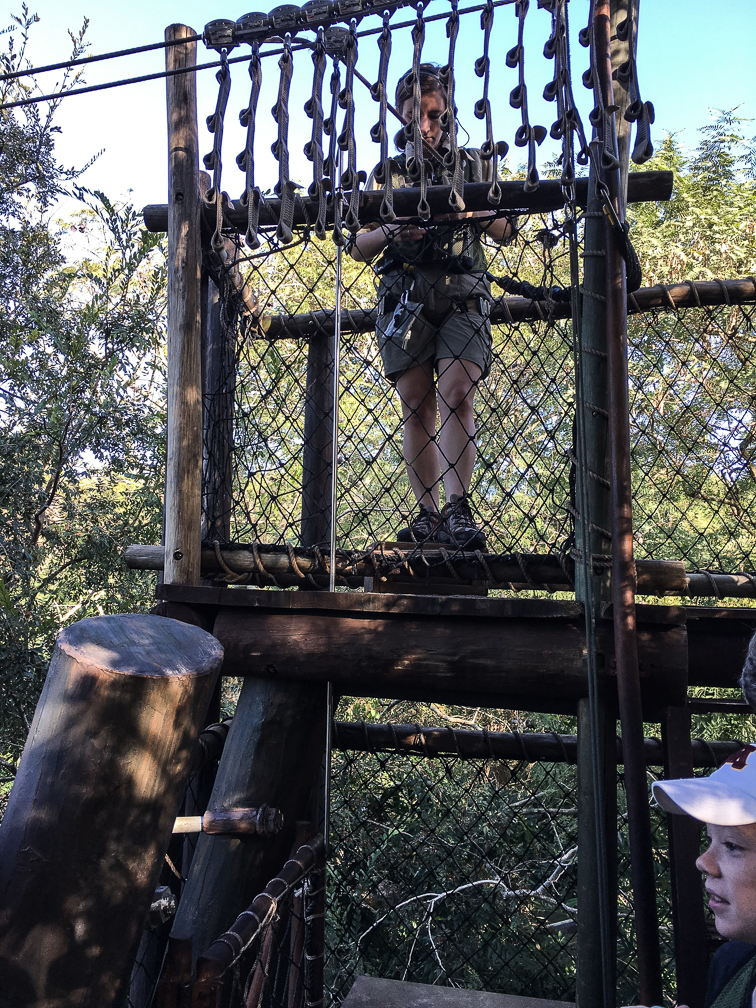
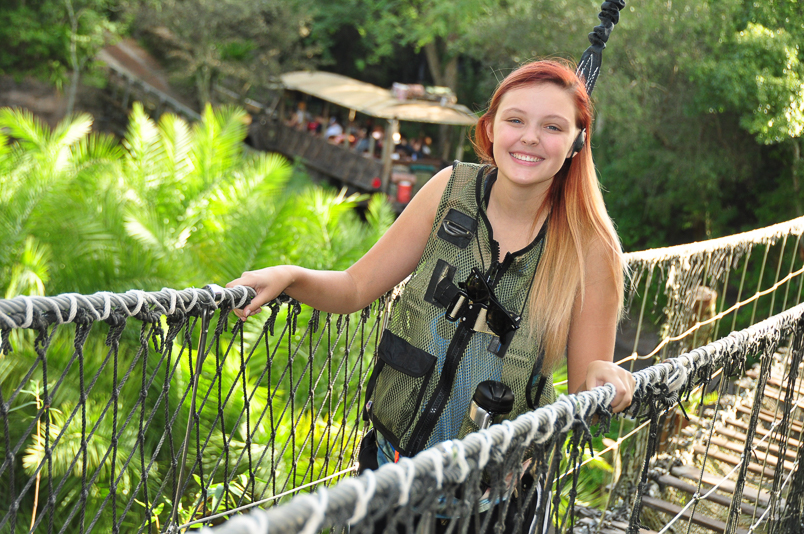
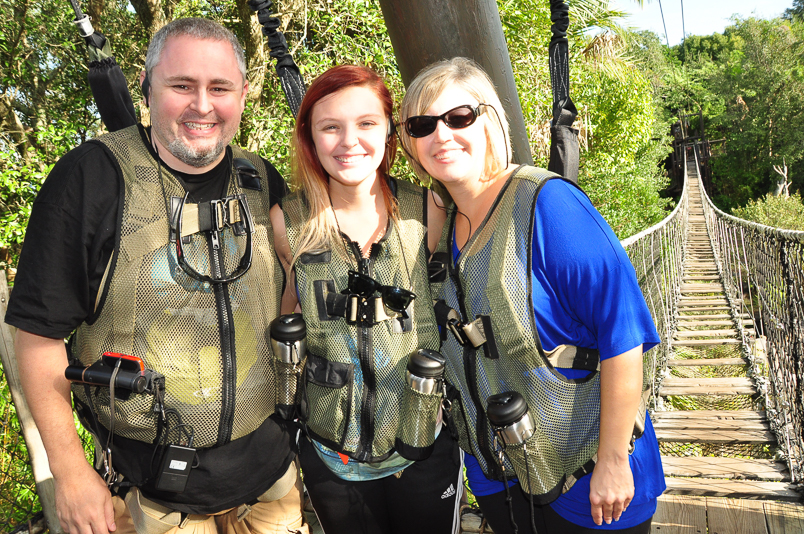
Once you’re across to the first platform, they stop each group for a quick photo:

IMG_1806

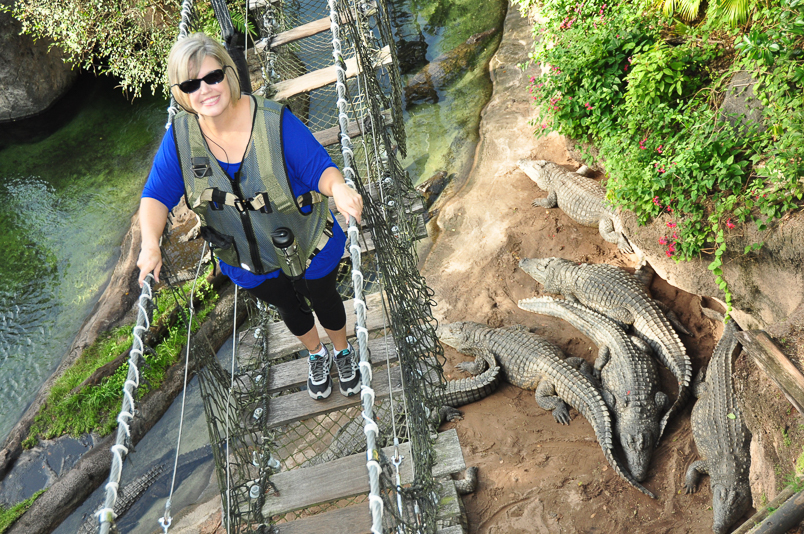
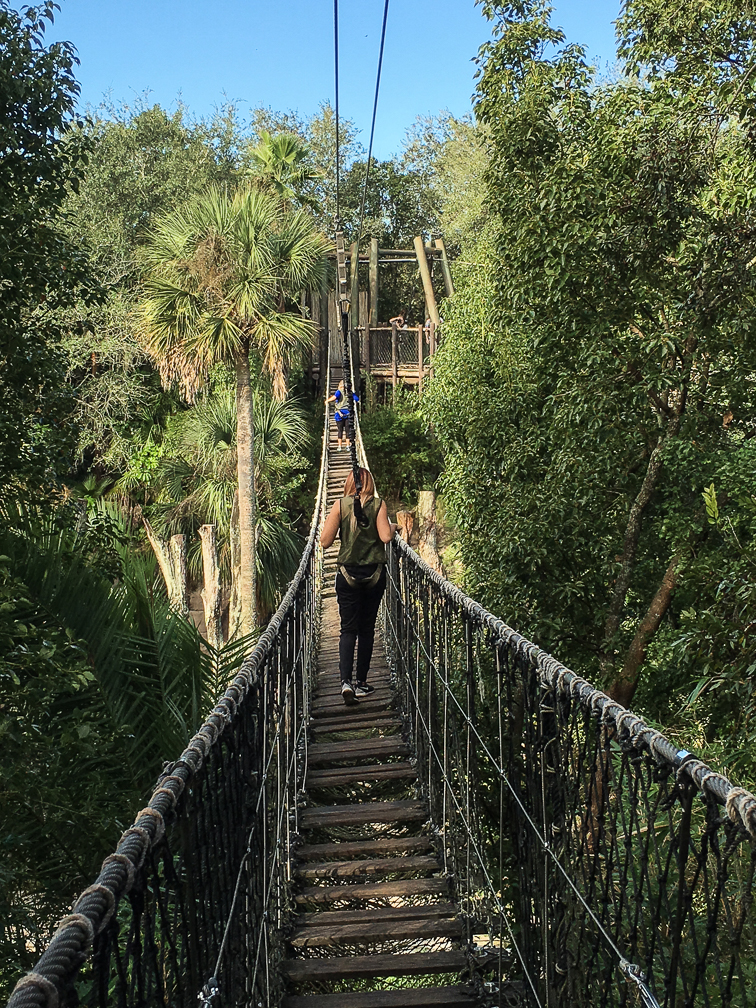
After that, you make your way across the second bridge one by one, and pass over the crocodiles. The bridges are pretty easy to walk across in my opinion, but they can get a little bouncy when more than one person is on. They also don’t mind if you make a quick stop while walking to take a pic or two if you have your camera on you, just don’t stop for long periods and hold everyone else up.

IMG_2957IMG_2959IMG_1648 IMG_2967

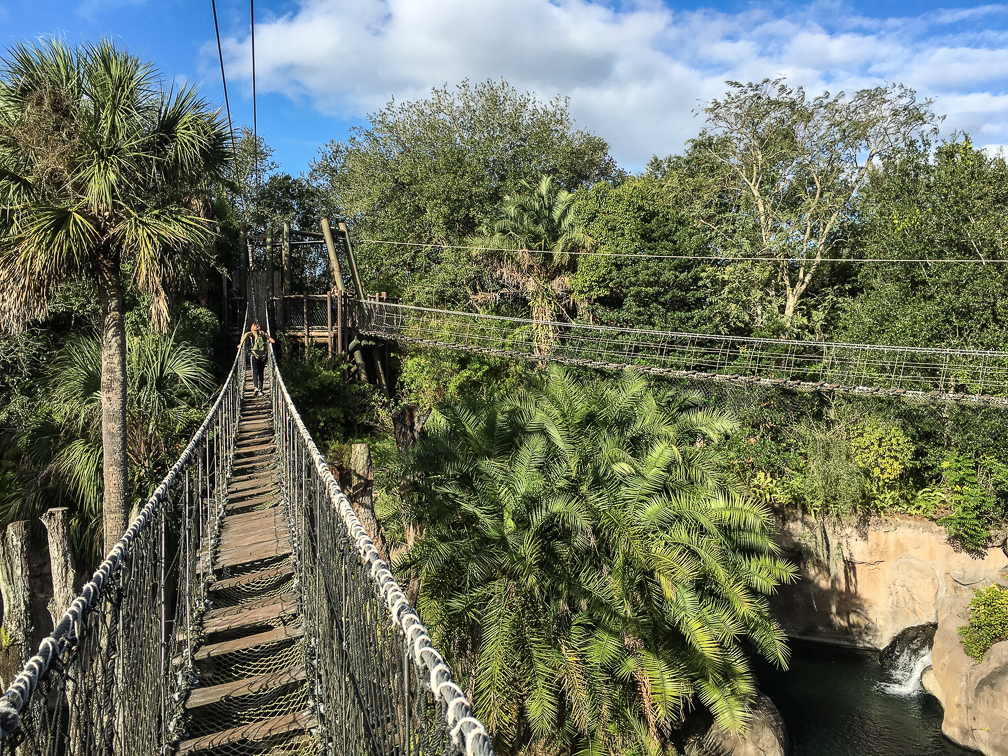
Disney’s attention to detail is quite evident on the bridges, too. Even though the bridges are perfectly secure, and there’s no danger of falling, they make the planks along the way look worn and brittle. Nice touch 🙂

Once across, you walk to a ledge overlooking the crocodile pit and strap in to another support railing while listening to the croc expert and having your picture taken with them.

Wild Africa Trek 108

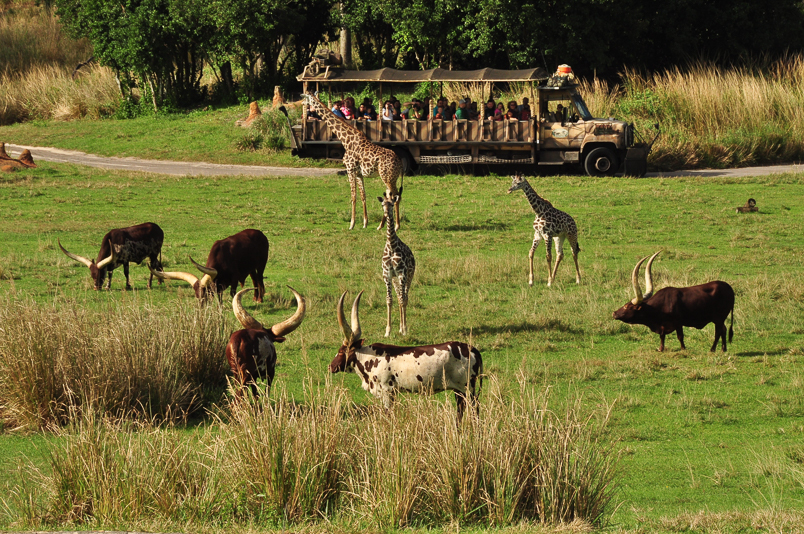
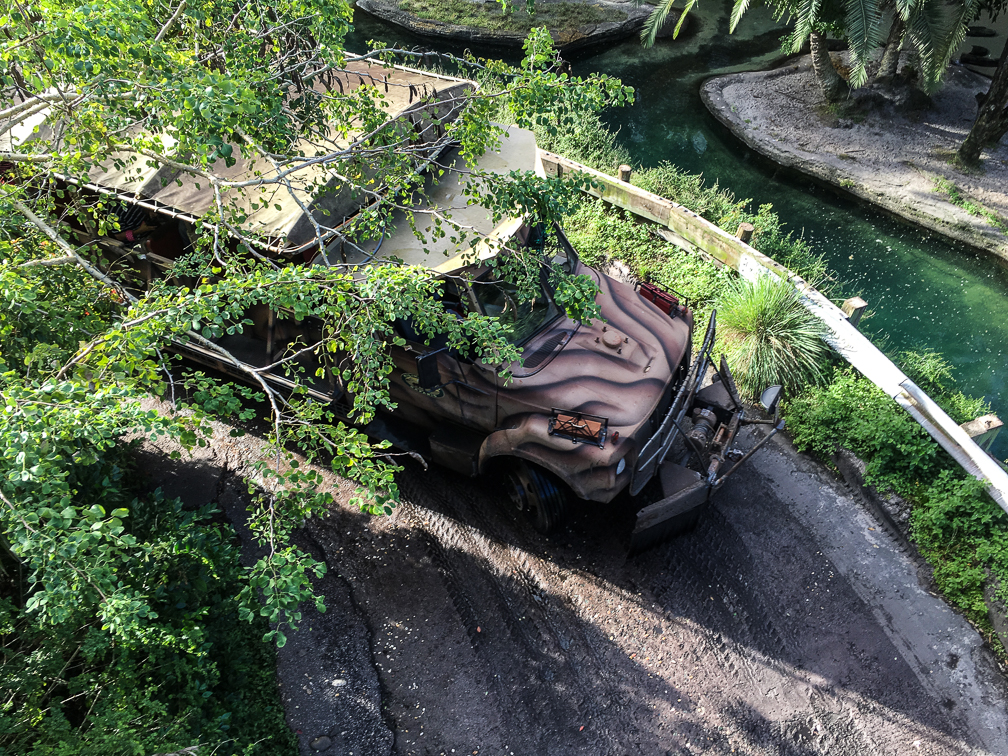
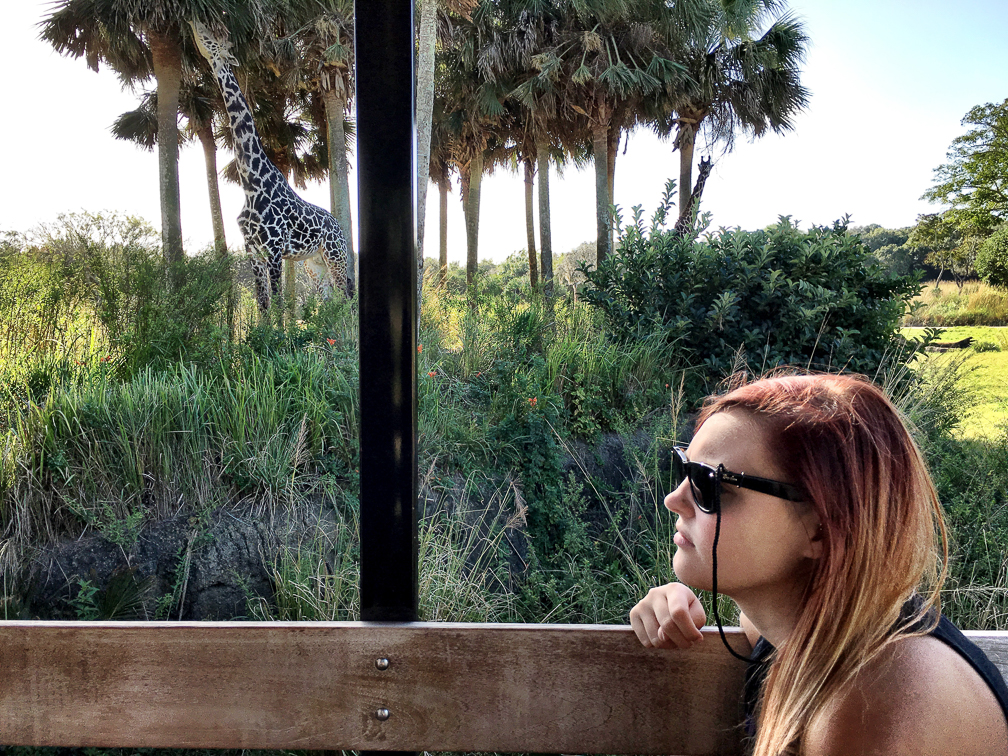
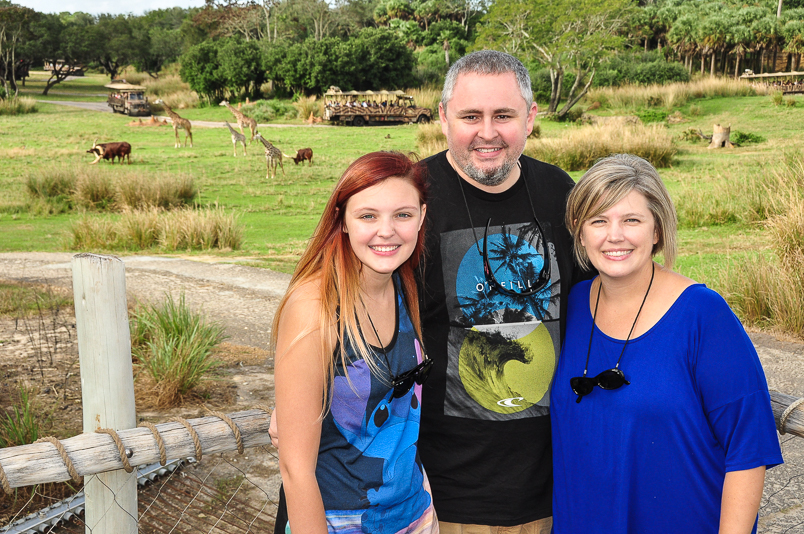
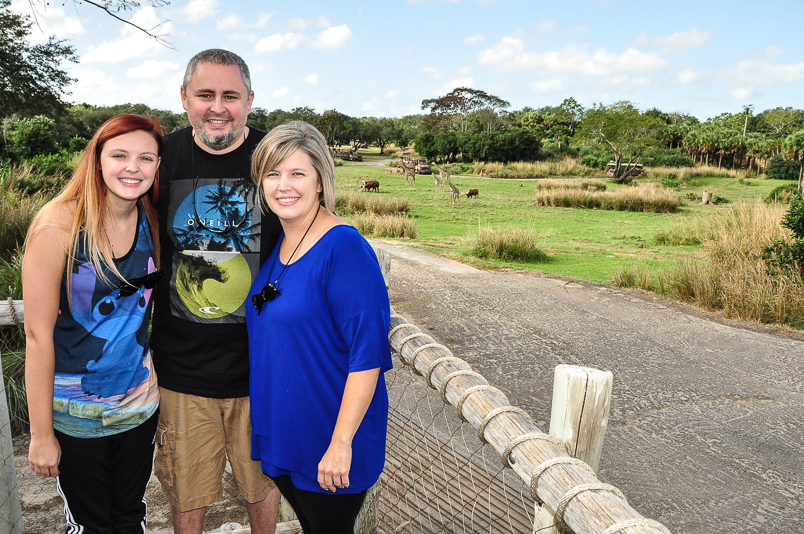
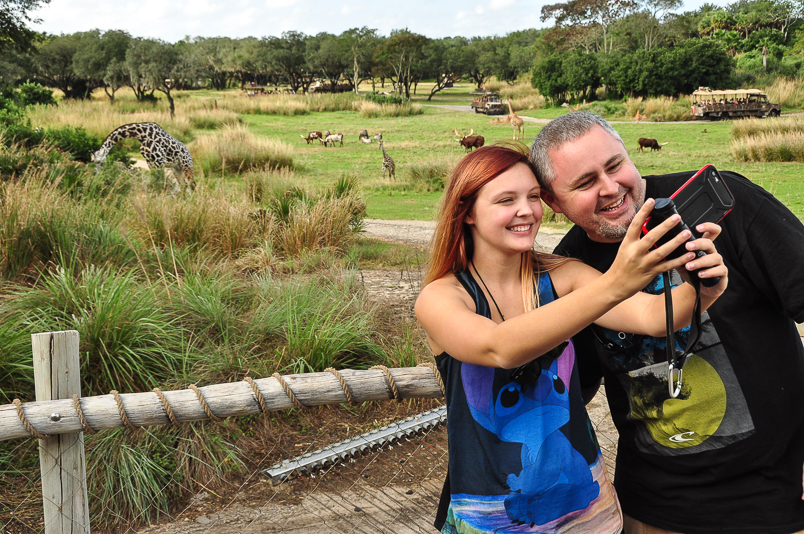
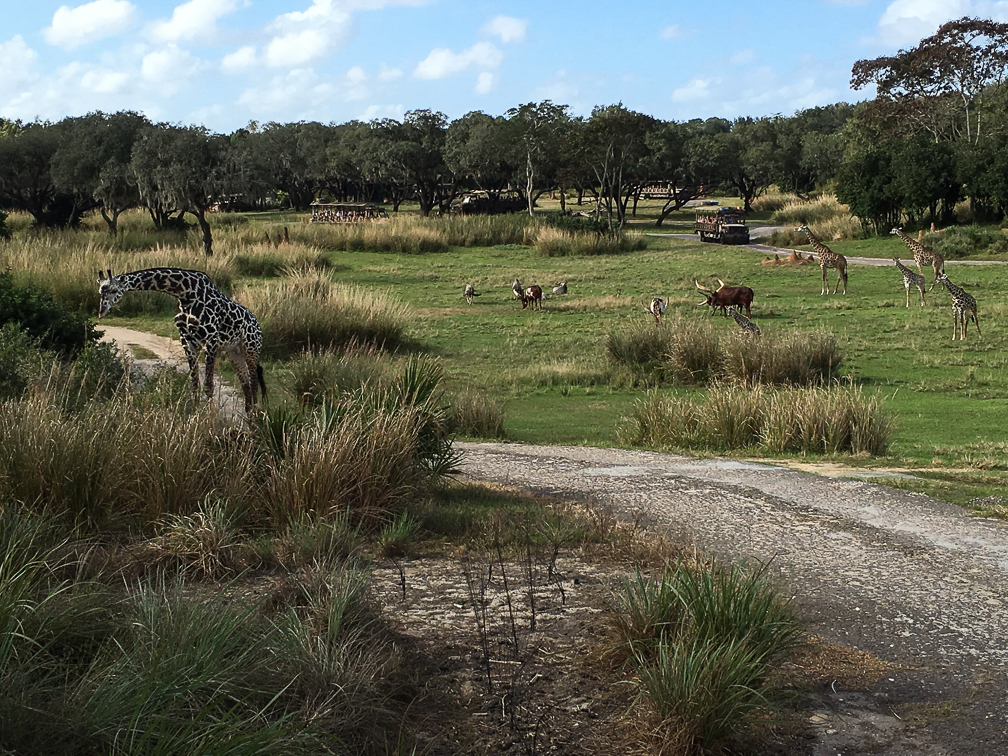
After you finish up here, you shed your harness, as you no longer need it, and hop into a safari truck for the next part of the expedition. Your truck joins the same path the regular Kilimanjaro Safari trucks are on, with the occasional deviation on to side paths the regular trucks don’t take. These side paths allow your group additional time to see some of the animals, and in some cases, allow you to get closer to animals than the regular path does, depending on where the animals are that day. When the trucks stop for these closer views, you can also stand up to get better shots. We got lucky with the giraffes, with several of them congregating right next to one of these side paths. Our truck pulled up next to them, and while our guides gave us good information on them and answered questions, we got to be pretty close and get some great shots.

IMG_1682

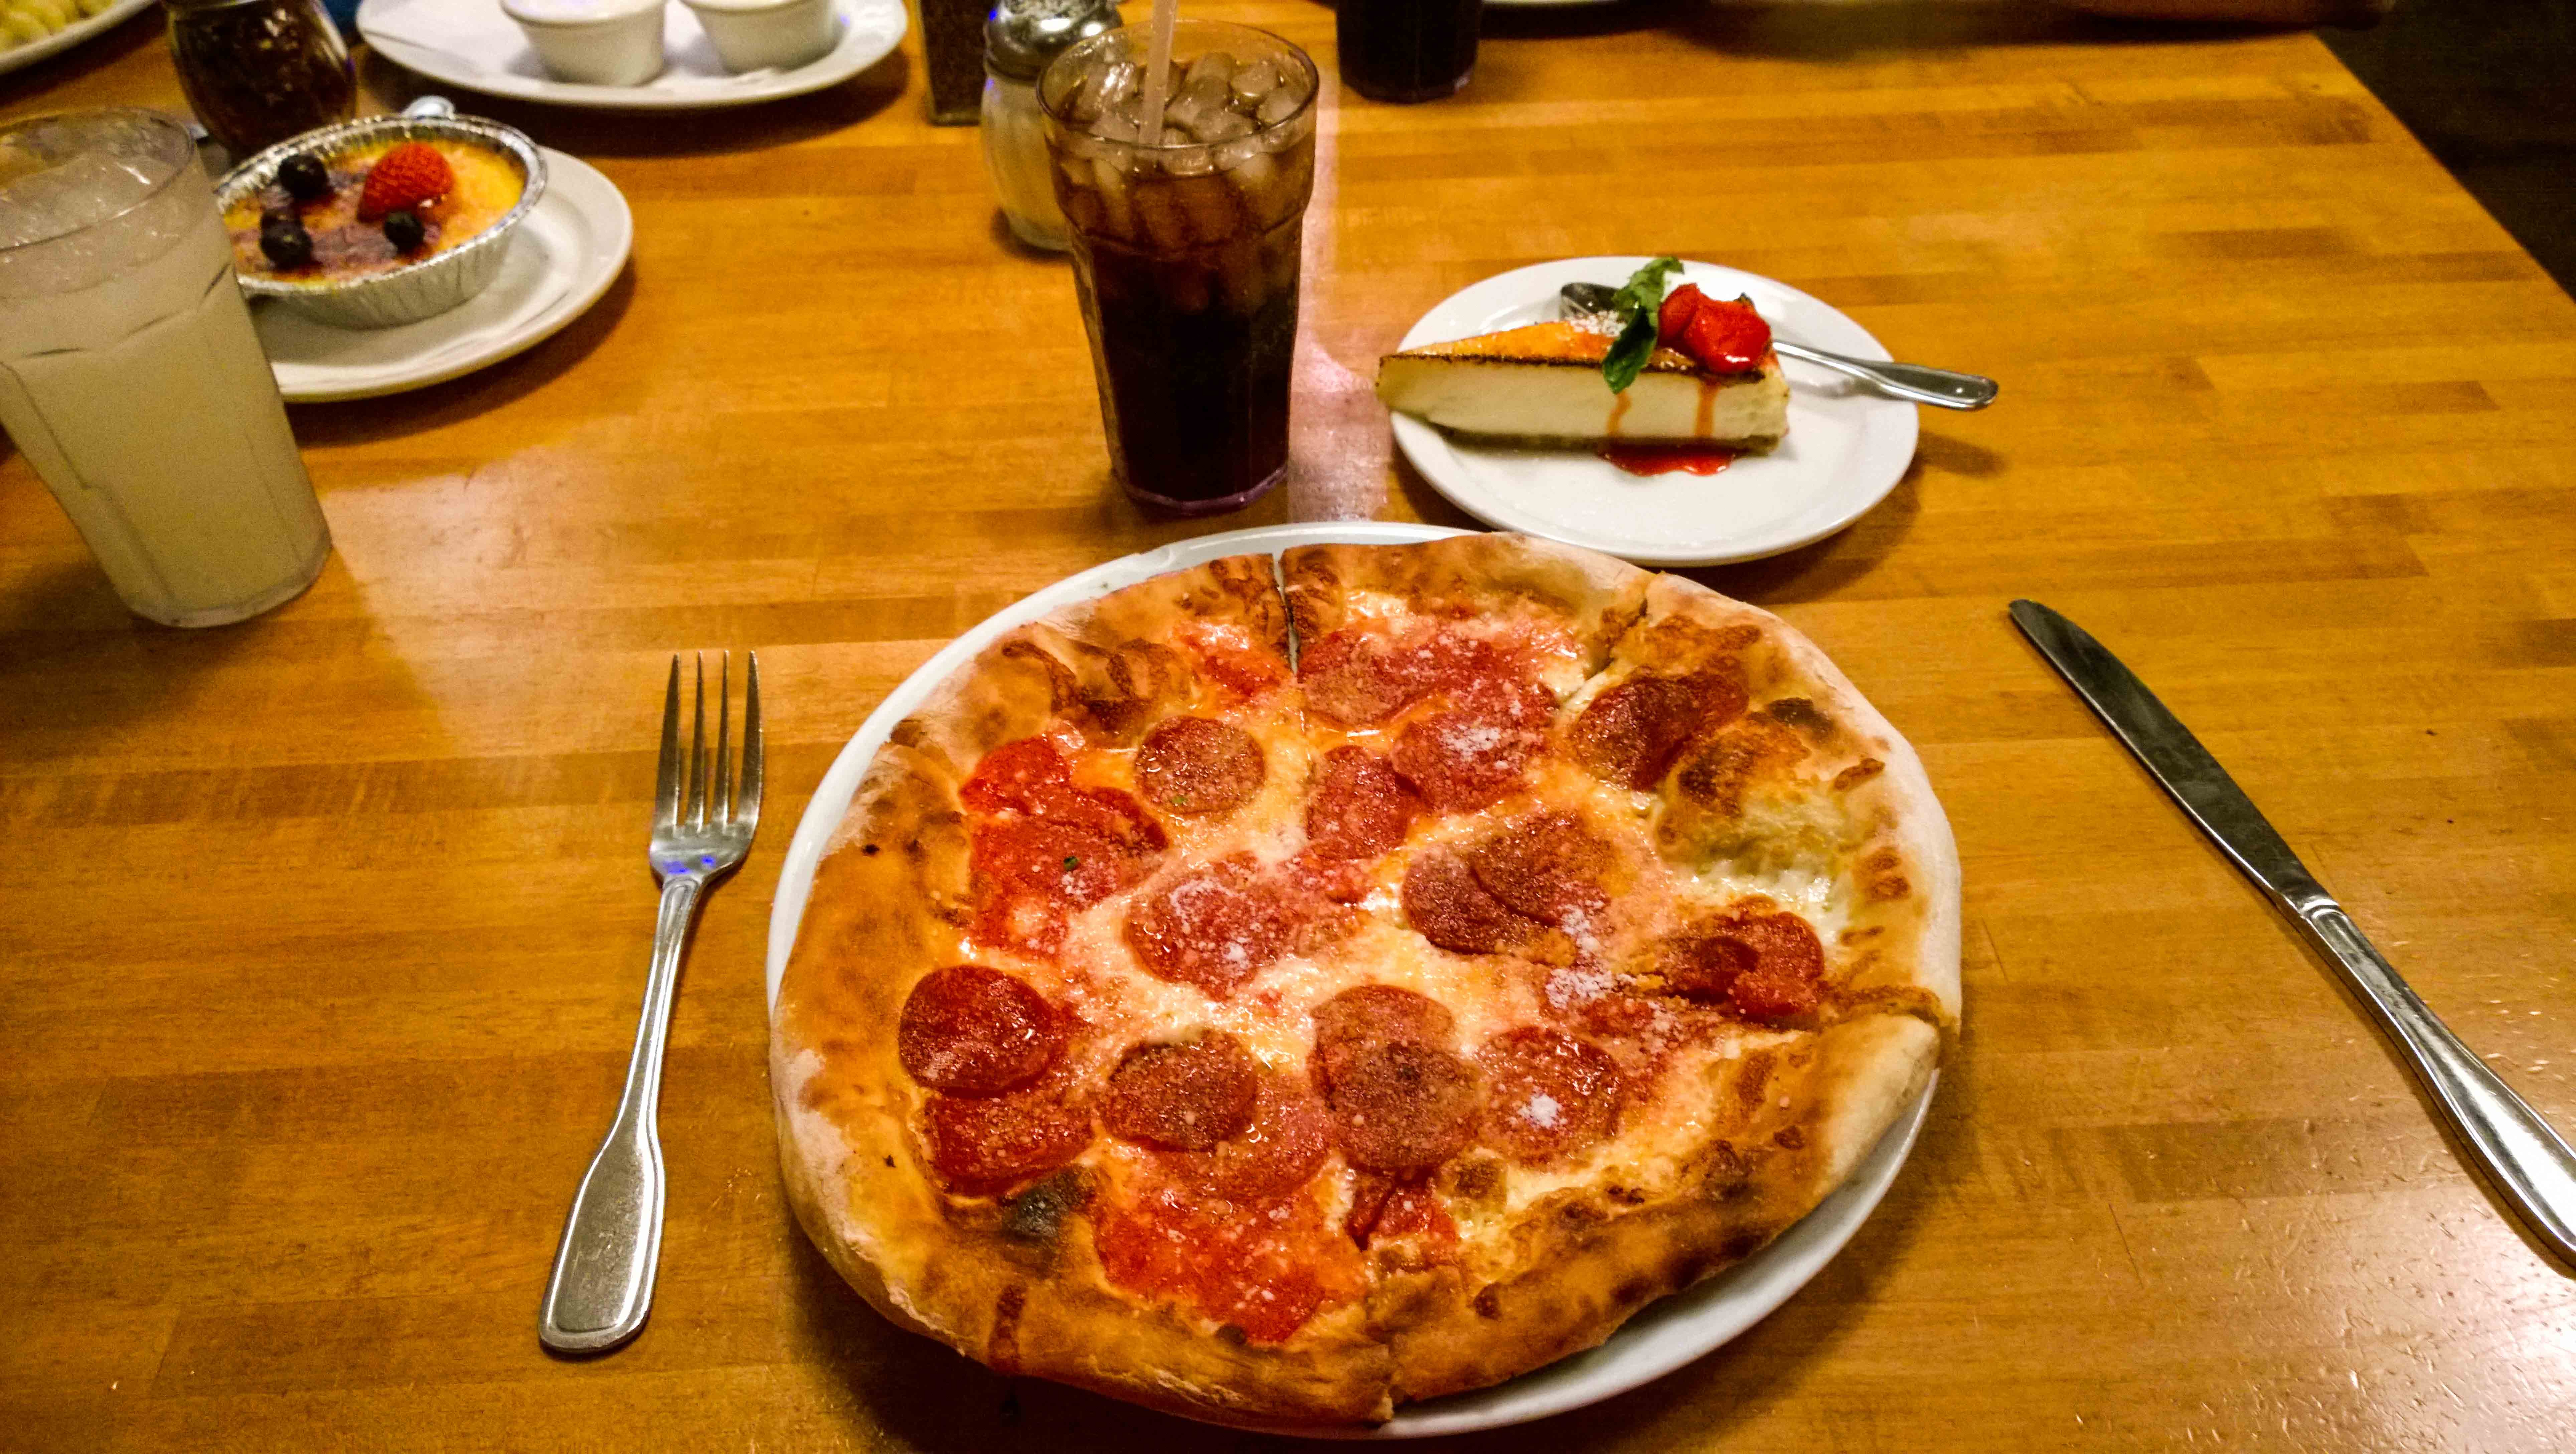
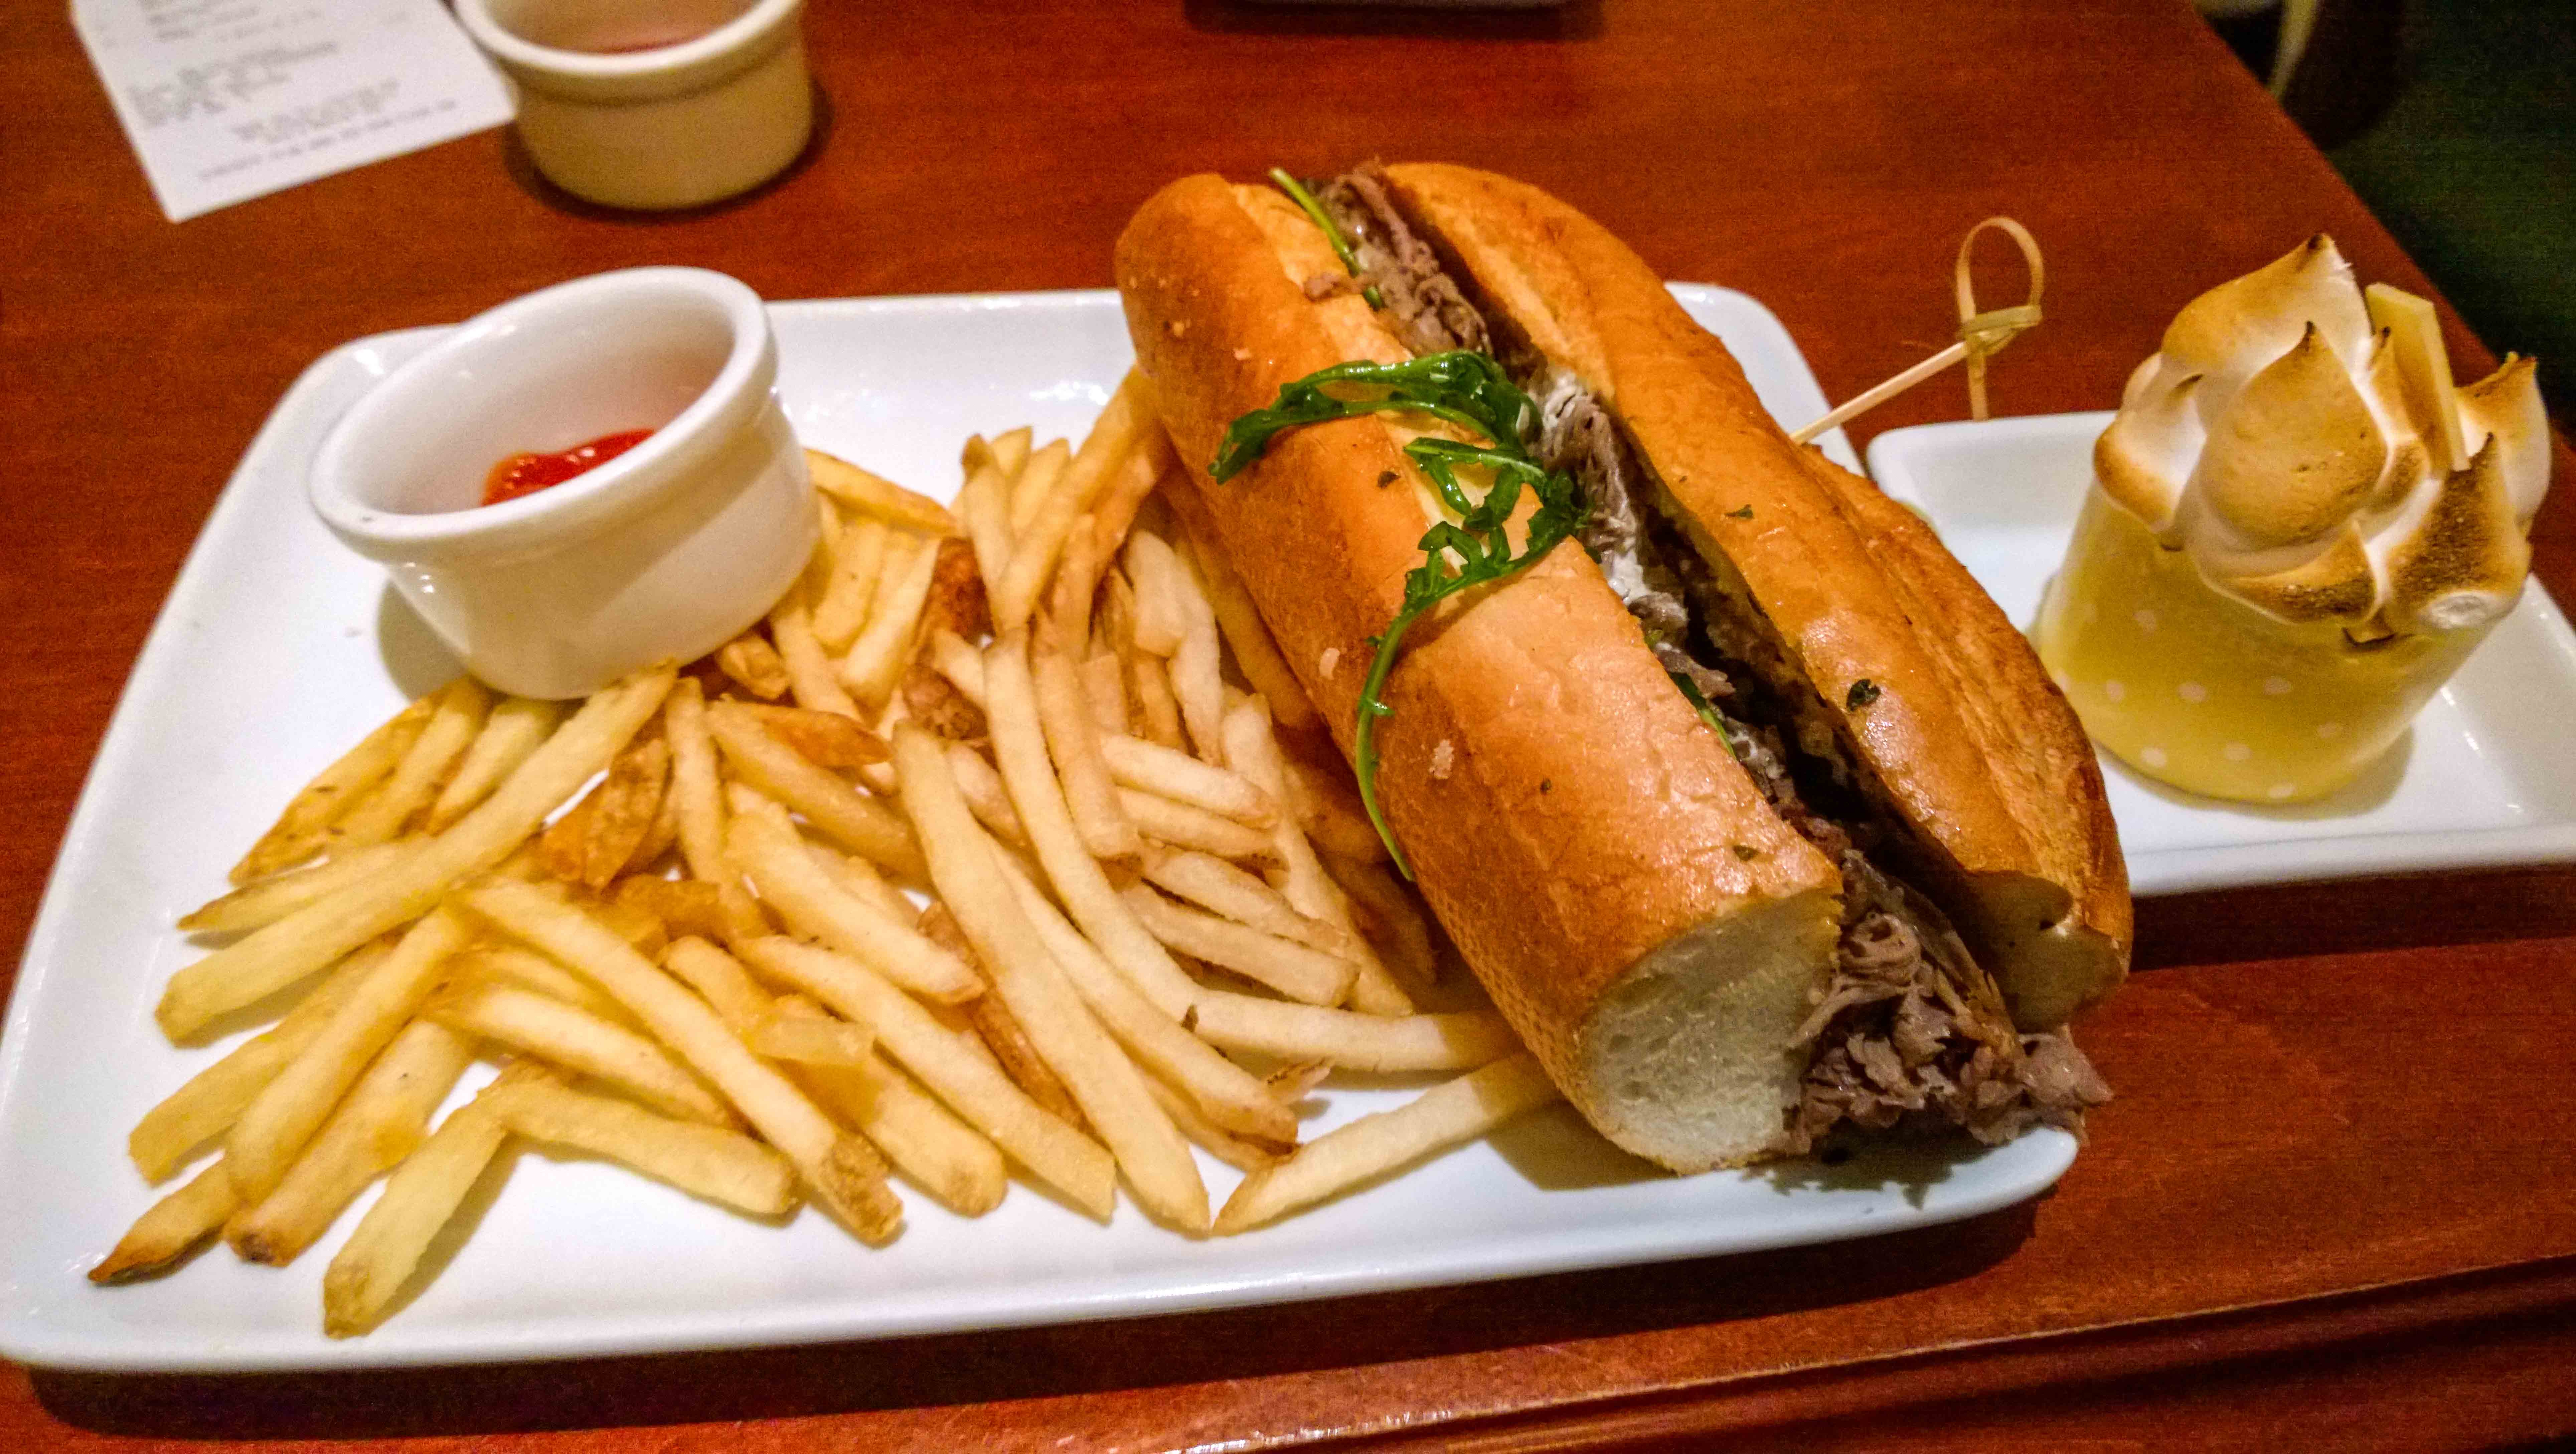
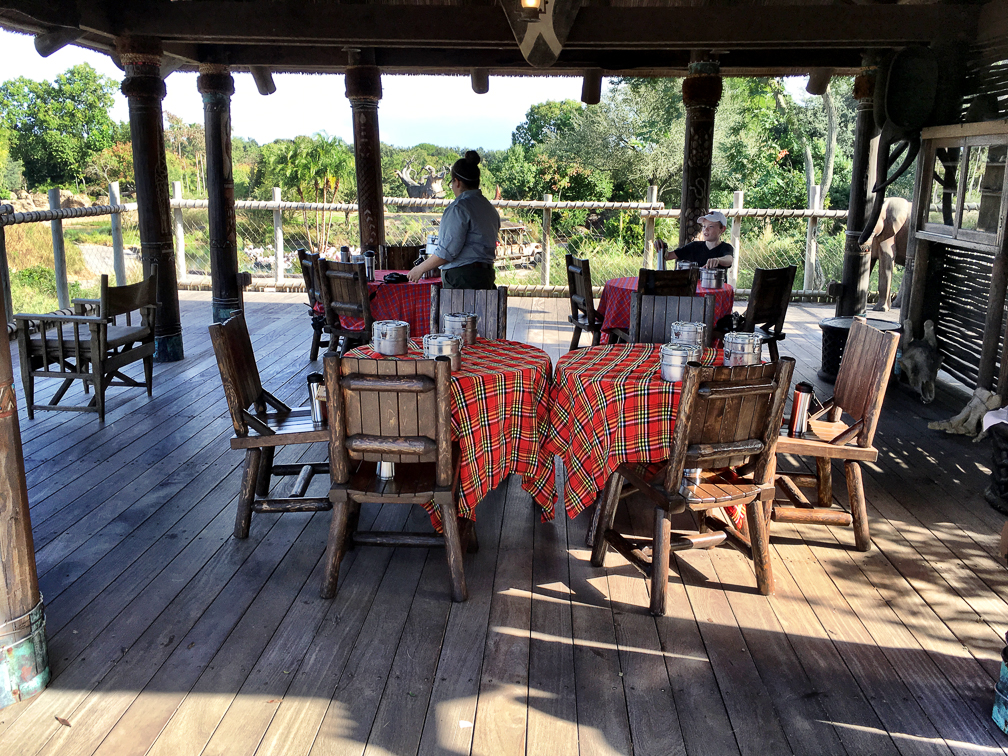
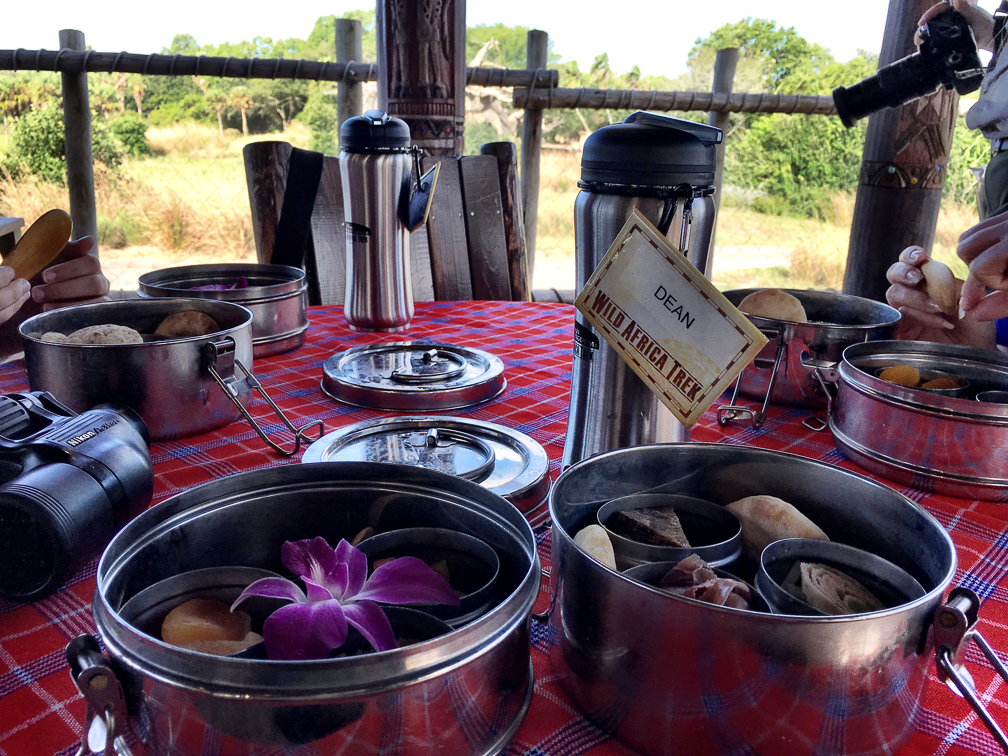
Once we finished up there, the truck headed up to a building sitting on the savannah. We’d seen this on past safari trips, but until now had no idea what the purpose was. For the trek, it actually gets used as a 30 minute rest stop, giving you time to relax and enjoy some food specially prepared by the chefs at Tusker House. All this as you enjoy some spectacular views, complete with binoculars to use. While there, the guides will also take pictures of you in various poses, and you obviously have the opportunity to take some of your own pictures.

IMG_1684IMG_1683IMG_1636 IMG_1809 IMG_1810Wild Africa Trek 175 IMG_1811 IMG_3048

There were also a coupe of short rain showers during our stop, which caused some of the animals to run for cover. I can’t say I’ve ever seen giraffes running so fast!

Once your time at the camp is up, you load back in to the truck for the ride back to the drop off point, which is the same platform the regular Kilimanjaro Safari trucks drop off at. You then follow your guide back to the Wild Africa Trek entrance where you pick up whatever you placed in the lockers before heading out into the park to enjoy the rest of your day.

The whole trek is about 3 hours, and it’s worth the time and money in my opinion. Getting to see things from a more behind-the-scenes perspective in a small group setting, while getting a ton of useful information was a blast. The rope bridges and brunch at the private safari camp are icing on the cake, and totally justify the cost, in my opinion. Our guides were great, too, we can’t thank them enough for an outstanding morning!

Wild Africa Trek 199

Enjoy a few more pictures from our trek, and when at Animal Kingdom, consider giving this a try!

IMG_1613 IMG_1813 IMG_1814 IMG_2897 IMG_2934 IMG_2951 IMG_2991 Wild Africa Trek 001 Wild Africa Trek 100 Wild Africa Trek 101 Wild Africa Trek 102 Wild Africa Trek 104 Wild Africa Trek 168

Disney Dining Plan Impressions

Coming in to this trip, we’d decided to splurge a little and add the dining package to our stay. Having never purchased it before, we went back and forth on which of the options to choose, but ultimately decided to go with the quick service plan on this trip, not wanting to spend more than necessary on an unknown. We did a little research on the dining plan ahead of time and had selected a few places to eat and snacks to get based on recommendations from other blogs on how to get the best value out of it, but if we’d had more time to devote to it likely could have done even better. My wife’s favorite resource was the Disney Tourist Blog, while I also utilized the Disney Food Blog quite a bit.

Reading various reviews and blogs on whether or not the dining plan is worth it will show some pretty mixed results. To get the full monetary value out of it, you do really need to plan ahead and figure out what restaurants and snacks represent the best value. Even if you get it free as part of one of their annual promotions, it still appears that you have to work to ensure it’s worth it when you factor in the non-discounted cost of the room and park tickets, at least according to this blog. Jen did a pretty good job tracking the cost of all of our meals and snacks over the week we had the plan, and thanks to a little creativity in where we ate we managed to come out ahead, but that only tells part of the story, and certainly doesn’t mean I’d do it again. Why? Let’s take a look.

For those unfamiliar with the counter service dining plan, you get two counter service meals and one snack per day per person. We had three meal plans, as we hadn’t added Bayley’s boyfriend Joe since we didn’t know until the last minute that he’d be joining us. This meant that overall, we had 42 meal credits and 21 snack credits to use as we saw fit over our stay on property. We each also got the refillable “unlimited” soda mugs as part of the plan. We did get unlimited mugs one time before when we stayed at Pop Century in 2009, but that was before they introduced the RFID-enabled mugs they use now. I get why they did it since far too many people refused to play by the rules when we were on the honor system and would bring the same mugs back on subsequent stays (this is why we can’t have nice things), but it made the experience a bit annoying a couple of times. It seems that once the system feels your cup is full, it induces a two minute delay before it lets you get more soda. It was smart enough to know that I hadn’t completely filled when I was doing a half-and-half fill with Cherry Coke and Coke Zero, but those times when I was super thirsty and wanted to drink some and refill right away, I was denied and had to wait. A minor inconvenience, but an inconvenience all the same. If you need it, there’s a great read on how the RFID-enabled cups work up here. They work at other Disney resorts, too, and appear to work for several days after your stay ends, as ours showed they were active until May 30th, a full 7 days after we checked out. We also found that paper cups given as part of meals at some of the hotel counter service restaurants had RFID chips in them that only allowed 3 refills that evening, too.

Anyway, back to the food. I think I mentioned in my last post that in the 5-6 weeks leading up to the trip that my wife and I had been on a pretty strict diet. It’s one that the coach at my boxing gym had put together for me to get me back in to shape after I’d regained some weight last year due to injury. I was down 25lbs when we got there, and over the course of the week on the dining plan, felt like I gained half of it back (but didn’t, thanks in large part to the amount of walking we did).

Oh, and I’d like to add that if anyone’s looking for a solid boxing gym in Charlotte, NC, be sure to give Dyme Boxing a try. I’ve been going 4 years now and have lost and kept off a lot of weight, and enjoy the workouts 🙂

Back on topic; with the dining plan, meals at counter service restaurants include an entree, dessert and drink. At most places I probably could have eaten a little healthier, but I’m pretty picky with my food, and many of the healthier options just didn’t appeal to me. My biggest example of why I didn’t like the dining plan centers around the desserts. Sure, I could have skipped them, but then I’m wasting money. That, and they looked awesome. For the most part, they tasted pretty good, too. Some examples of desserts we had, including a shot of the inside of Darth Cupcake (that’s delicious peanut butter in the frosting):

WP_20150517_13_24_54_Pro WP_20150517_13_39_06_Pro WP_20150517_21_25_40_Pro WP_20150518_19_41_08_ProWP_20150521_13_30_32_Pro 1WP_20150522_21_31_03_Pro

We expected cupcakes with dry cake and cheap frosting, but were pleasantly surprised by all of them. Moist delicious cake with some pretty good frosting. By day three, however, I was tired of anything cake-based and was doing my best to find other options, like the frozen lemonade at Yak and Yeti, which was perfect on a super humid day at Animal Kingdom. By the time day five hit I’d had my fill of park food, too. Maybe it would have been different if we’d had the next plan up, where we could have gotten one table service meal, but still, I wanted something that didn’t taste like mass produced food. Thankfully the counter service options aren’t limited to the parks. The plan works at a small handful of restaurants at Downtown Disney as well, so a few days in to our stay, the kids headed out for a date night (Joe took her to dinner at Sanaa, which we all love), and Jen and I took the water taxi over to Downtown Disney and ate at Wolfgang Puck Express on the dining plan. Honestly, this place was easily the best bang for your buck that we found with any of our counter service meals. For the two of us, the total that night was over $50 before tip (tips aren’t covered by the plan), and our entrees were much better quality food than what we’d eaten in the parks. I had the bacon-wrapped meatloaf on garlic mashed potatoes with creme brulee for dessert, and loved it. We all agreed that their vanilla bean cheesecake shown in the picture below was better than the creme brulee, though, and all got that on our two subsequent visits. Here are pics of my meals here. I had the meatloaf twice 🙂

WP_20150519_19_32_39_Pro WP_20150519_19_32_48_Pro WP_20150520_22_27_08_Pro

Due to our character meals falling on day one of the meal plan and having small meals at other places we didn’t want to use the meal plan, we were able to use our credits to cover Joe’s counter service meals several times. We also ended the last day with 4 snack credits, and let the kids go pick out whatever they wanted before we left Hollywood Studios on the last night. Your credits expire at midnight on the day you check out, and you don’t get a refund on any that go unused. For snacks, we generally tried to ensure we used those credits on things over $4.50 in cost. My favorite was easily the school bread found at the bakery in Epcot’s Norway pavilion, although we had some pretty good sweets at the bakery in Germany, too. I don’t have a list of all the places we got snacks at, but I do have a list of the counter service locations we ate:

Be Our Guest was an interesting one. After checking the Disney Dining site multiple times each day to see if any space had opened up, we finally managed to get a reservation on one of our last park days. It’s an interesting (albeit slow) experience in the way you order, with kiosks available for your group to customize your meals. Once you order you go find a place to sit, and they bring your food to you on real plates, locating you by the RFID chip in your Magic Band (or the magic rose they give you if you don’t have a Magic Band). The food itself was some of the better in-park counter service food we had too, although the roast beef in my sandwich was slightly overcooked for my tastes. Regardless, it’s a neat experience that shouldn’t be missed.

WP_20150522_14_56_34_Pro WP_20150522_15_02_51_Pro

Oh, one additional tip when eating at any counter service restaurant with a dining plan: if you want a large drink, just ask. They generally default to giving you a regular size one, but will give you a large at no additional cost if you ask for it in our experience.

We did get value out of the plan, having consumed $142 more in food and snacks than the dining plan cost, but I can honestly say I wouldn’t have eaten half the sweets I did if it didn’t come with the meal or purchased the unlimited soda mugs, and as such, we likely would have spent noticeably less on park food, although to be fair we might have made up for it elsewhere. For me, the only reasons I’d have for getting a dining plan would be convenience and lack of sticker shock. Even those counter service meals are pricy, and the cost of a single meal adds up quick for a family. Not having to fork over a bunch of actual money with each meal would probably keep stress levels down. It’s a lot easier to just swipe a Magic Band, and Disney knows it.

Final verdict: While I wouldn’t jump on the chance to get the dining plan again, I think I’d get outvoted. They both want to try the plan with one table service meal at some point. We’ll see…

%d bloggers like this: