A Weekend at the 2016 Grand Prix of St Pete

Last week I took a few days off and headed down to Florida to hang out with the kid. This wasn’t just any random trip, however, it’s one we’ve been planning for a few months now. Her school is about 10 minutes from the location of the IndyCar season opener, the Grand Prix of St Petersburg, and being big IndyCar fans, seemed like the perfect location to blow my annual racing budget. There’s nothing better than a street race, and mid-March in St Pete seemed about perfect.

Since she already had a place to stay, I just needed somewhere for me to sleep. Looking at the hotel situation back in early January, I could see I was going to have to get creative. Many of the downtown hotels were near capacity, and the cheapest rates I was finding started at ~$200/night for what are normally low budget hotels, climbing to over $400/night for the 3 and 4 star stuff. That just wasn’t going to work. After a quick search on Airbnb, I found a perfect little studio-ish apartment for 1 that was easily within walking distance from the track. Great, quiet little place with parking that wasn’t more than a 10min walk to the track’s gates, all for a total cost of what the average one night hotel stay in downtown would be.

I drove down Wednesday, with an overnight stop in Ocala so I could arrive in downtown St Pete on Thursday morning. My timing was intentional, as (with a huge amount of help from someone at IndyCar) I’d managed to secure an early birthday present for Bayley, a ride around the track in one of the two-seaters on Thursday at noon. I got in around 10am Thursday just to scout things out, and quickly realized that St Pete doesn’t do things like Baltimore did. At those races, the track and paddock areas weren’t closed in on Thursday, you could walk around pretty freely and check out the activity as the IndyCar and support series teams were unloading the transporters. At St Pete, the track is totally enclosed by Thursday morning, and unless you’ve got a reason to be in there, it’s not happening. A shame if you ask me, as we saw a lot of locals in Baltimore walking around and checking things out. It’s the kind of thing that could possibly draw interest from people who hadn’t planned on buying tickets, if you ask me.

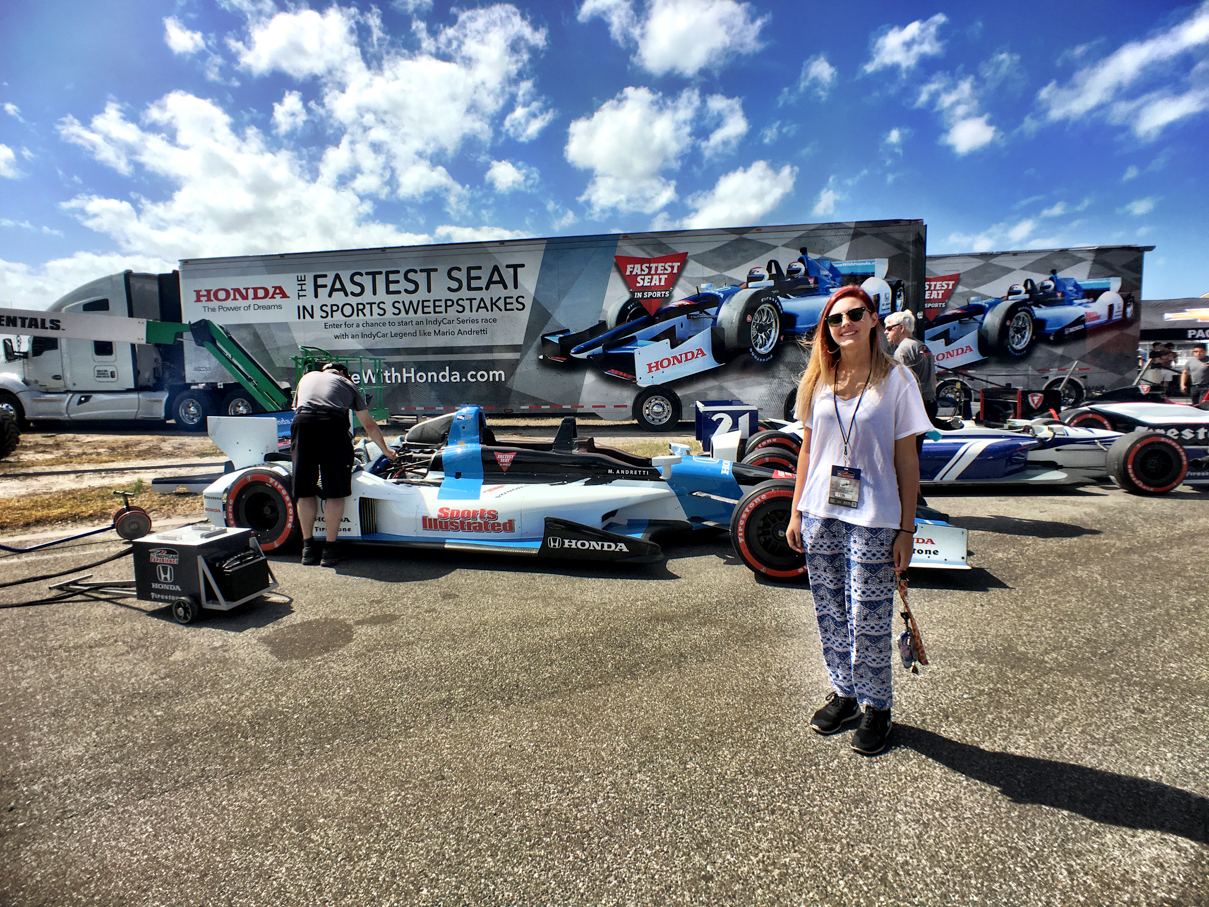
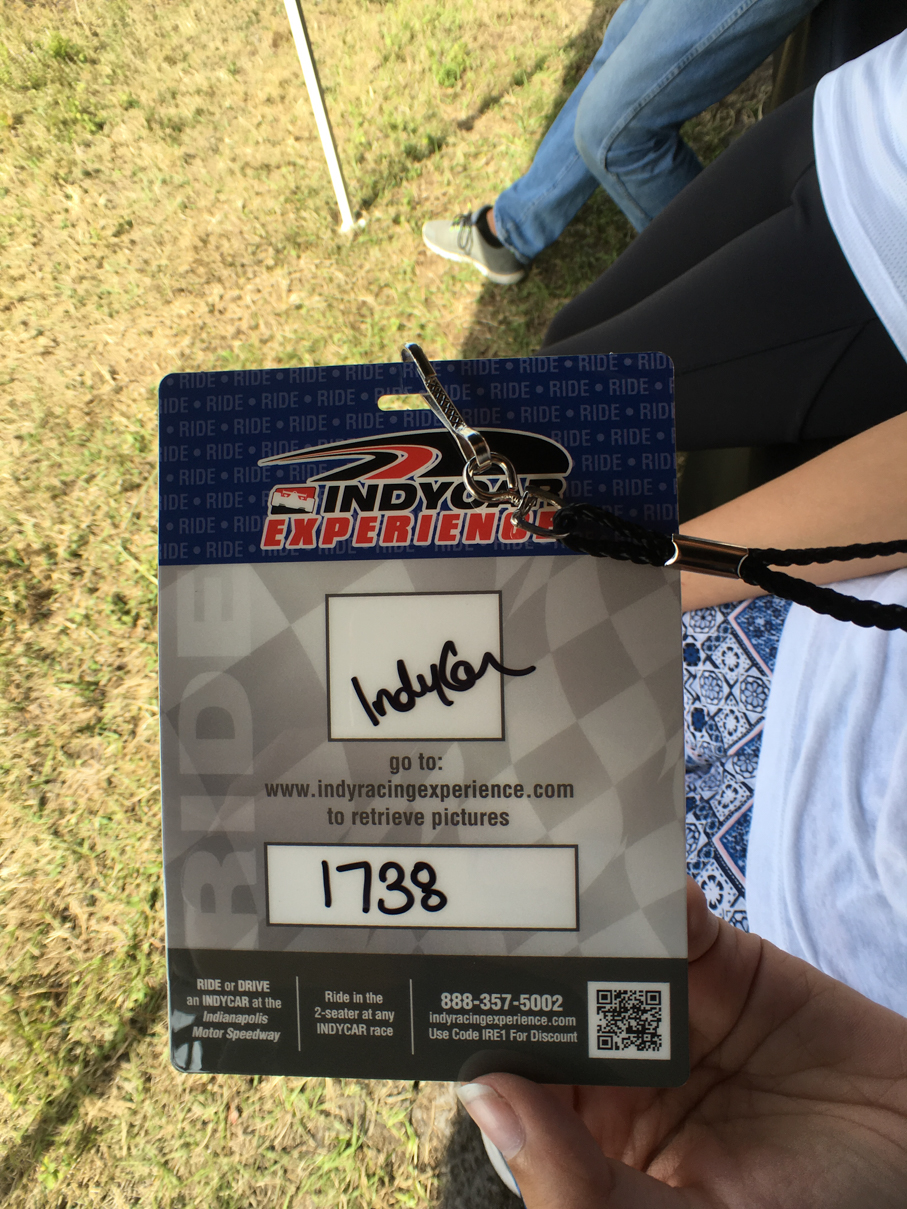
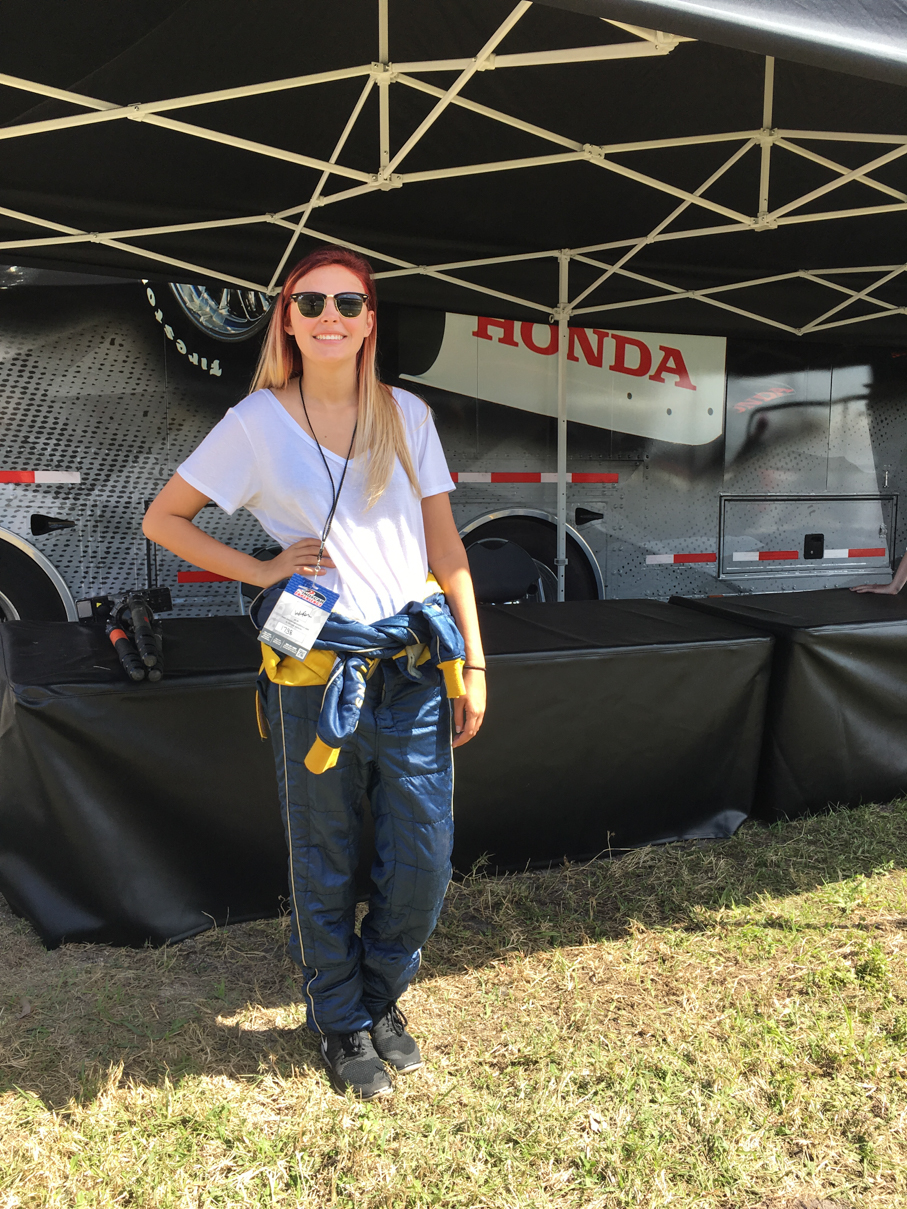
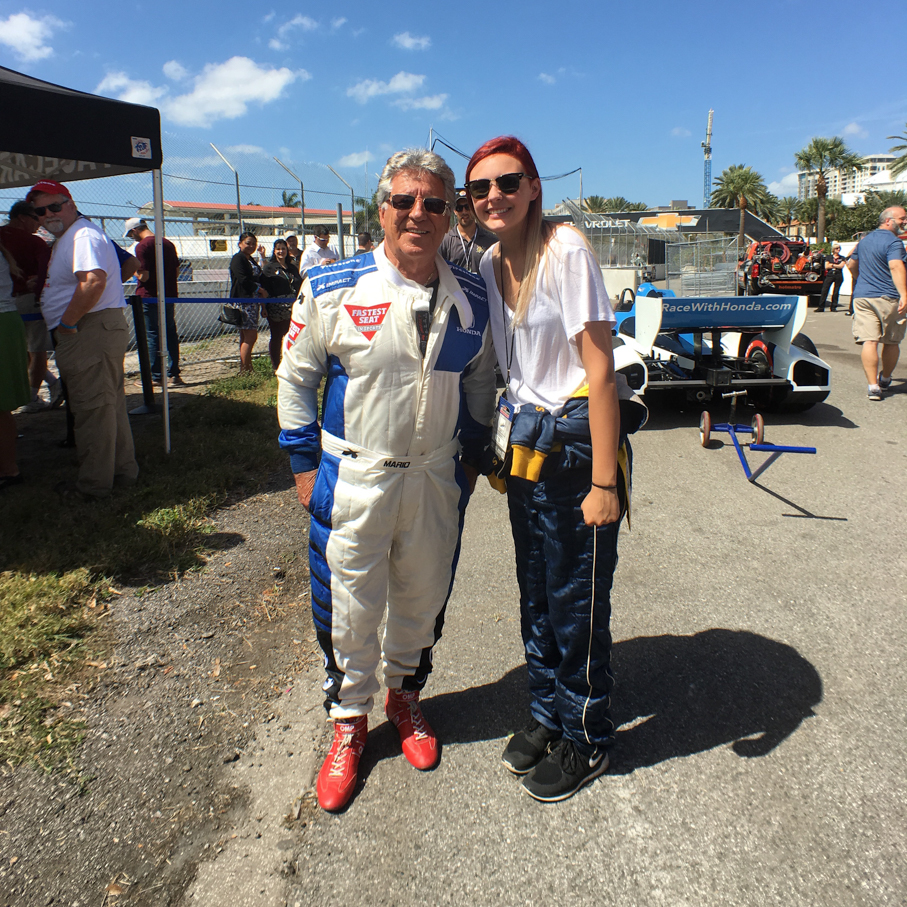
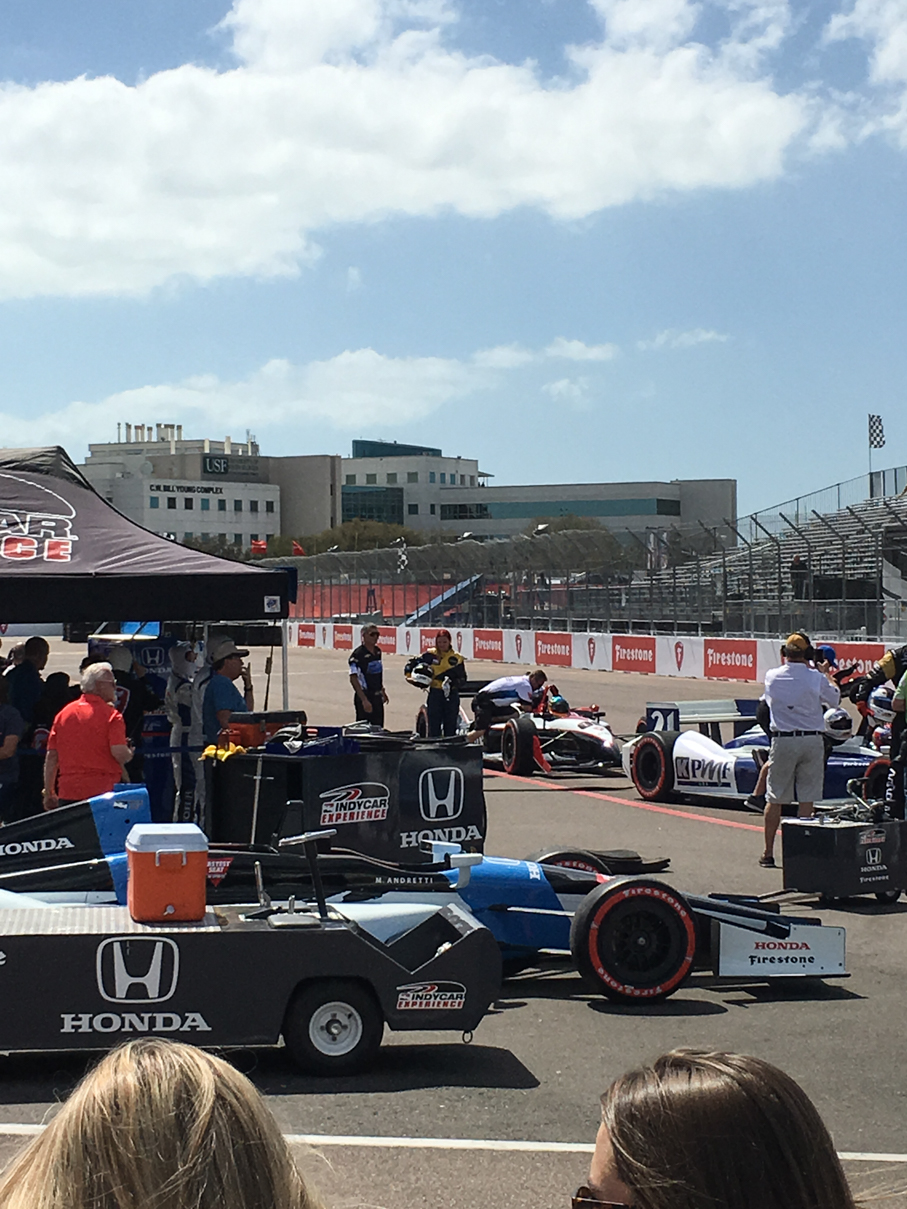
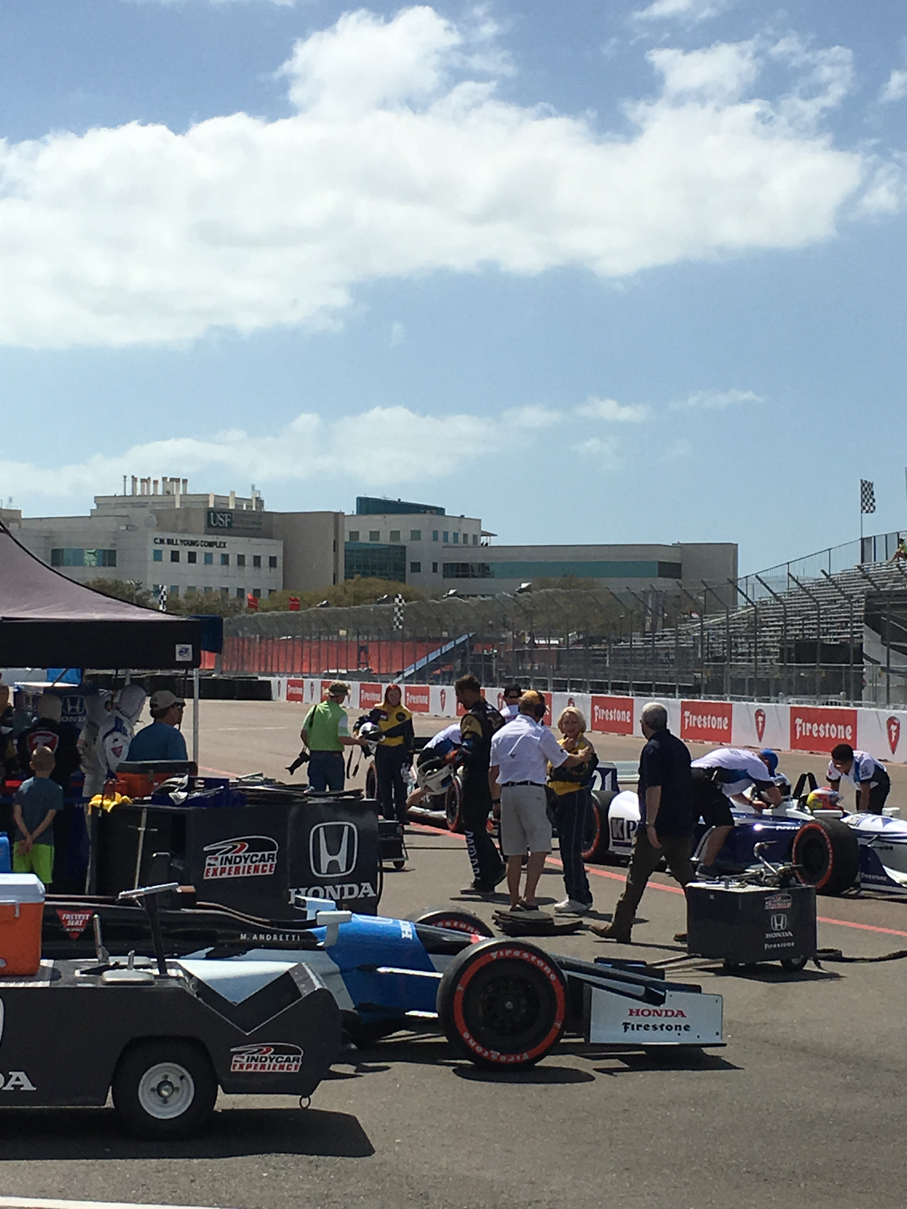
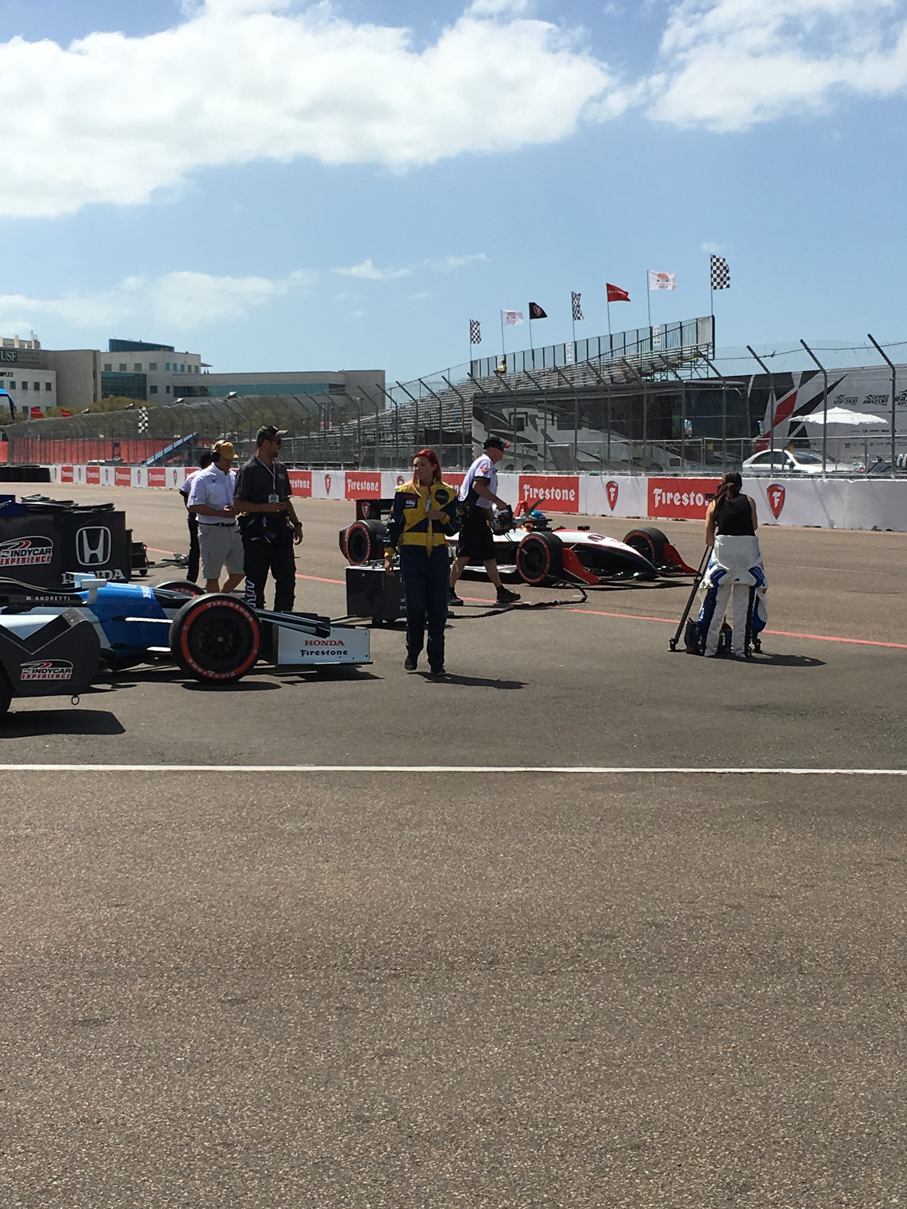
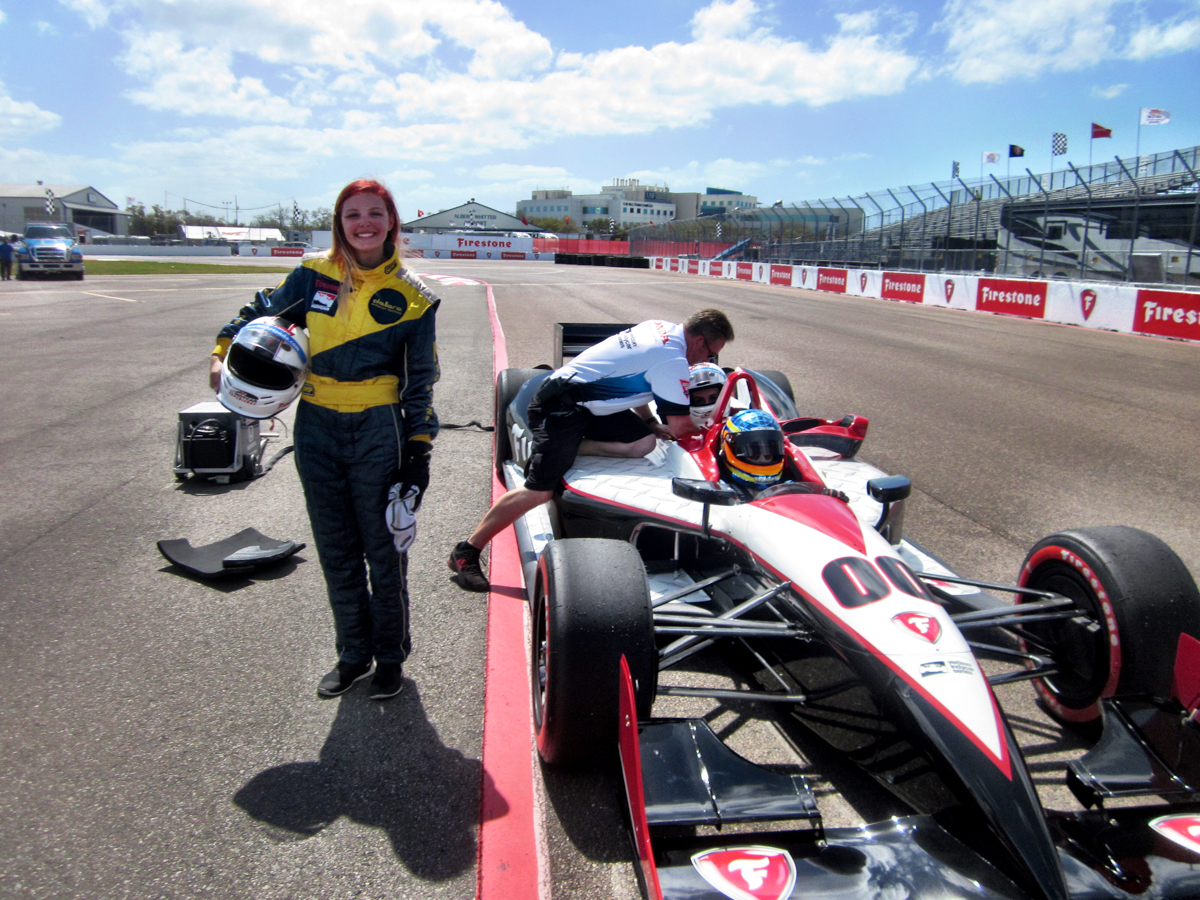
Bayley got in to downtown about 11am and met up with me at a parking garage near the track. After a short walk back to the entrance gate, we presented her IndyCar Experience ticket and walked back to the area near pit exit where the IndyCar Experience haulers were located. Check-in was pretty quick, and gave us a few minutes to relax while we waited for the event to start. While walking around right there, we saw both Mario Andretti and Davey Hamilton come over, both of whom were drivers for the experience. A few shots from prior to her ride:

IMG_6595 IMG_6598 IMG_6599 IMG_6601 IMG_6605 IMG_6606 IMG_6613

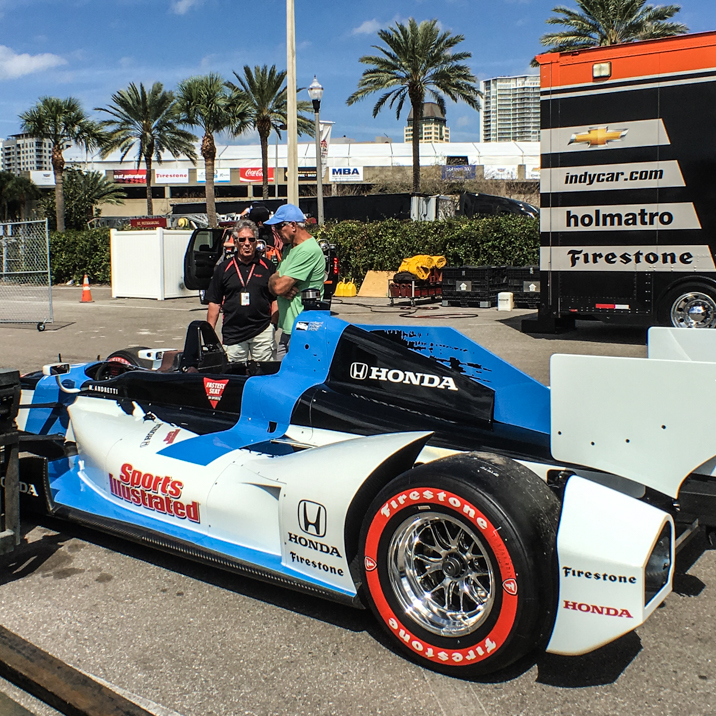
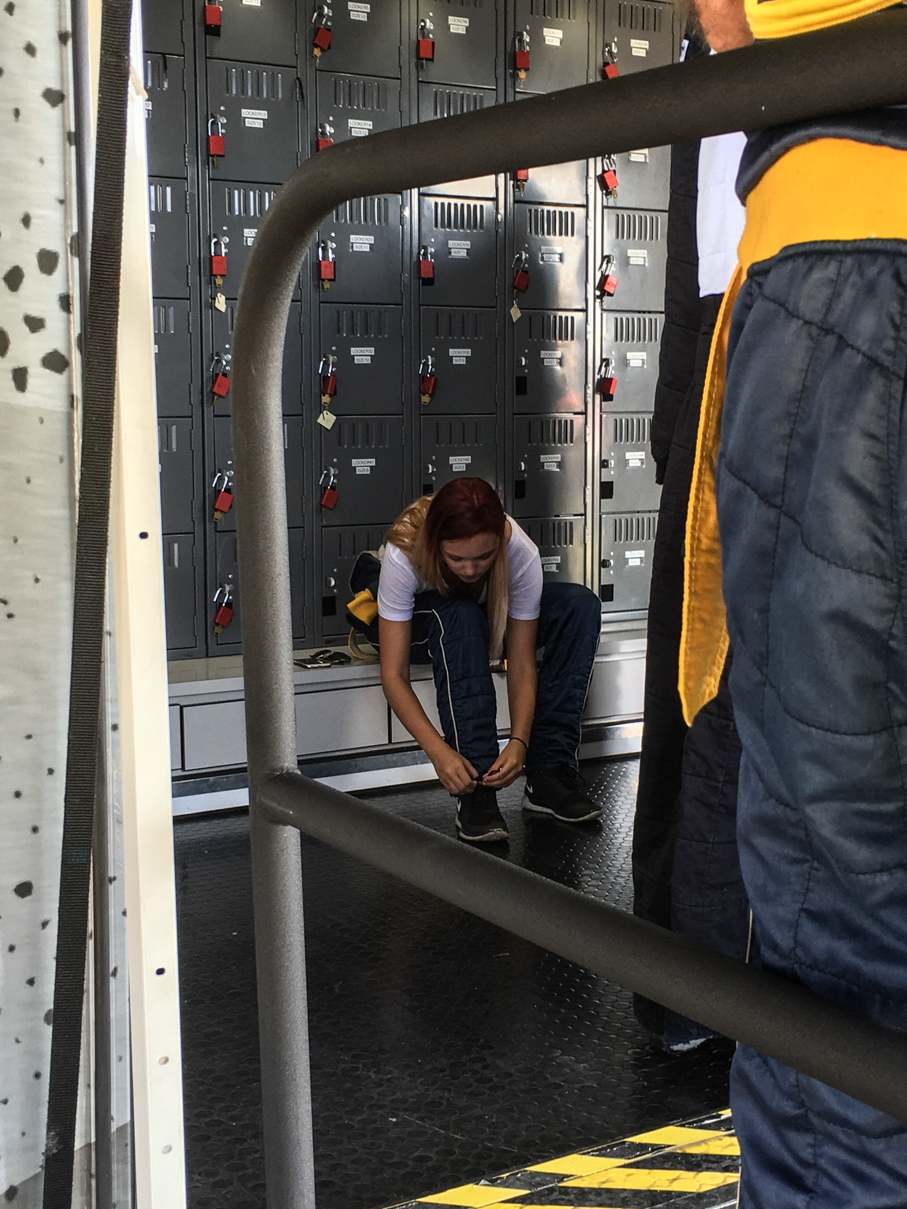
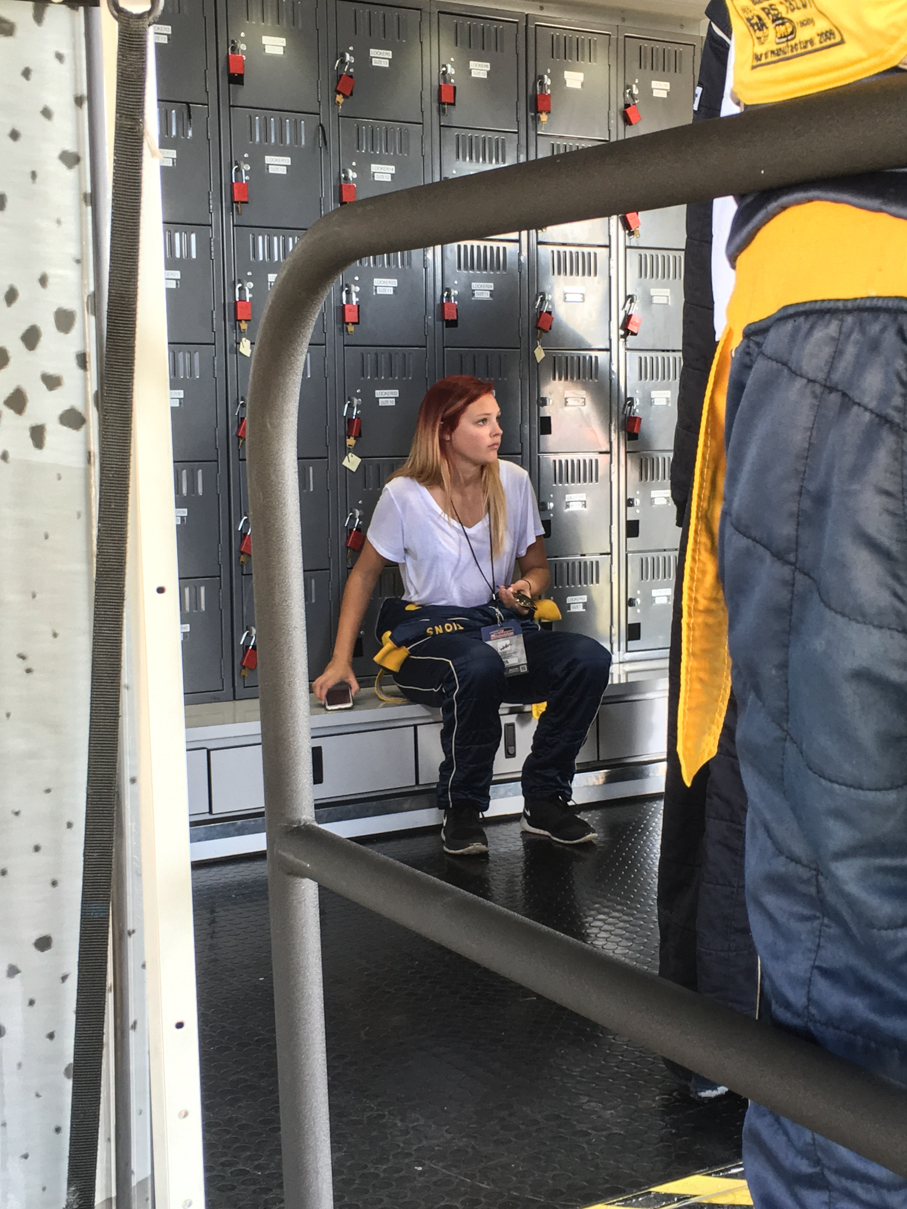
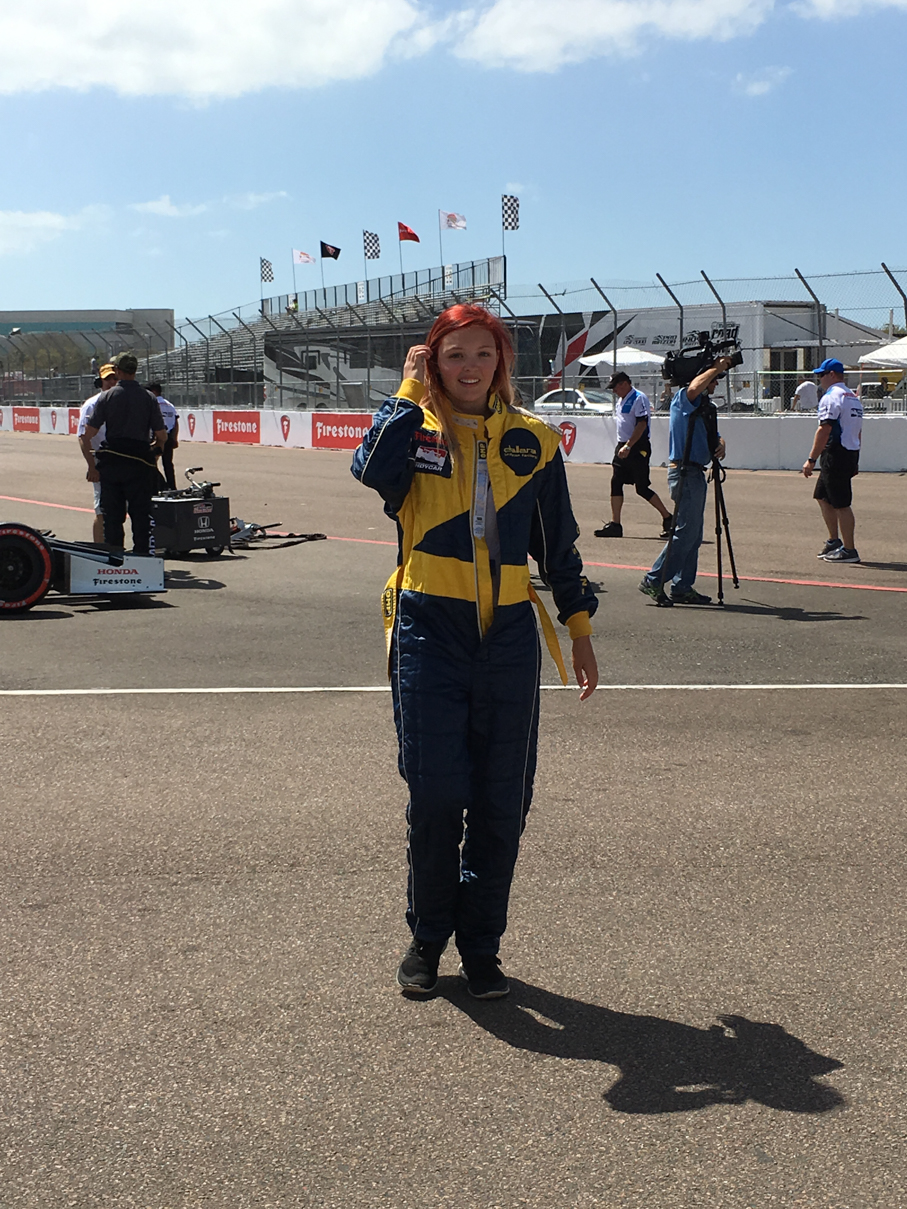
After everyone was ready, they walked them across pit exit to where the 3 two-seaters were set up between turns 1 and 2. Everyone already had their fire suits on, but were given headsocks and helmets. Bayley went out in the first group of three, with Davey Hamilton driving her car. Being in that first group proved to be a lucky thing, as for whatever reason, they did two laps, not the usual one lap the groups behind them got. After getting back and hopping out of the car, I could see by the look on her face she had an absolute blast. Again, I can’t thank IndyCar enough for setting this up for us at the last minute. Without giving anything away, I’d like to send a huge thank you to a few key people over there (you know who you are :)). A really special gesture that neither of us will soon forget.

IMG_6618 IMG_6620 IMG_6622 IMG_6624 IMG_6628

Friday morning started with me walking the track alone as soon as the gates opened. A good friend of Bayley’s had been in town all week, heading back to her school early afternoon that day, so it gave me a chance to check things out, having never been to this race. For this one, I’d bought grandstand seats near the top of GS 23, which is in turn 10 (here’s the track map for reference), and had also purchased both pit and paddock passes for us. To me, paddock passes are a must for any race, as it gives you closer access to the teams and drivers. We’ve had it for every race (both IndyCar and IMSA) we’ve been to, but this was the first time she was old enough for actual pit passes (generally have to be 18), so I spent the extra money on those, too. Well worth the added cost in my opinion, but more on that later.

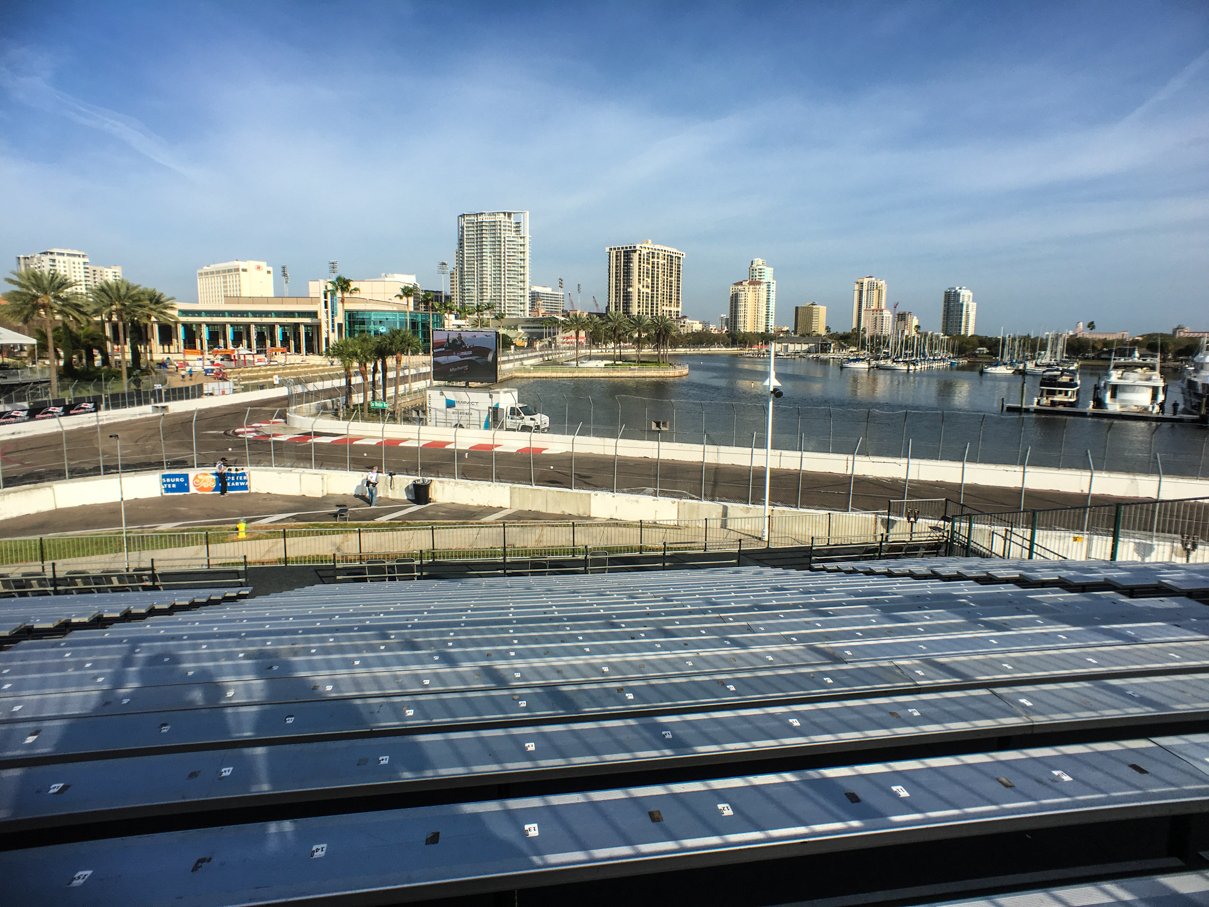
Walking around, I found the atmosphere to be pretty much what I expected, sort of a street carnival setup on the inside of the track, with a lot of food, drink, and other vendors all over the track. Plenty of race viewing areas for general admission ticket holders, too. I walked up to our grandstands to see how good the seats were, and was pleasantly surprised at the view, as GS23 provides a great look at the straight coming in to turn 10 and on to Dan Wheldon Way:

IMG_6921

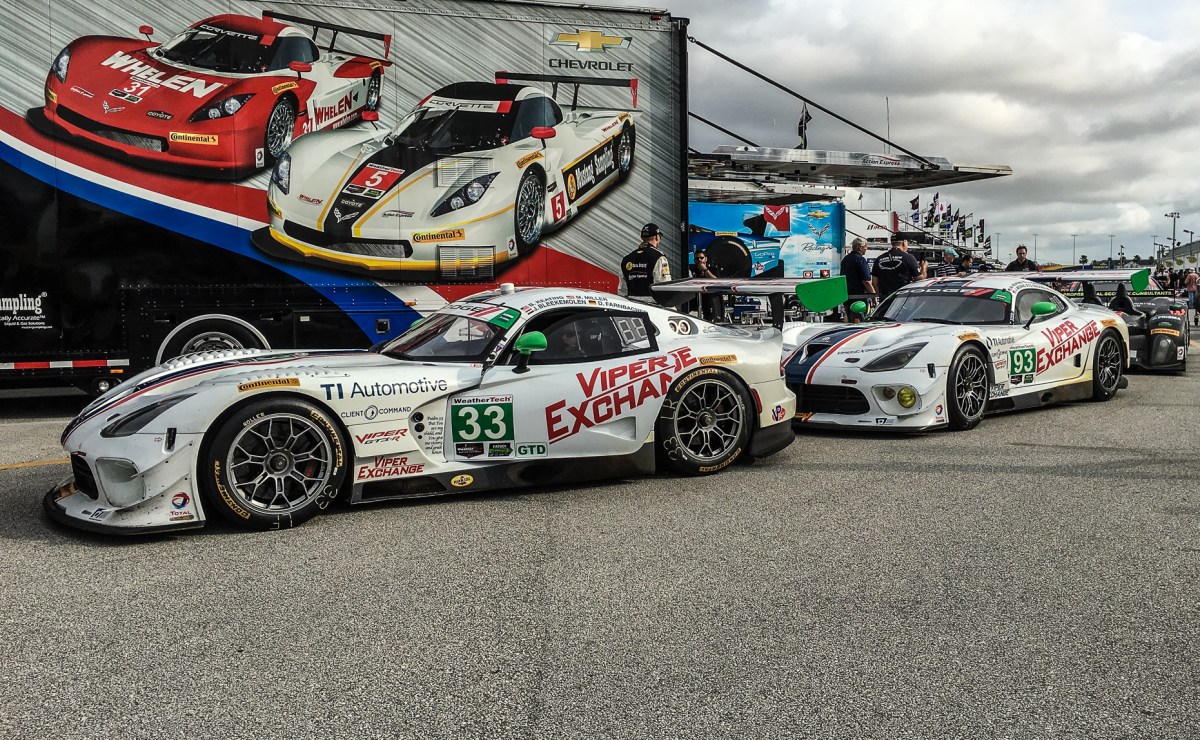
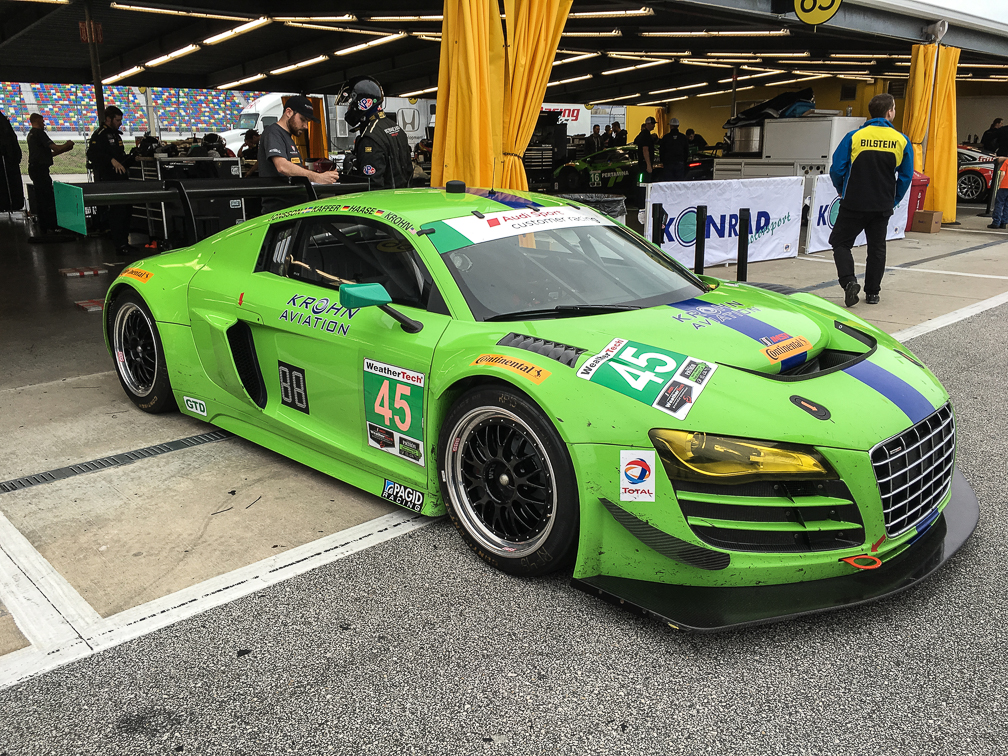
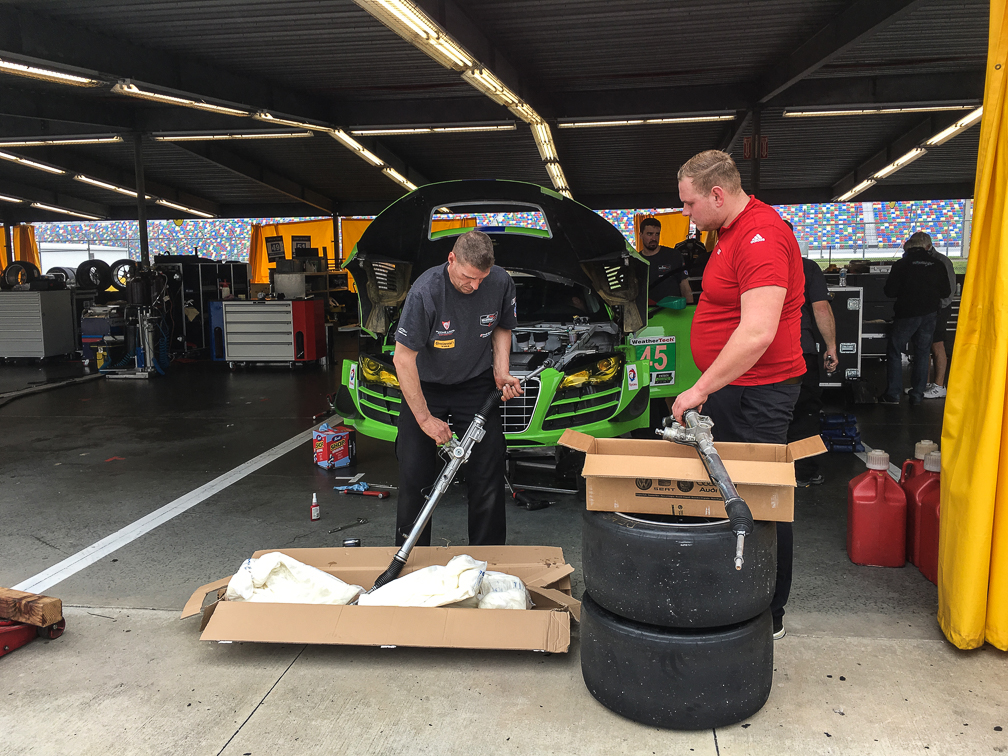
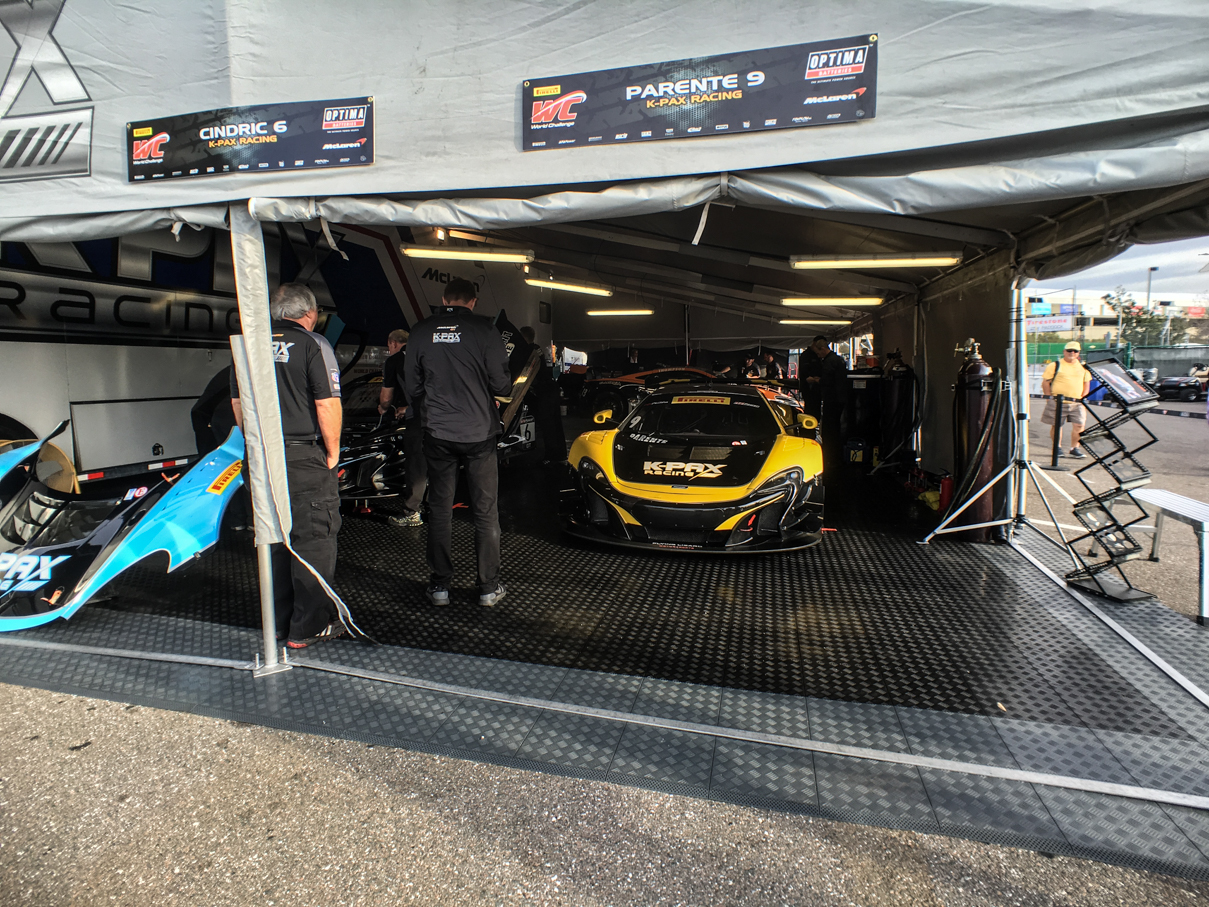
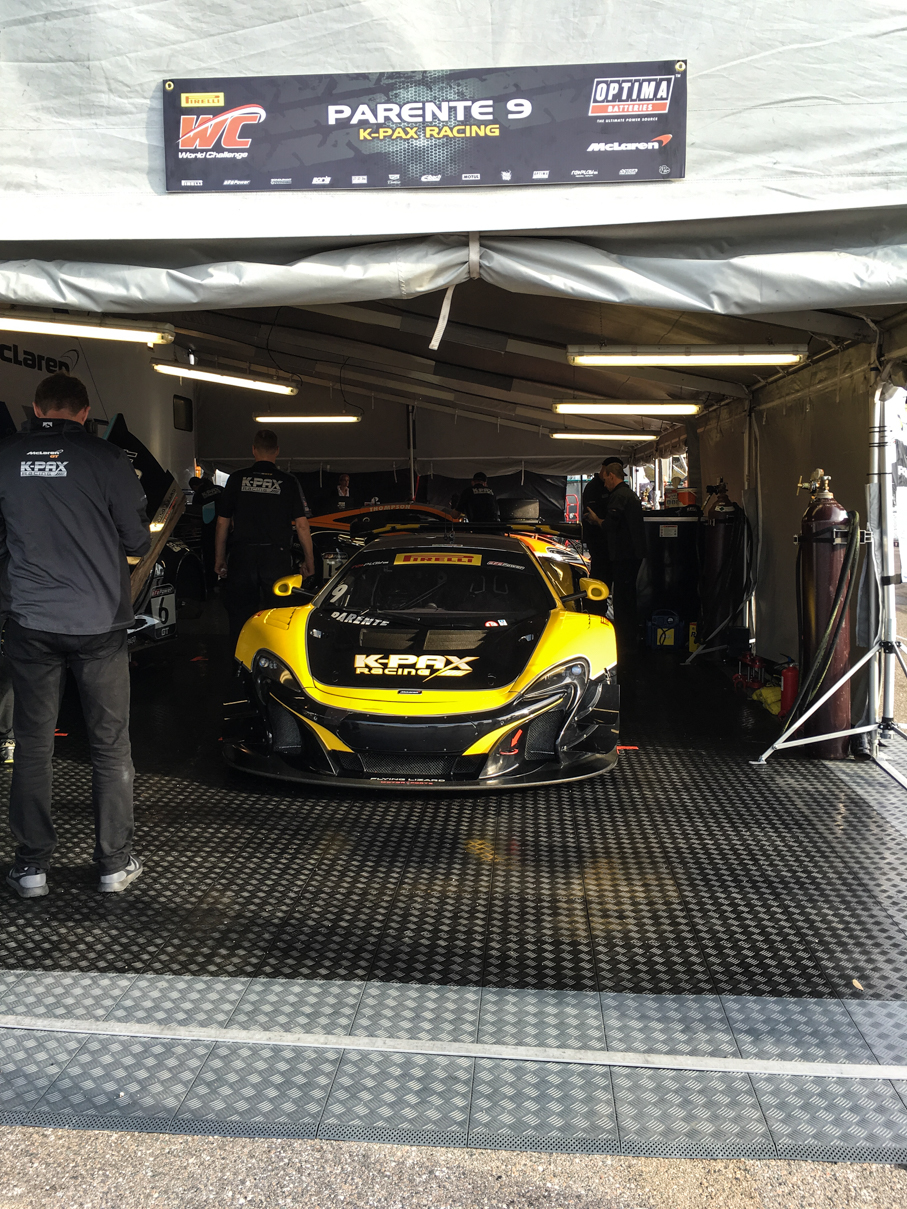
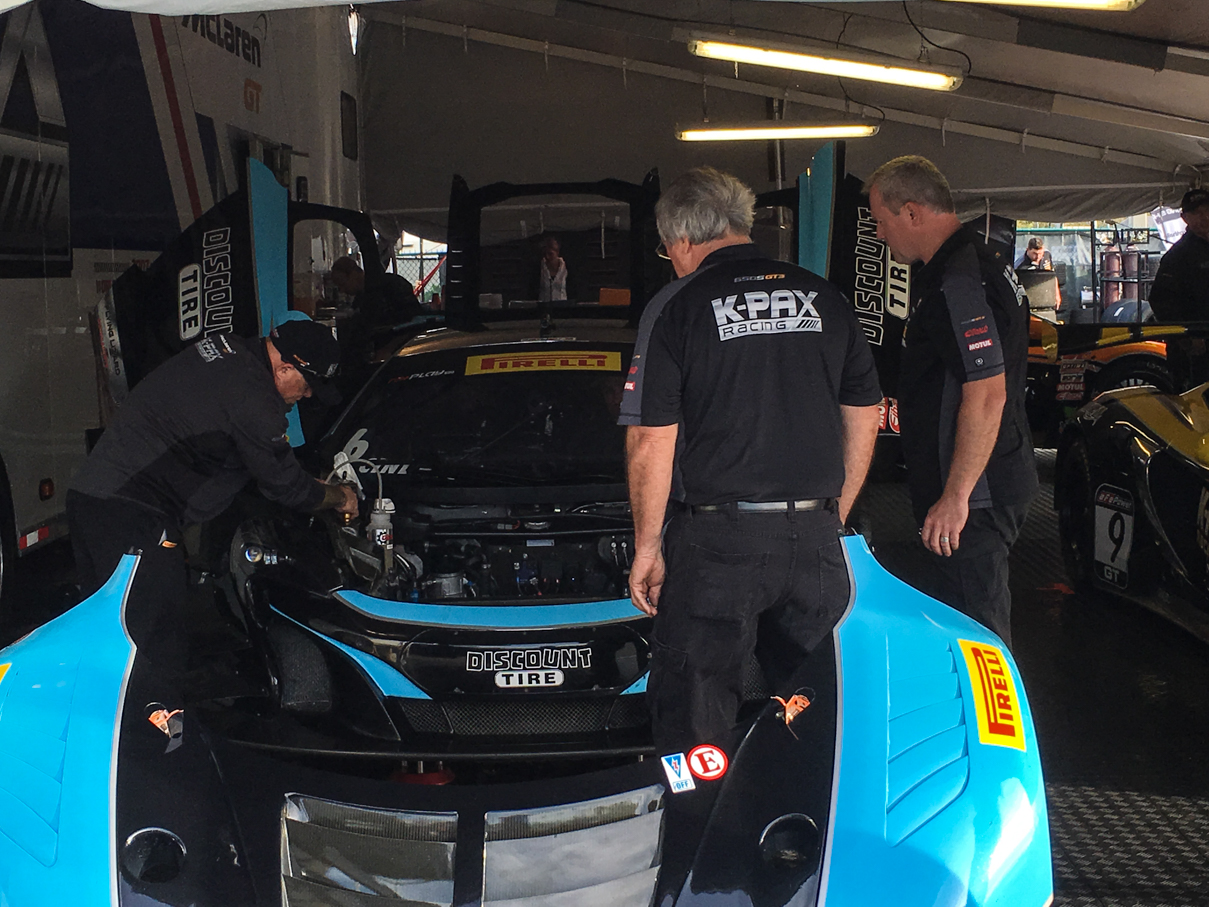
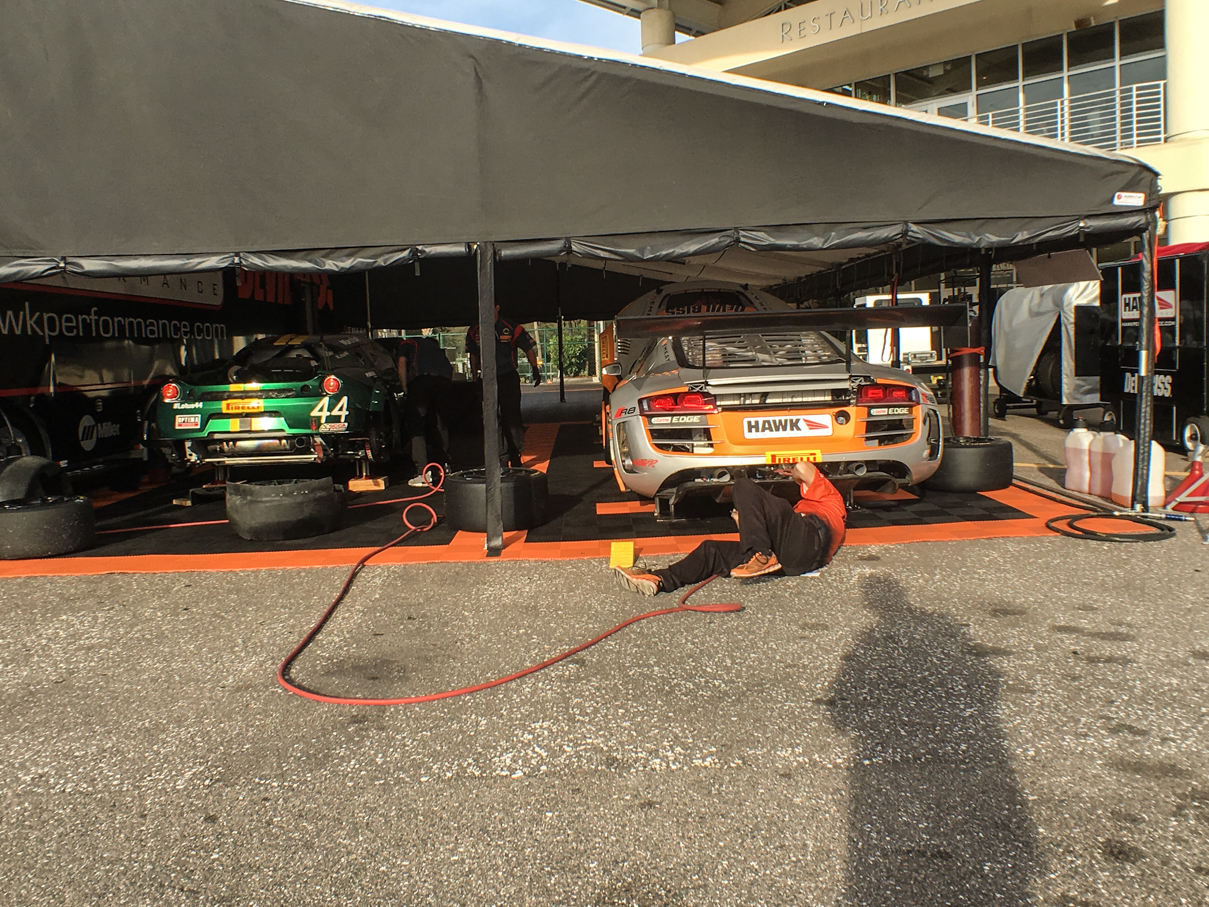
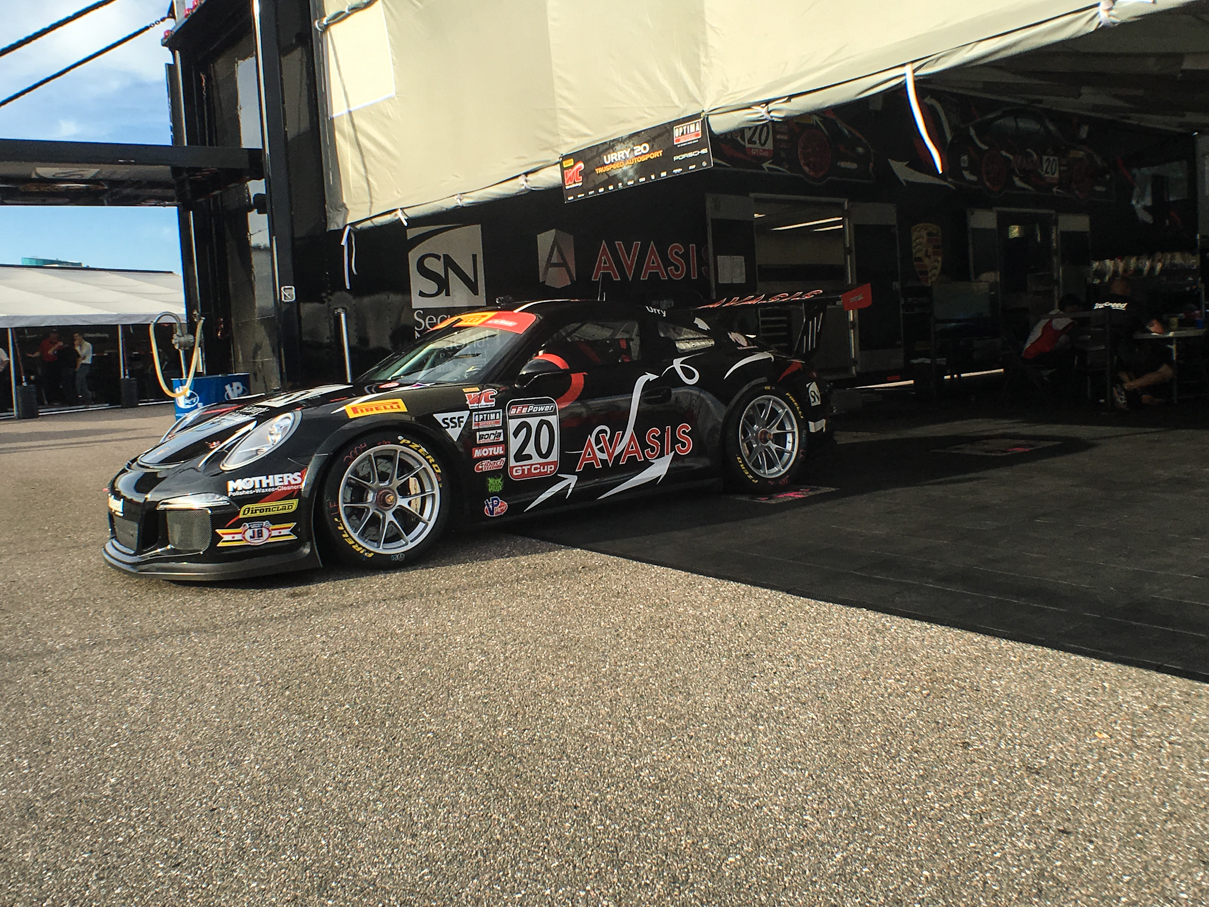
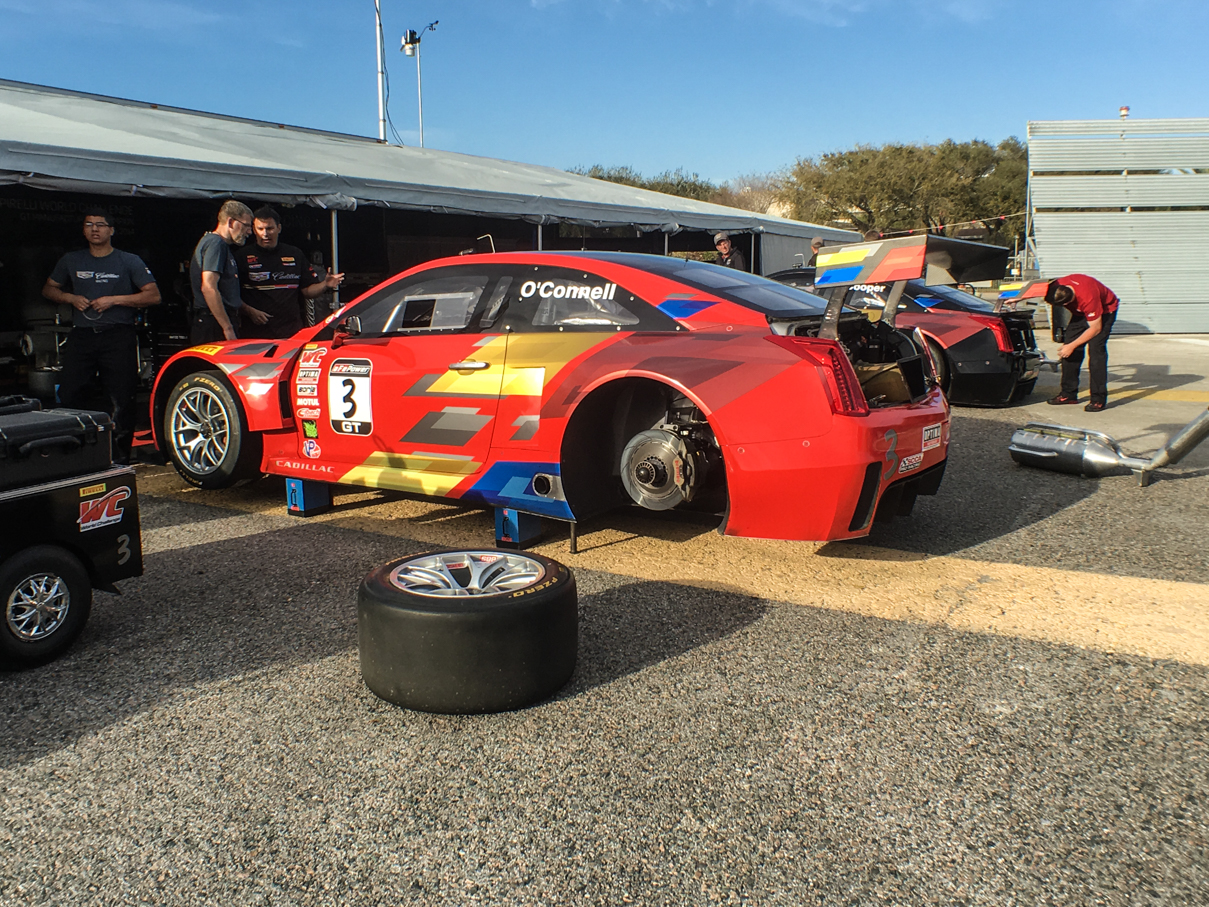
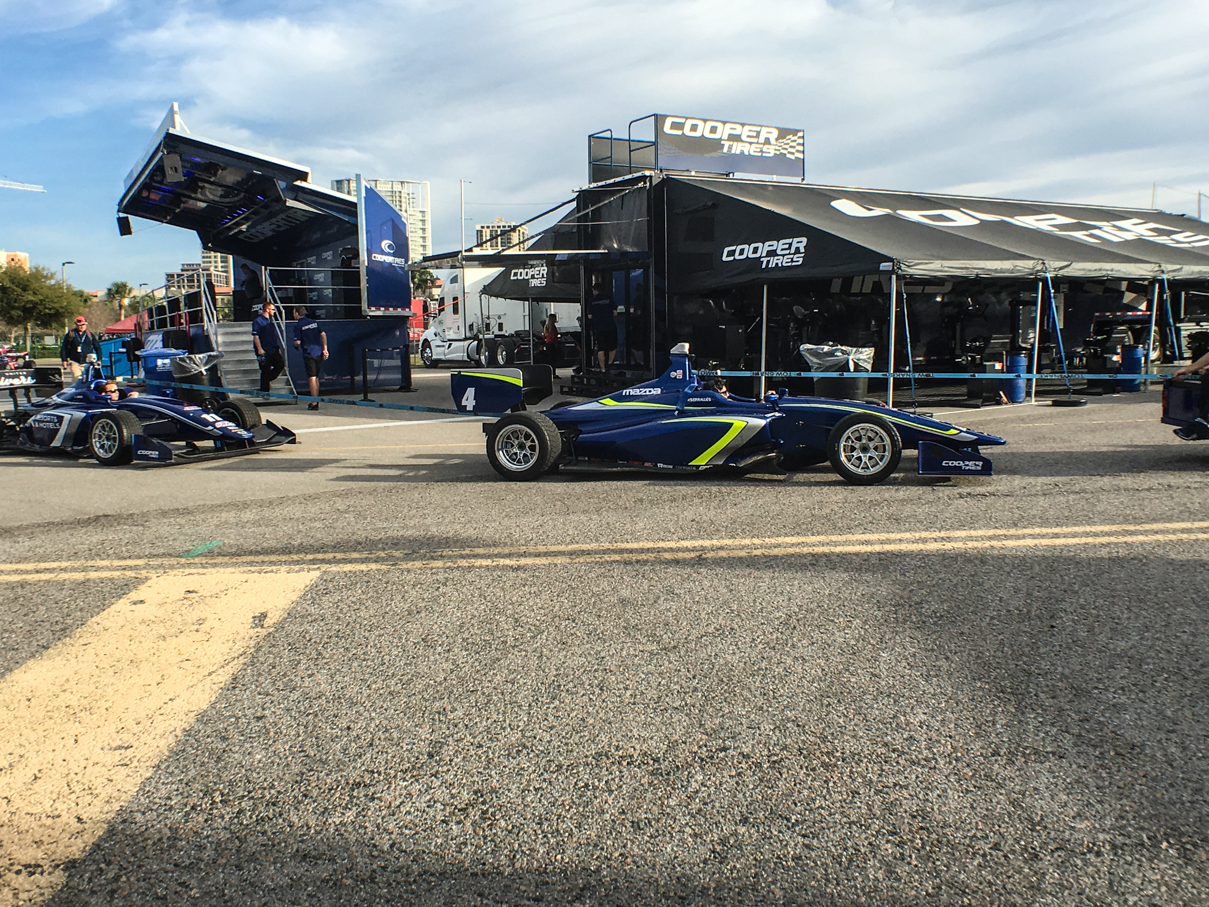
After watching some of the USF200 and Pro Mazda practice, I headed across the pedestrian bridge to the paddock area for the Pirelli World Challenge and Indy Lights teams. Both had track time coming up, and as I got over there, the Lights teams were already heading to pit lane for morning practice. All of the Pirelli teams were hard at work, however, as they had GT, GTA, and GT Cup qualifying after Lights was done with practice.

IMG_6659 IMG_6660 IMG_6662 IMG_6665 IMG_6669 IMG_6672 IMG_6675

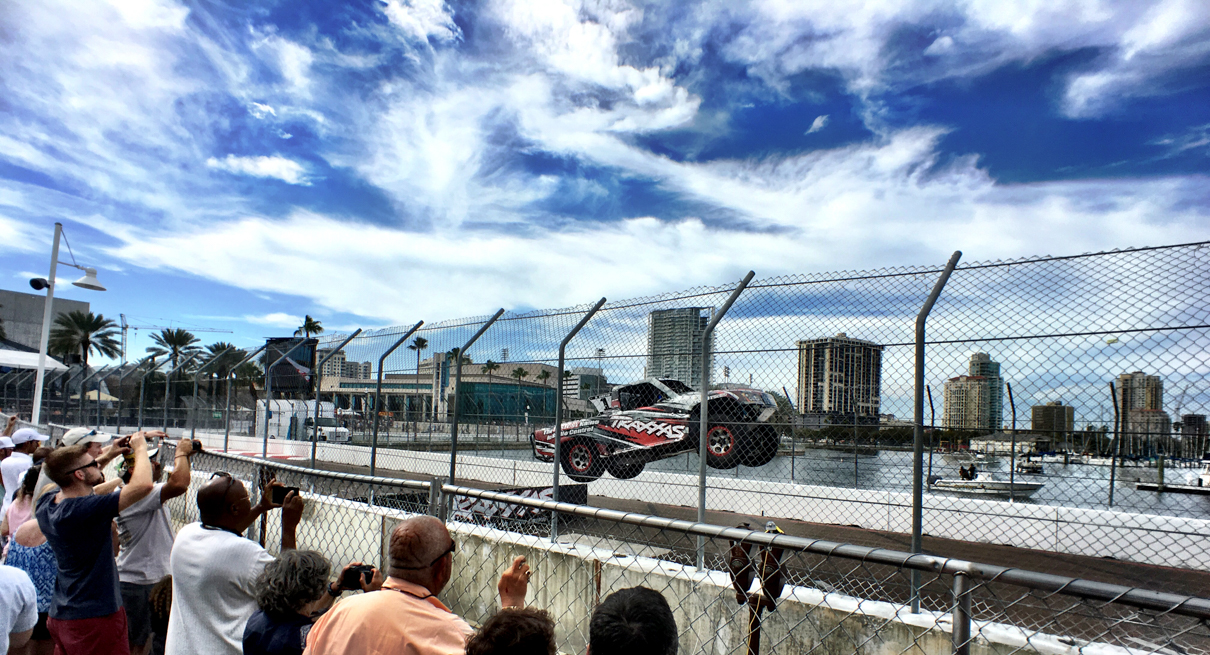
After a short walk through the pits during Pirelli qualifying, I headed out to meet Bayley and her friend for a late breakfast. They were headed to the airport after that, so I ended up getting a little more track time by myself before Bayley made it over a little after noon. We spent the day enjoying the pits, walking the various paddock areas, and even taking in something we’d never seen live before, the practice session for the Stadium Super Truck series. Wow. Those things are so cool to watch in person. We hung out near our grandstands for them, as they had a ramp set up just outside of turn 10, in full view of our seats. They raced both Saturday and Sunday, and we made sure to catch both races, those things are cool, just hit play on the video below to check em out:


IMG_6889

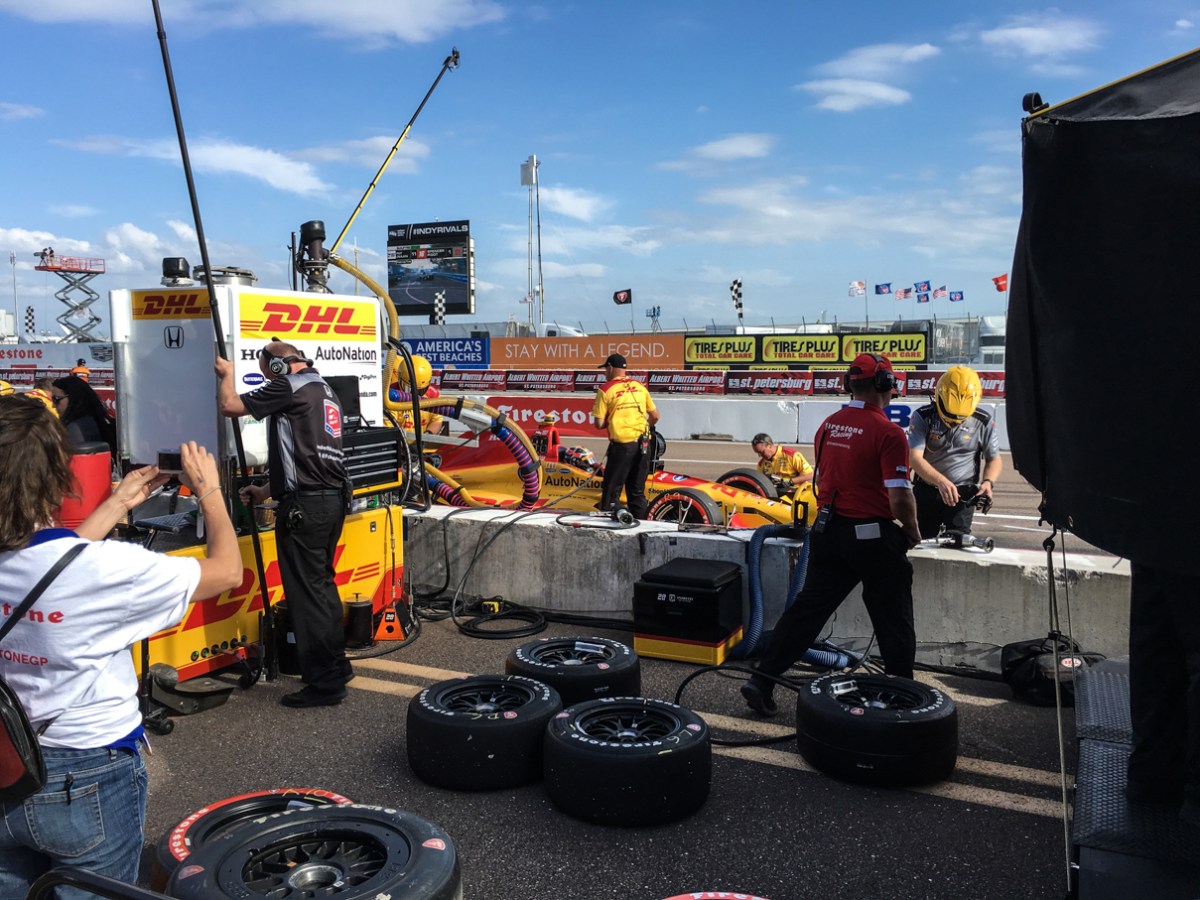
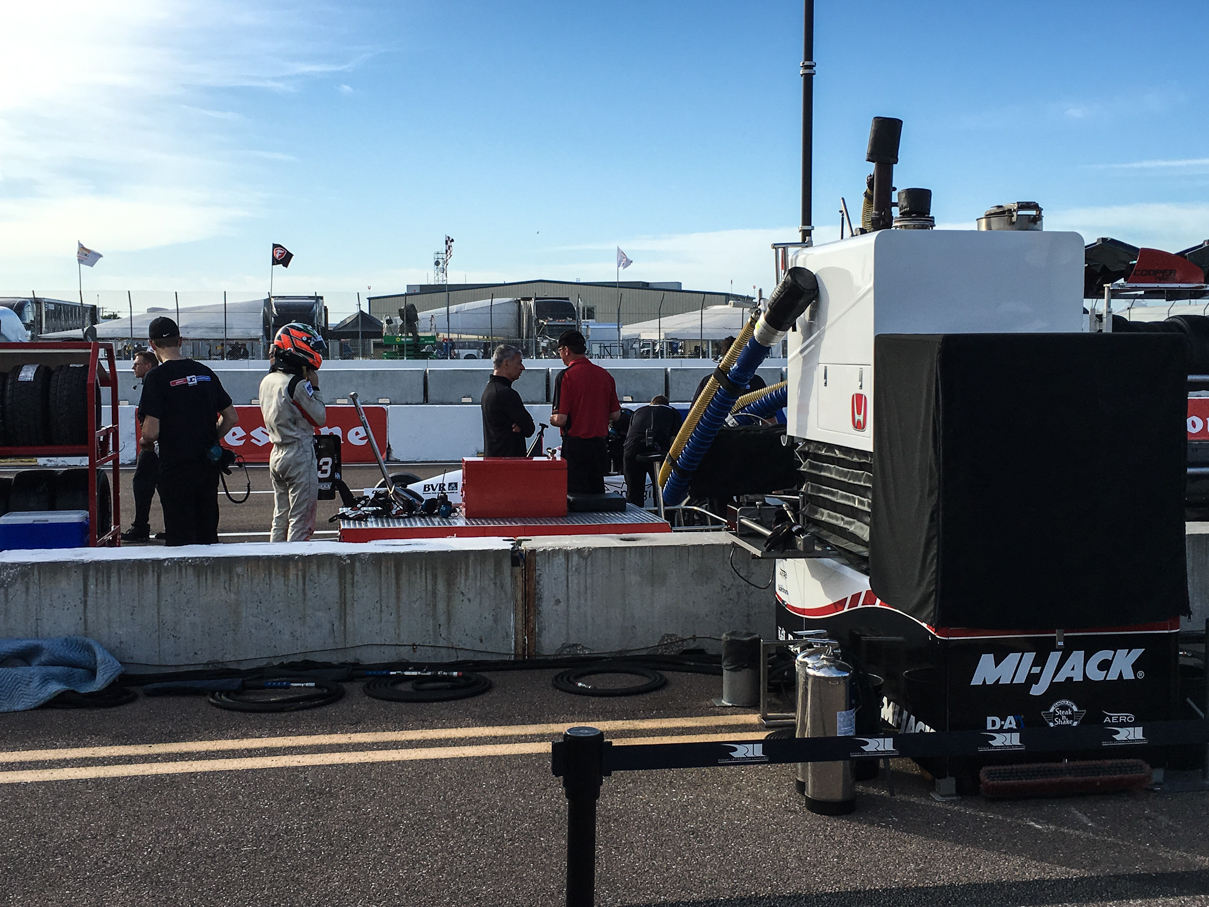
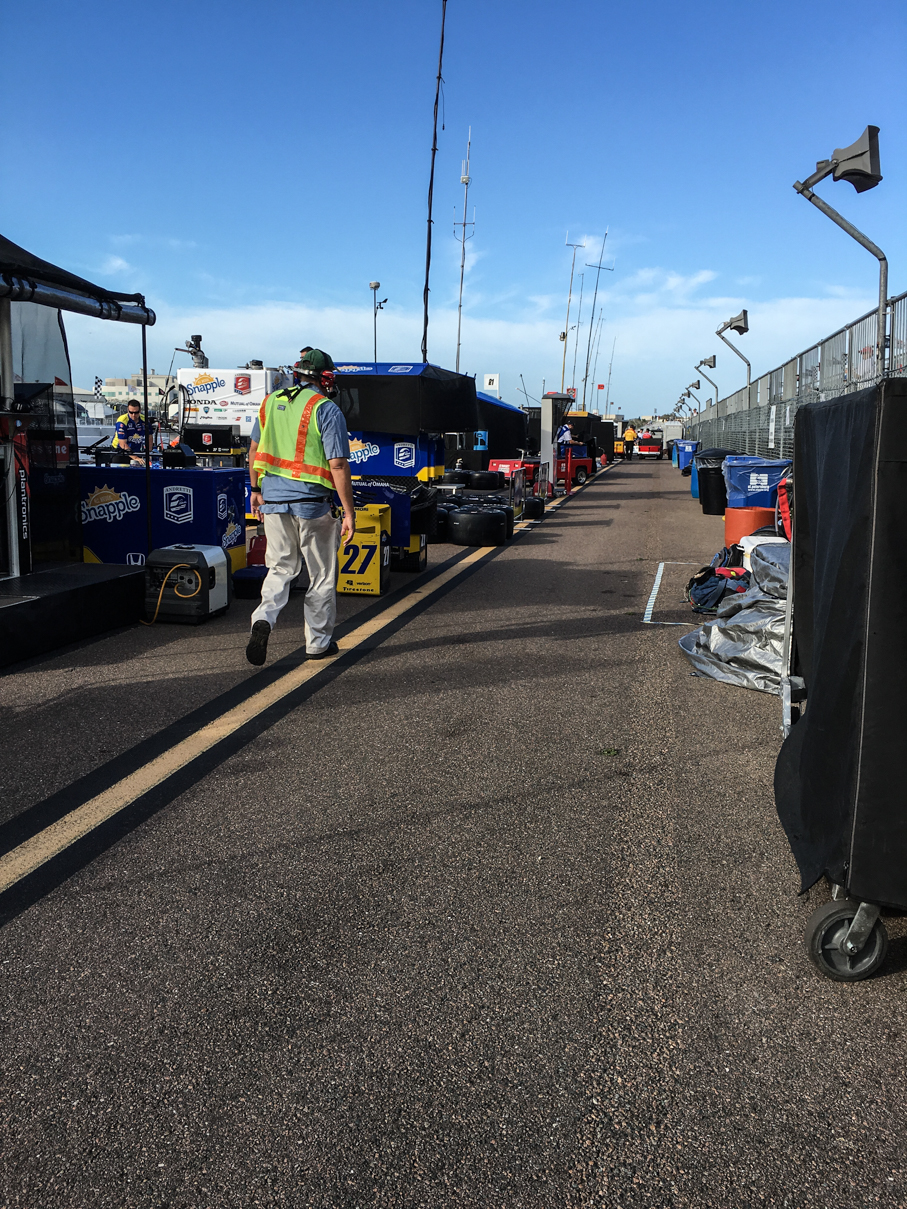
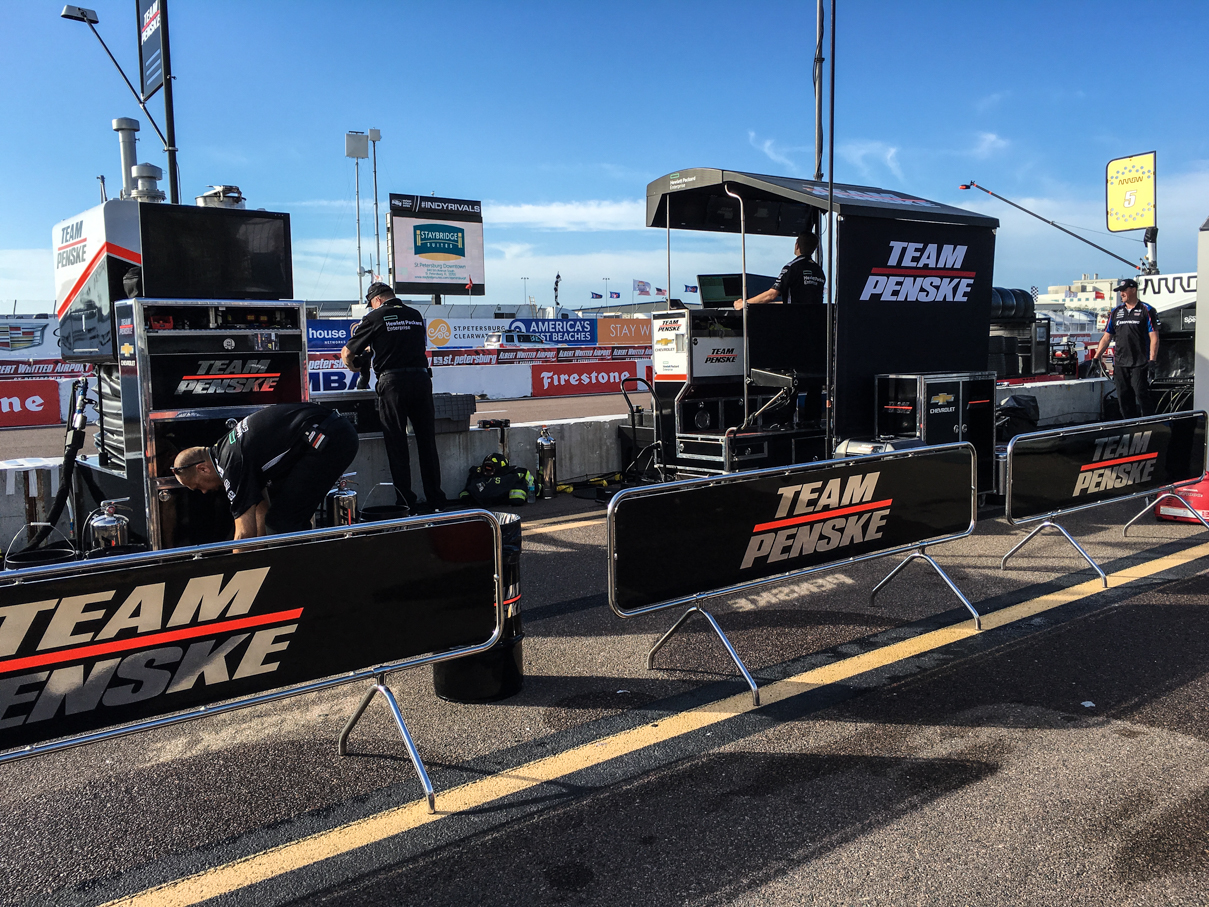
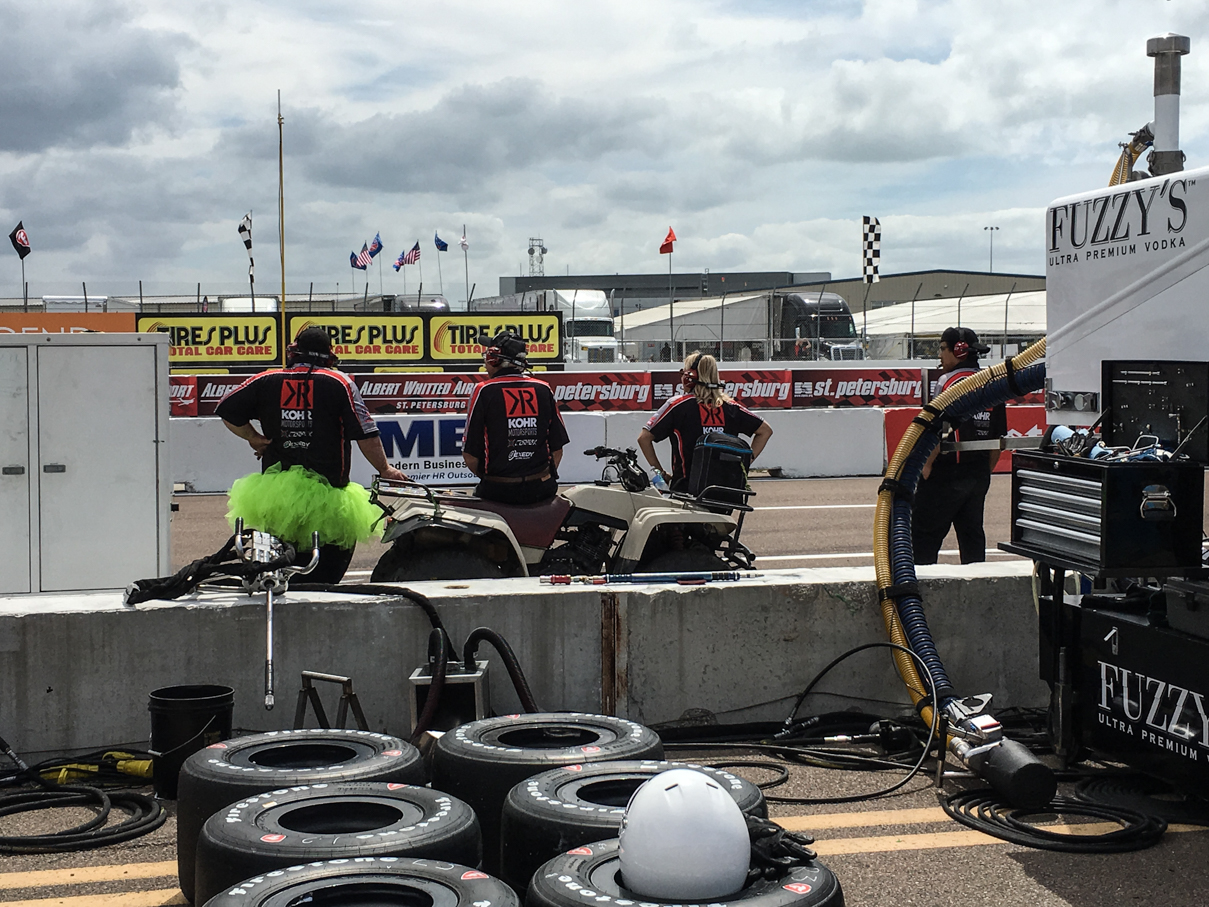
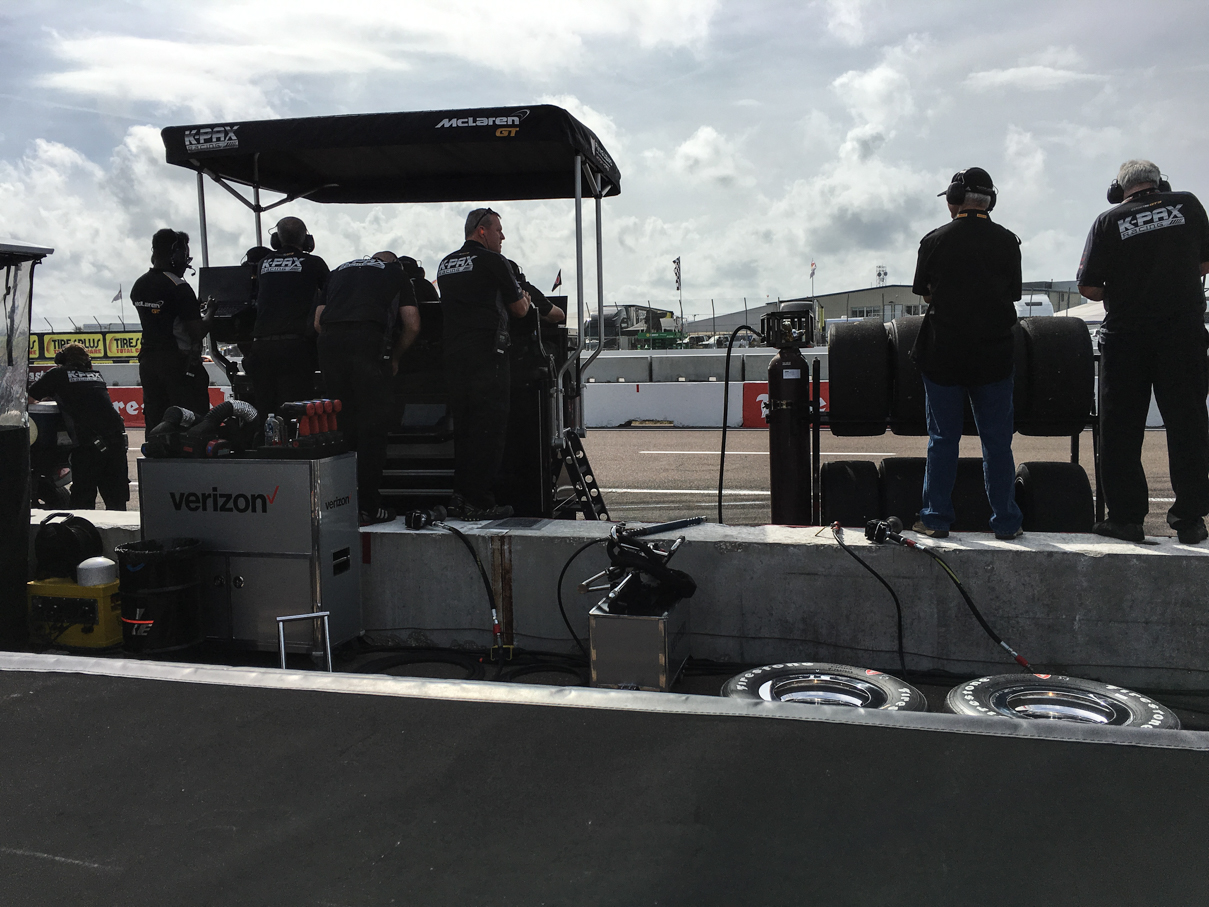
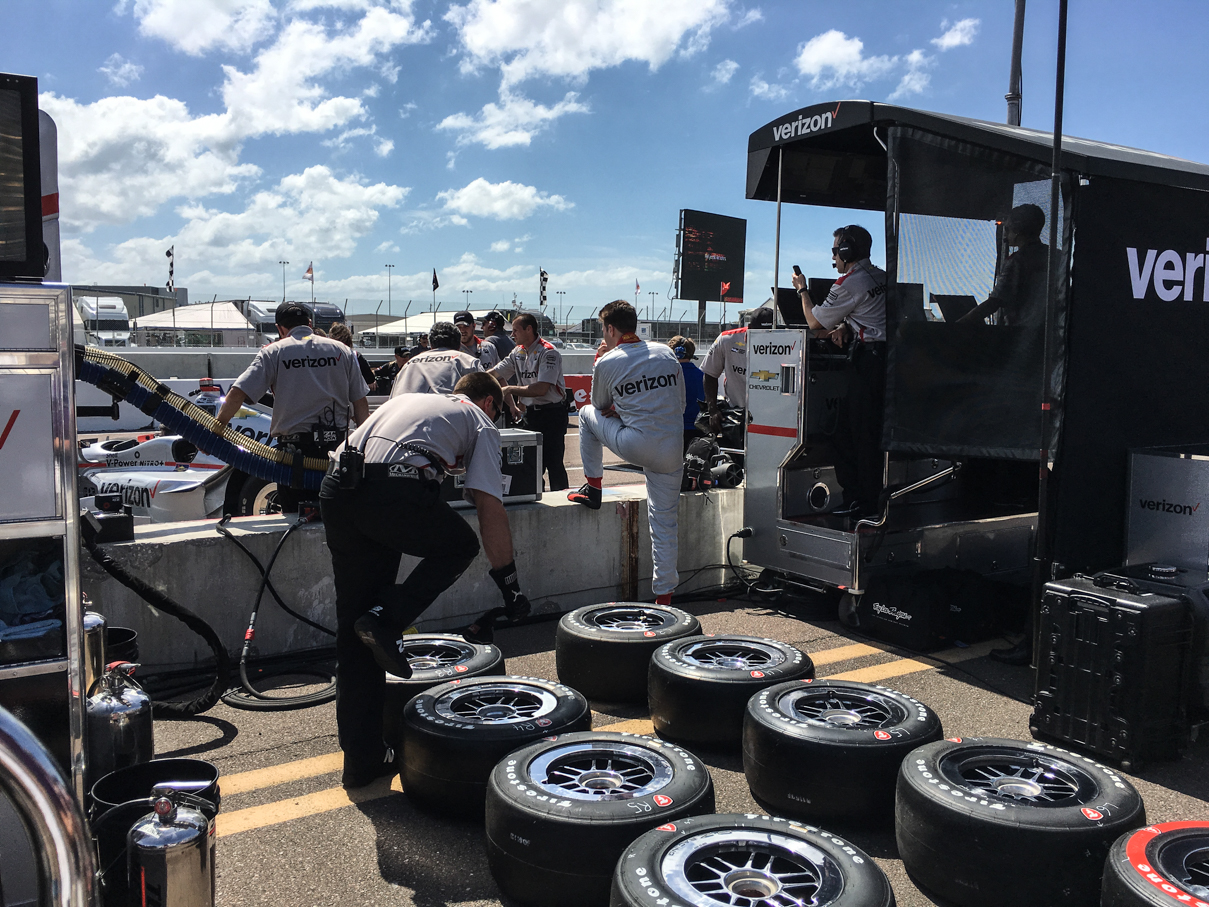
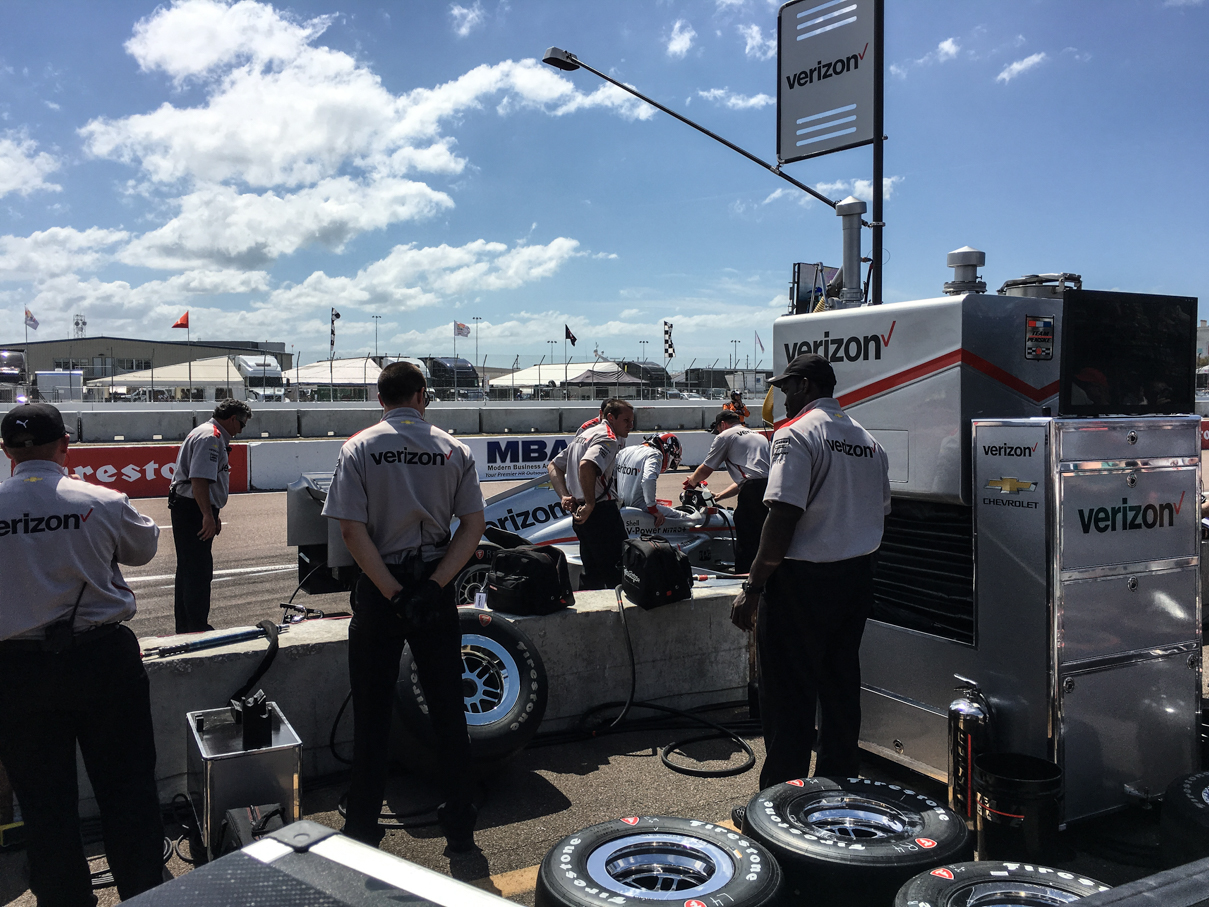
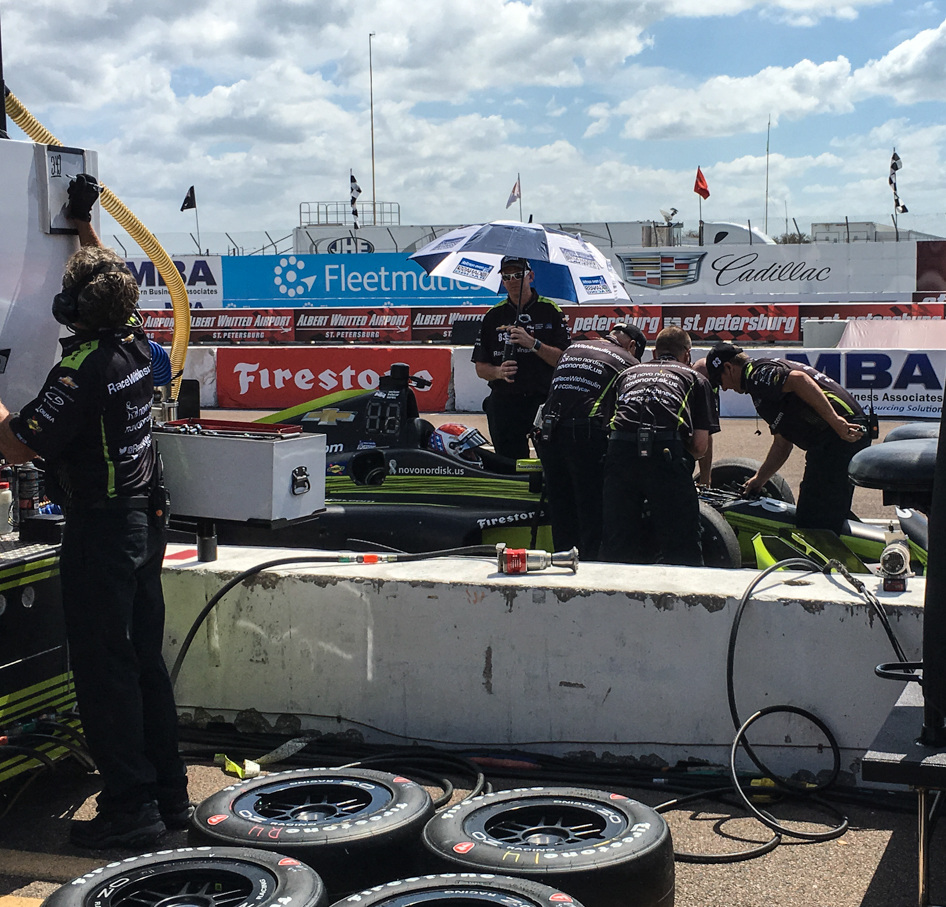
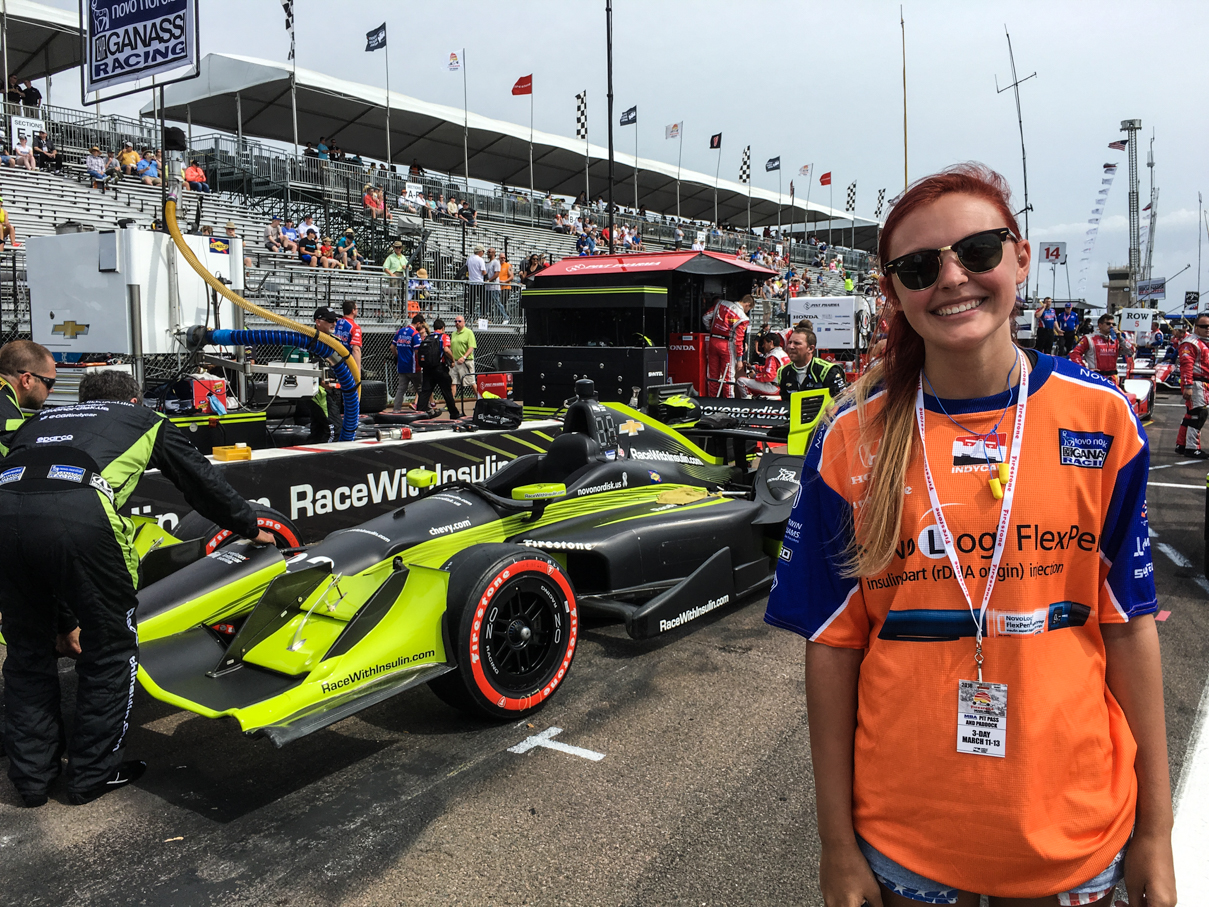
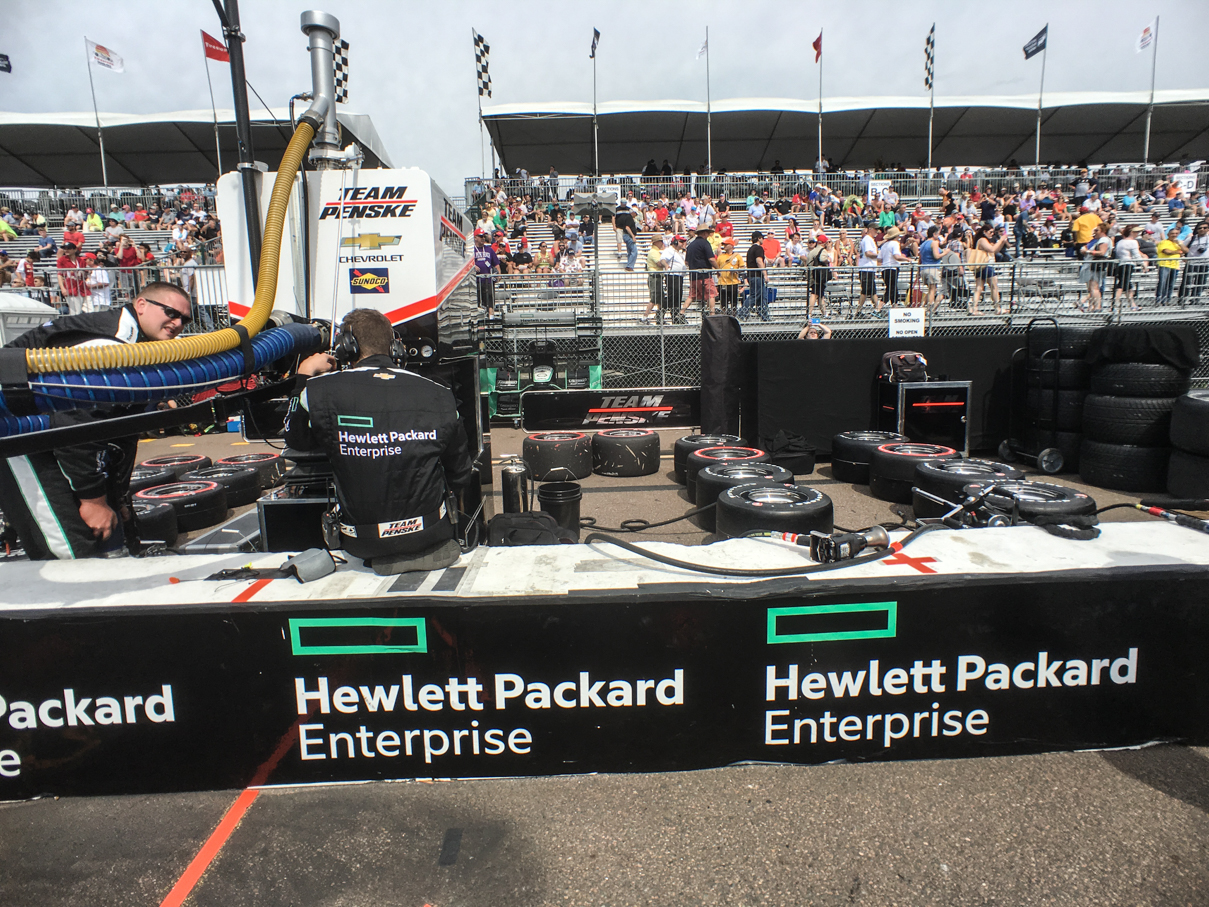
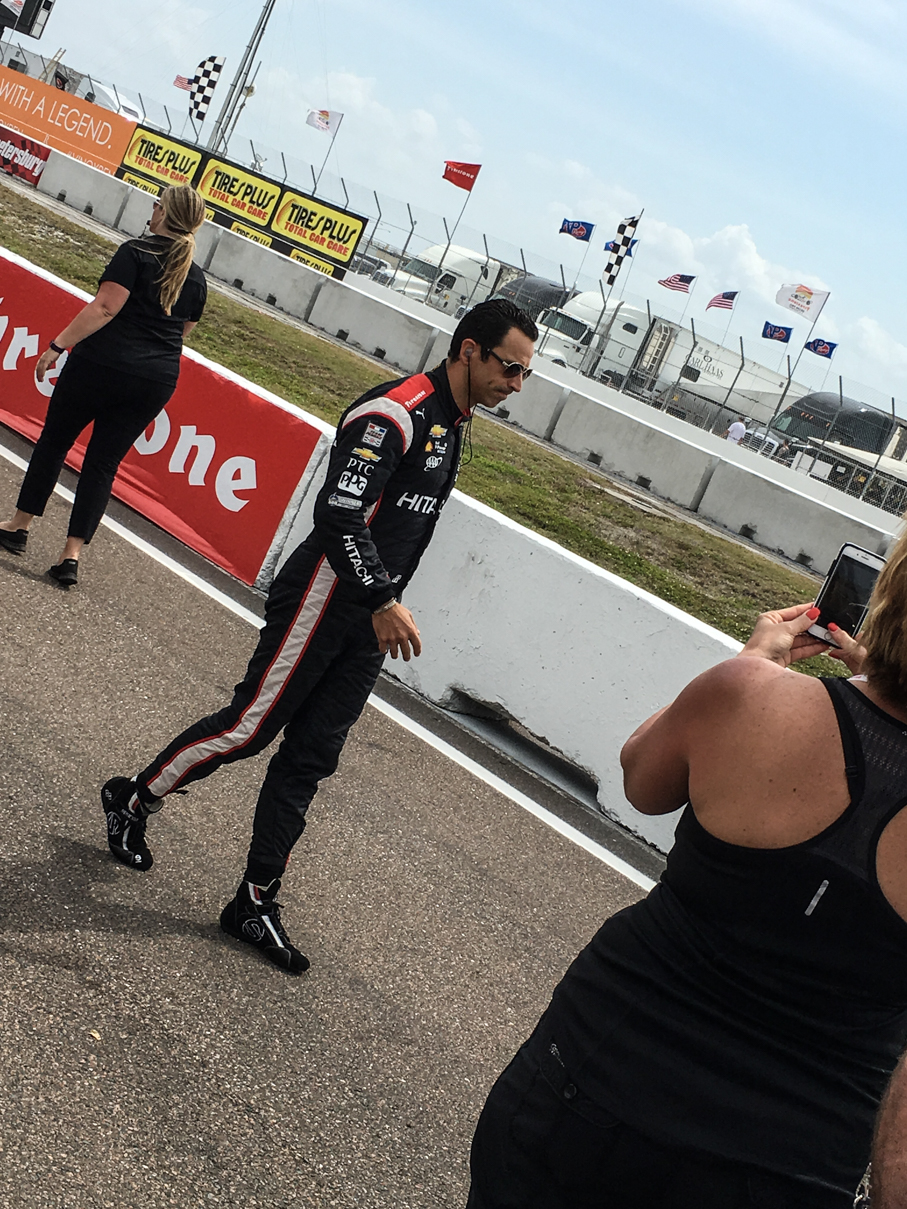
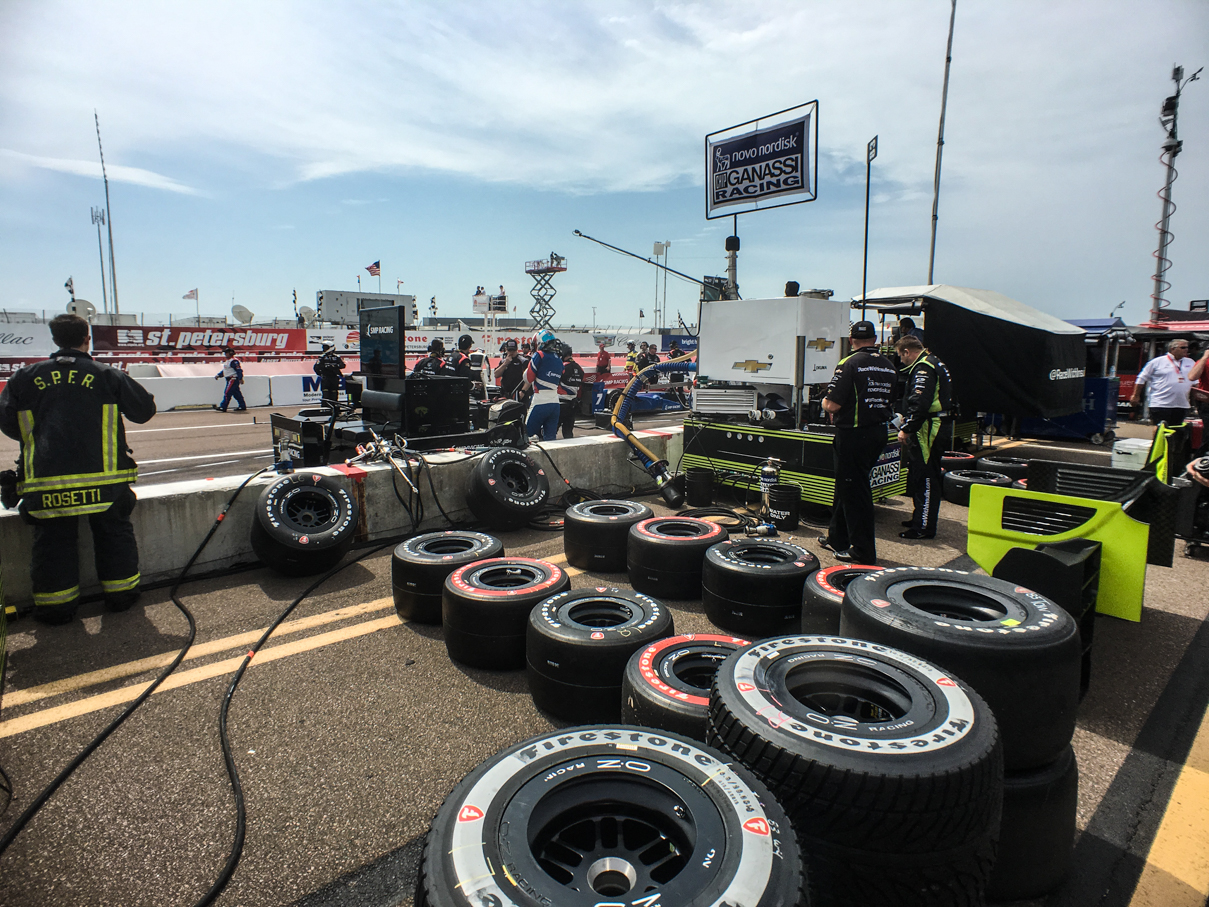
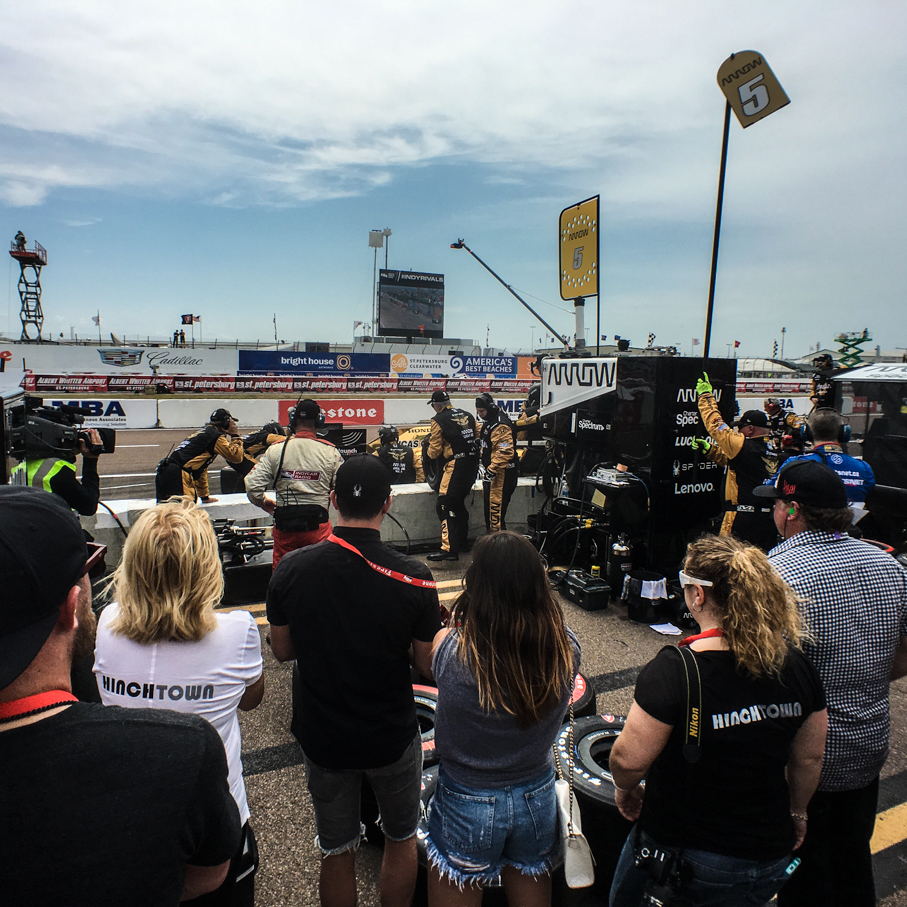
The weekend was pretty much the same activity on our part both Saturday and Sunday, meaning we spent a lot of time walking the paddock, pits and enjoying some activity from our seats, but the highlights pretty much revolved around those pit passes. They weren’t cheap (especially since they required purchasing grandstand seats), but they were worth every penny in our opinion. They give you access to the pits pretty much any time other than the actual IndyCar race on Sunday. We watched practice and portions of races for the various support series from pit lane, as well as all IndyCar practices and qualifying. It’s so much fun to be standing right there watching the teams work. The walkway between the team equipment areas and front-straight grandstands is pretty narrow, too, so you really have to be cognizant of what’s going on around you, too. Teams have a job to do, and need to be able to get up and down that lane on their carts to shuttle parts and equipment between the pits and transporters.

IMG_6687 IMG_6689 IMG_6693 IMG_6707 IMG_6824 IMG_6960 IMG_6964 IMG_6977 IMG_7042 IMG_7055 IMG_7070 IMG_7089 IMG_7093 IMG_7357 IMG_7368

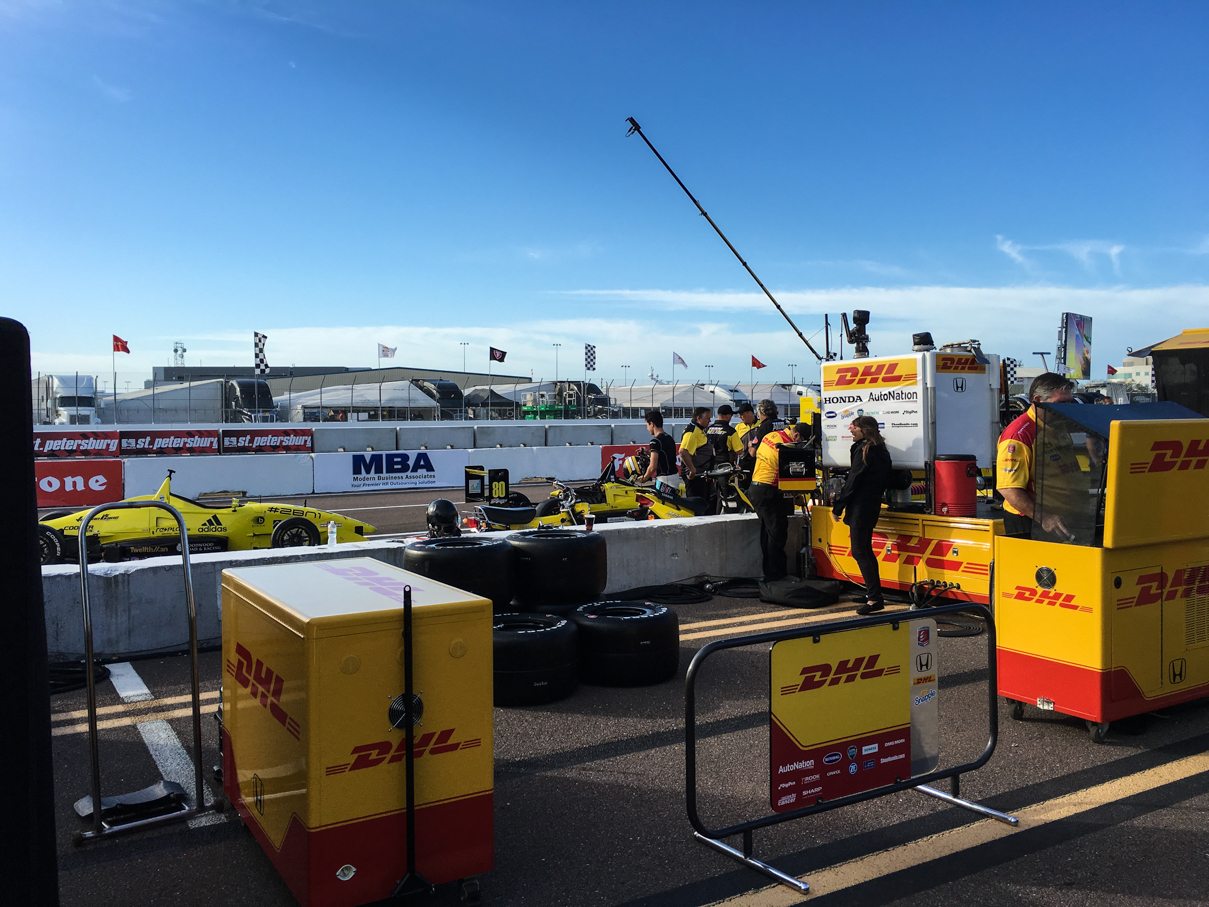
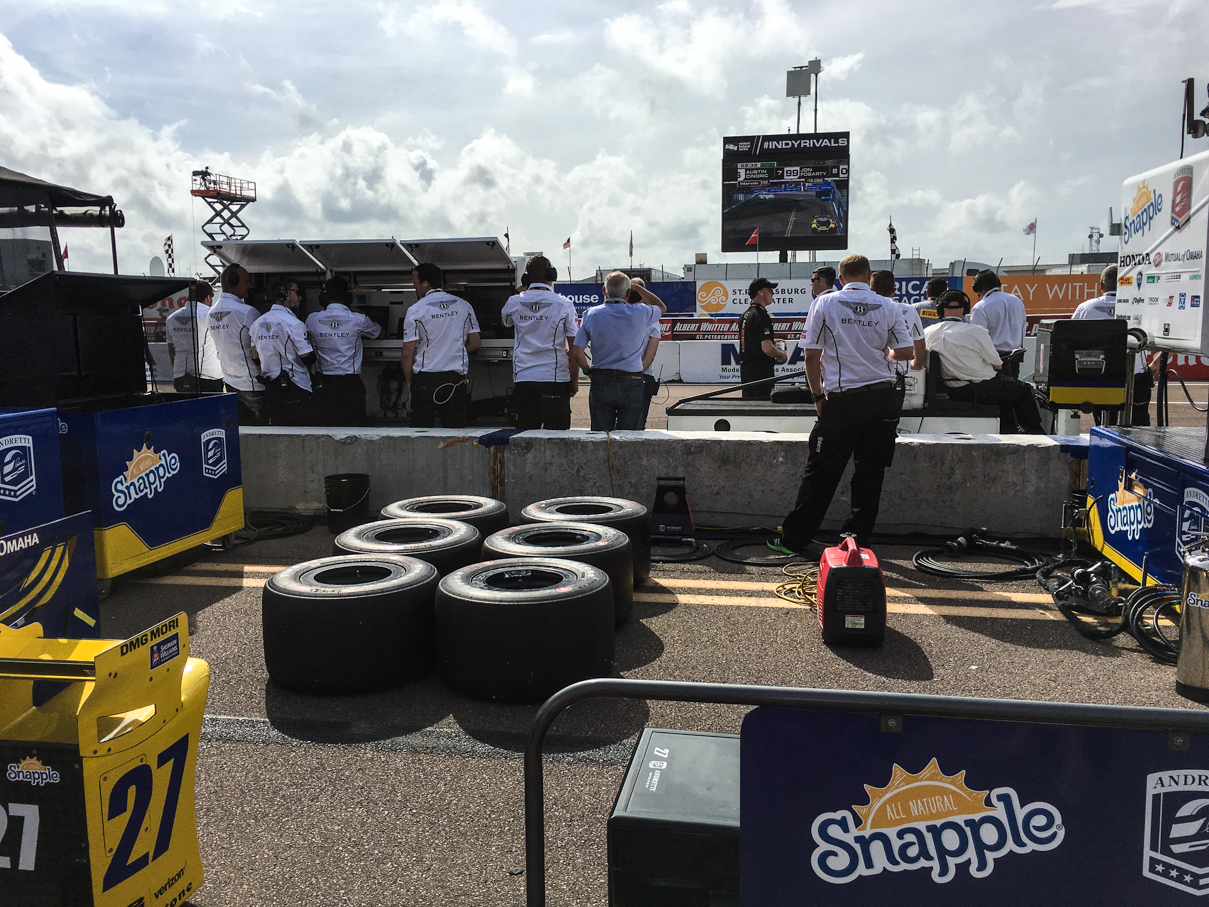
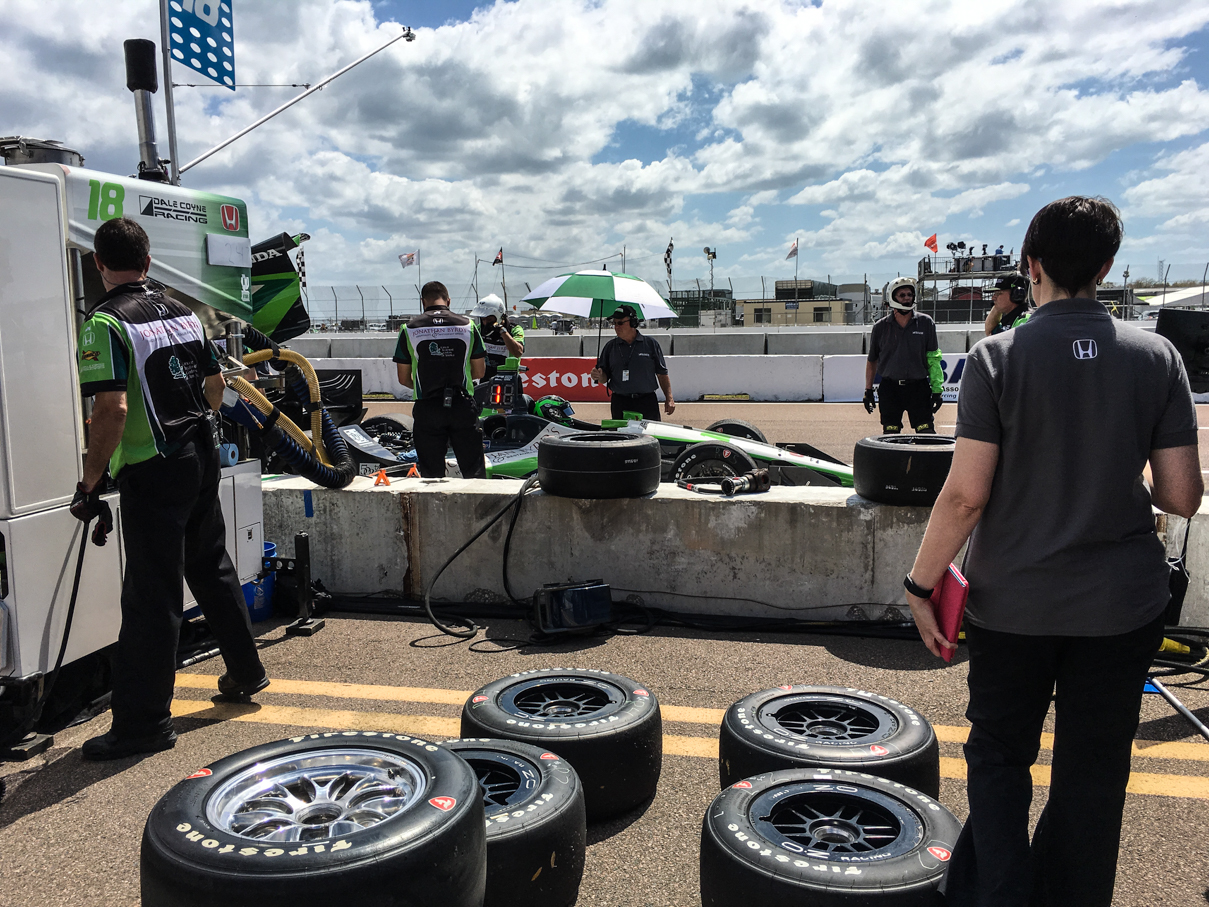
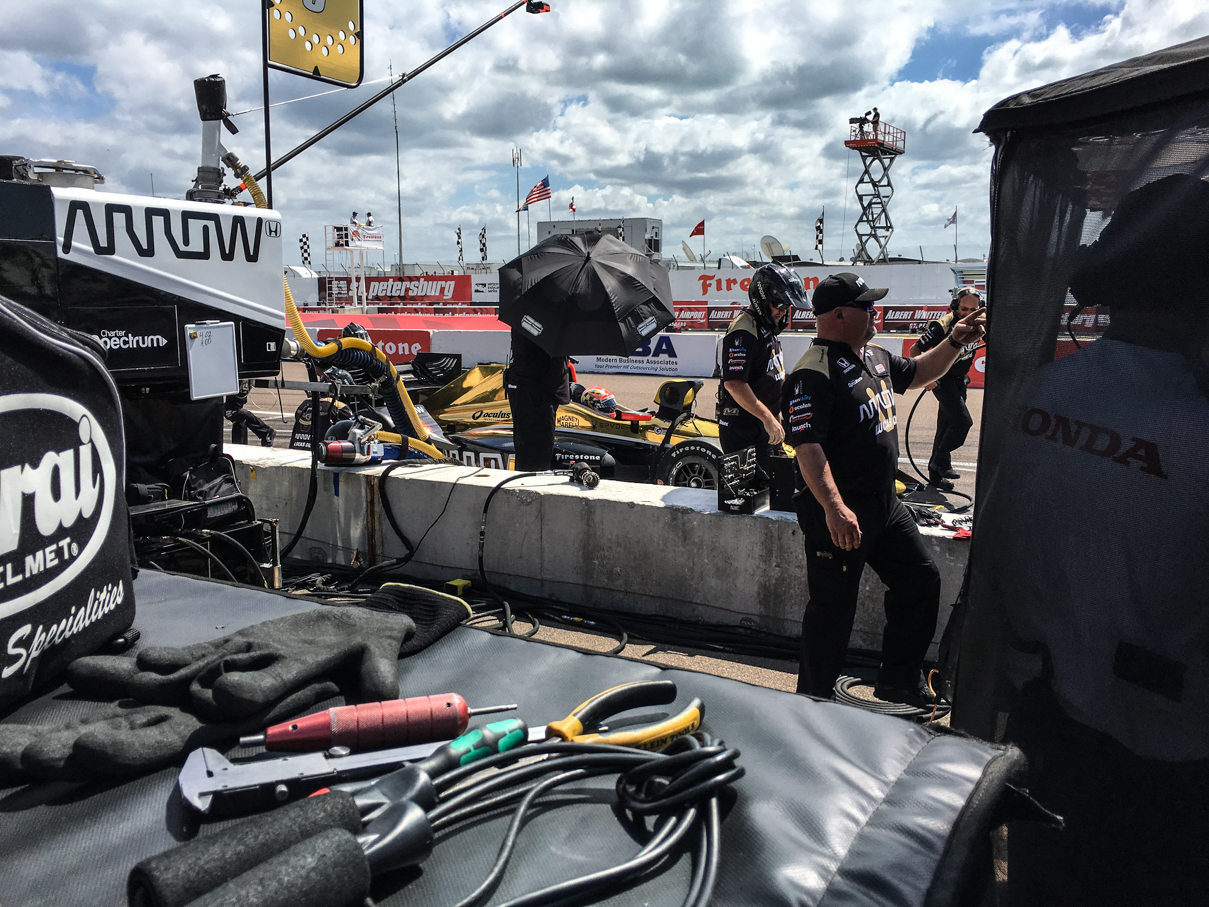
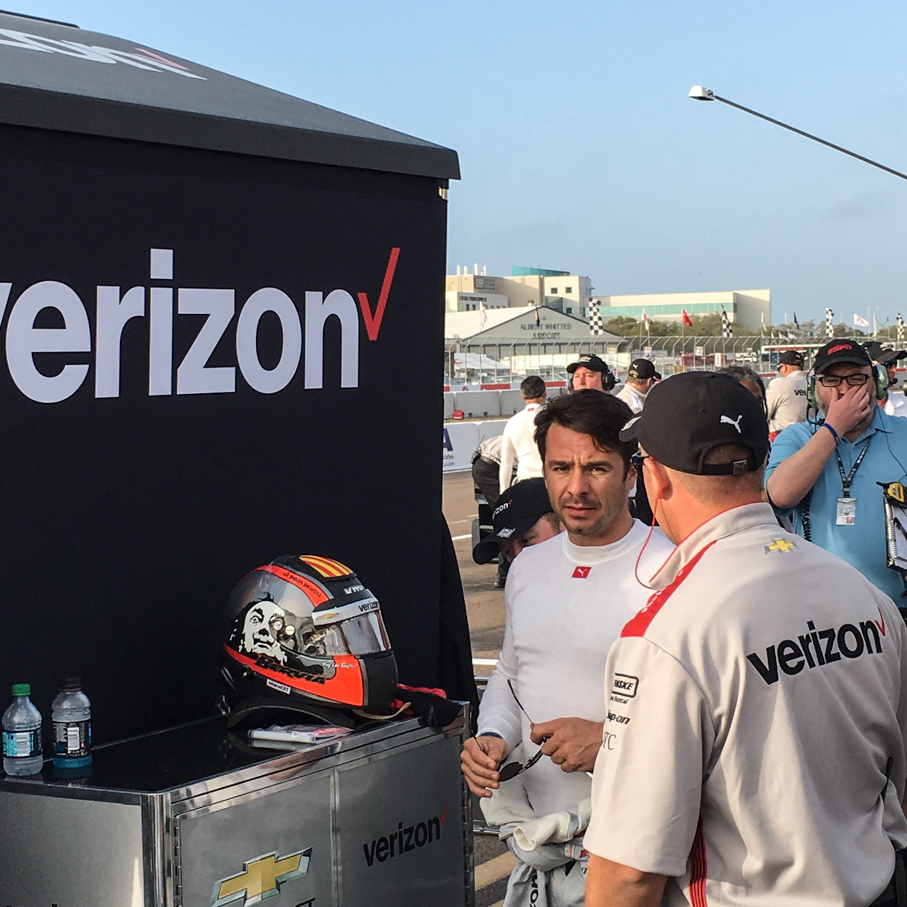
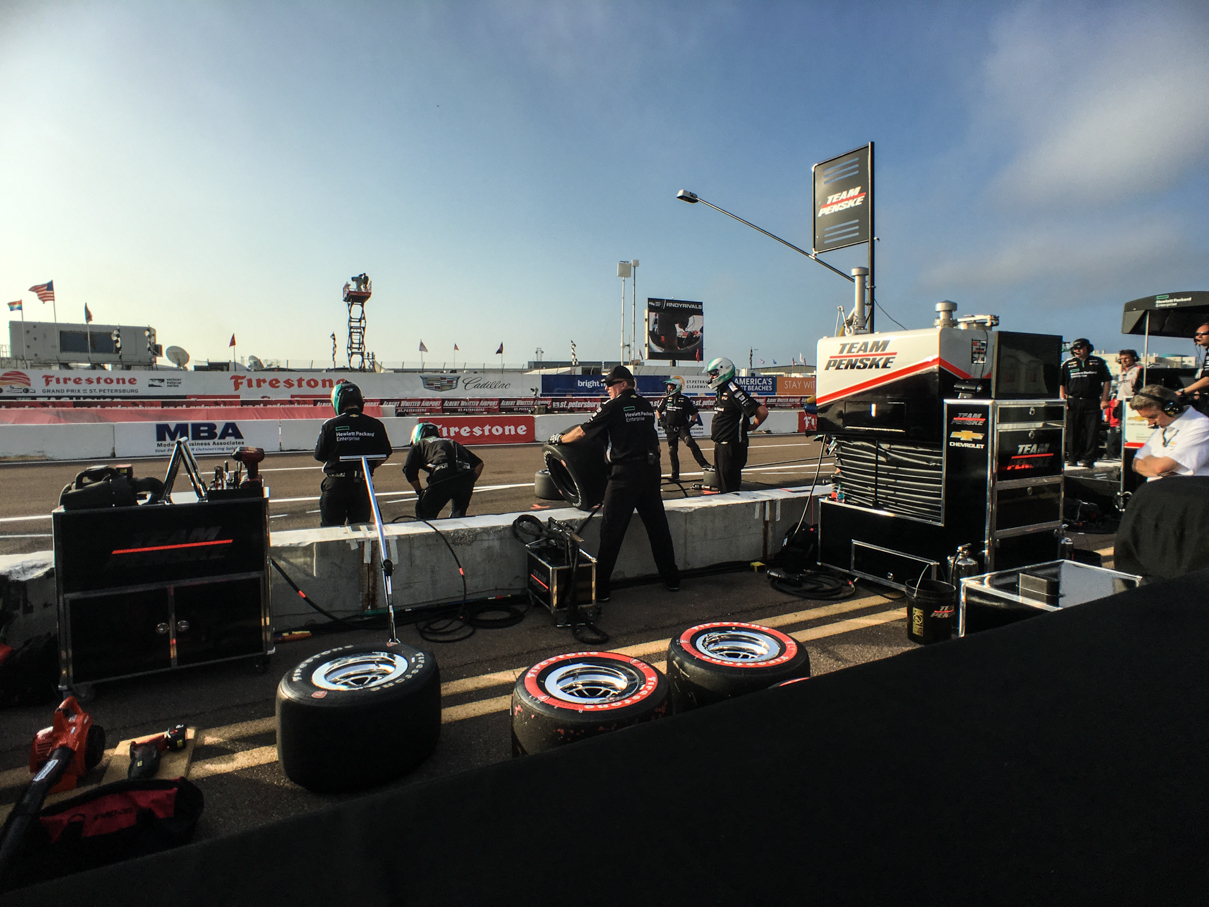
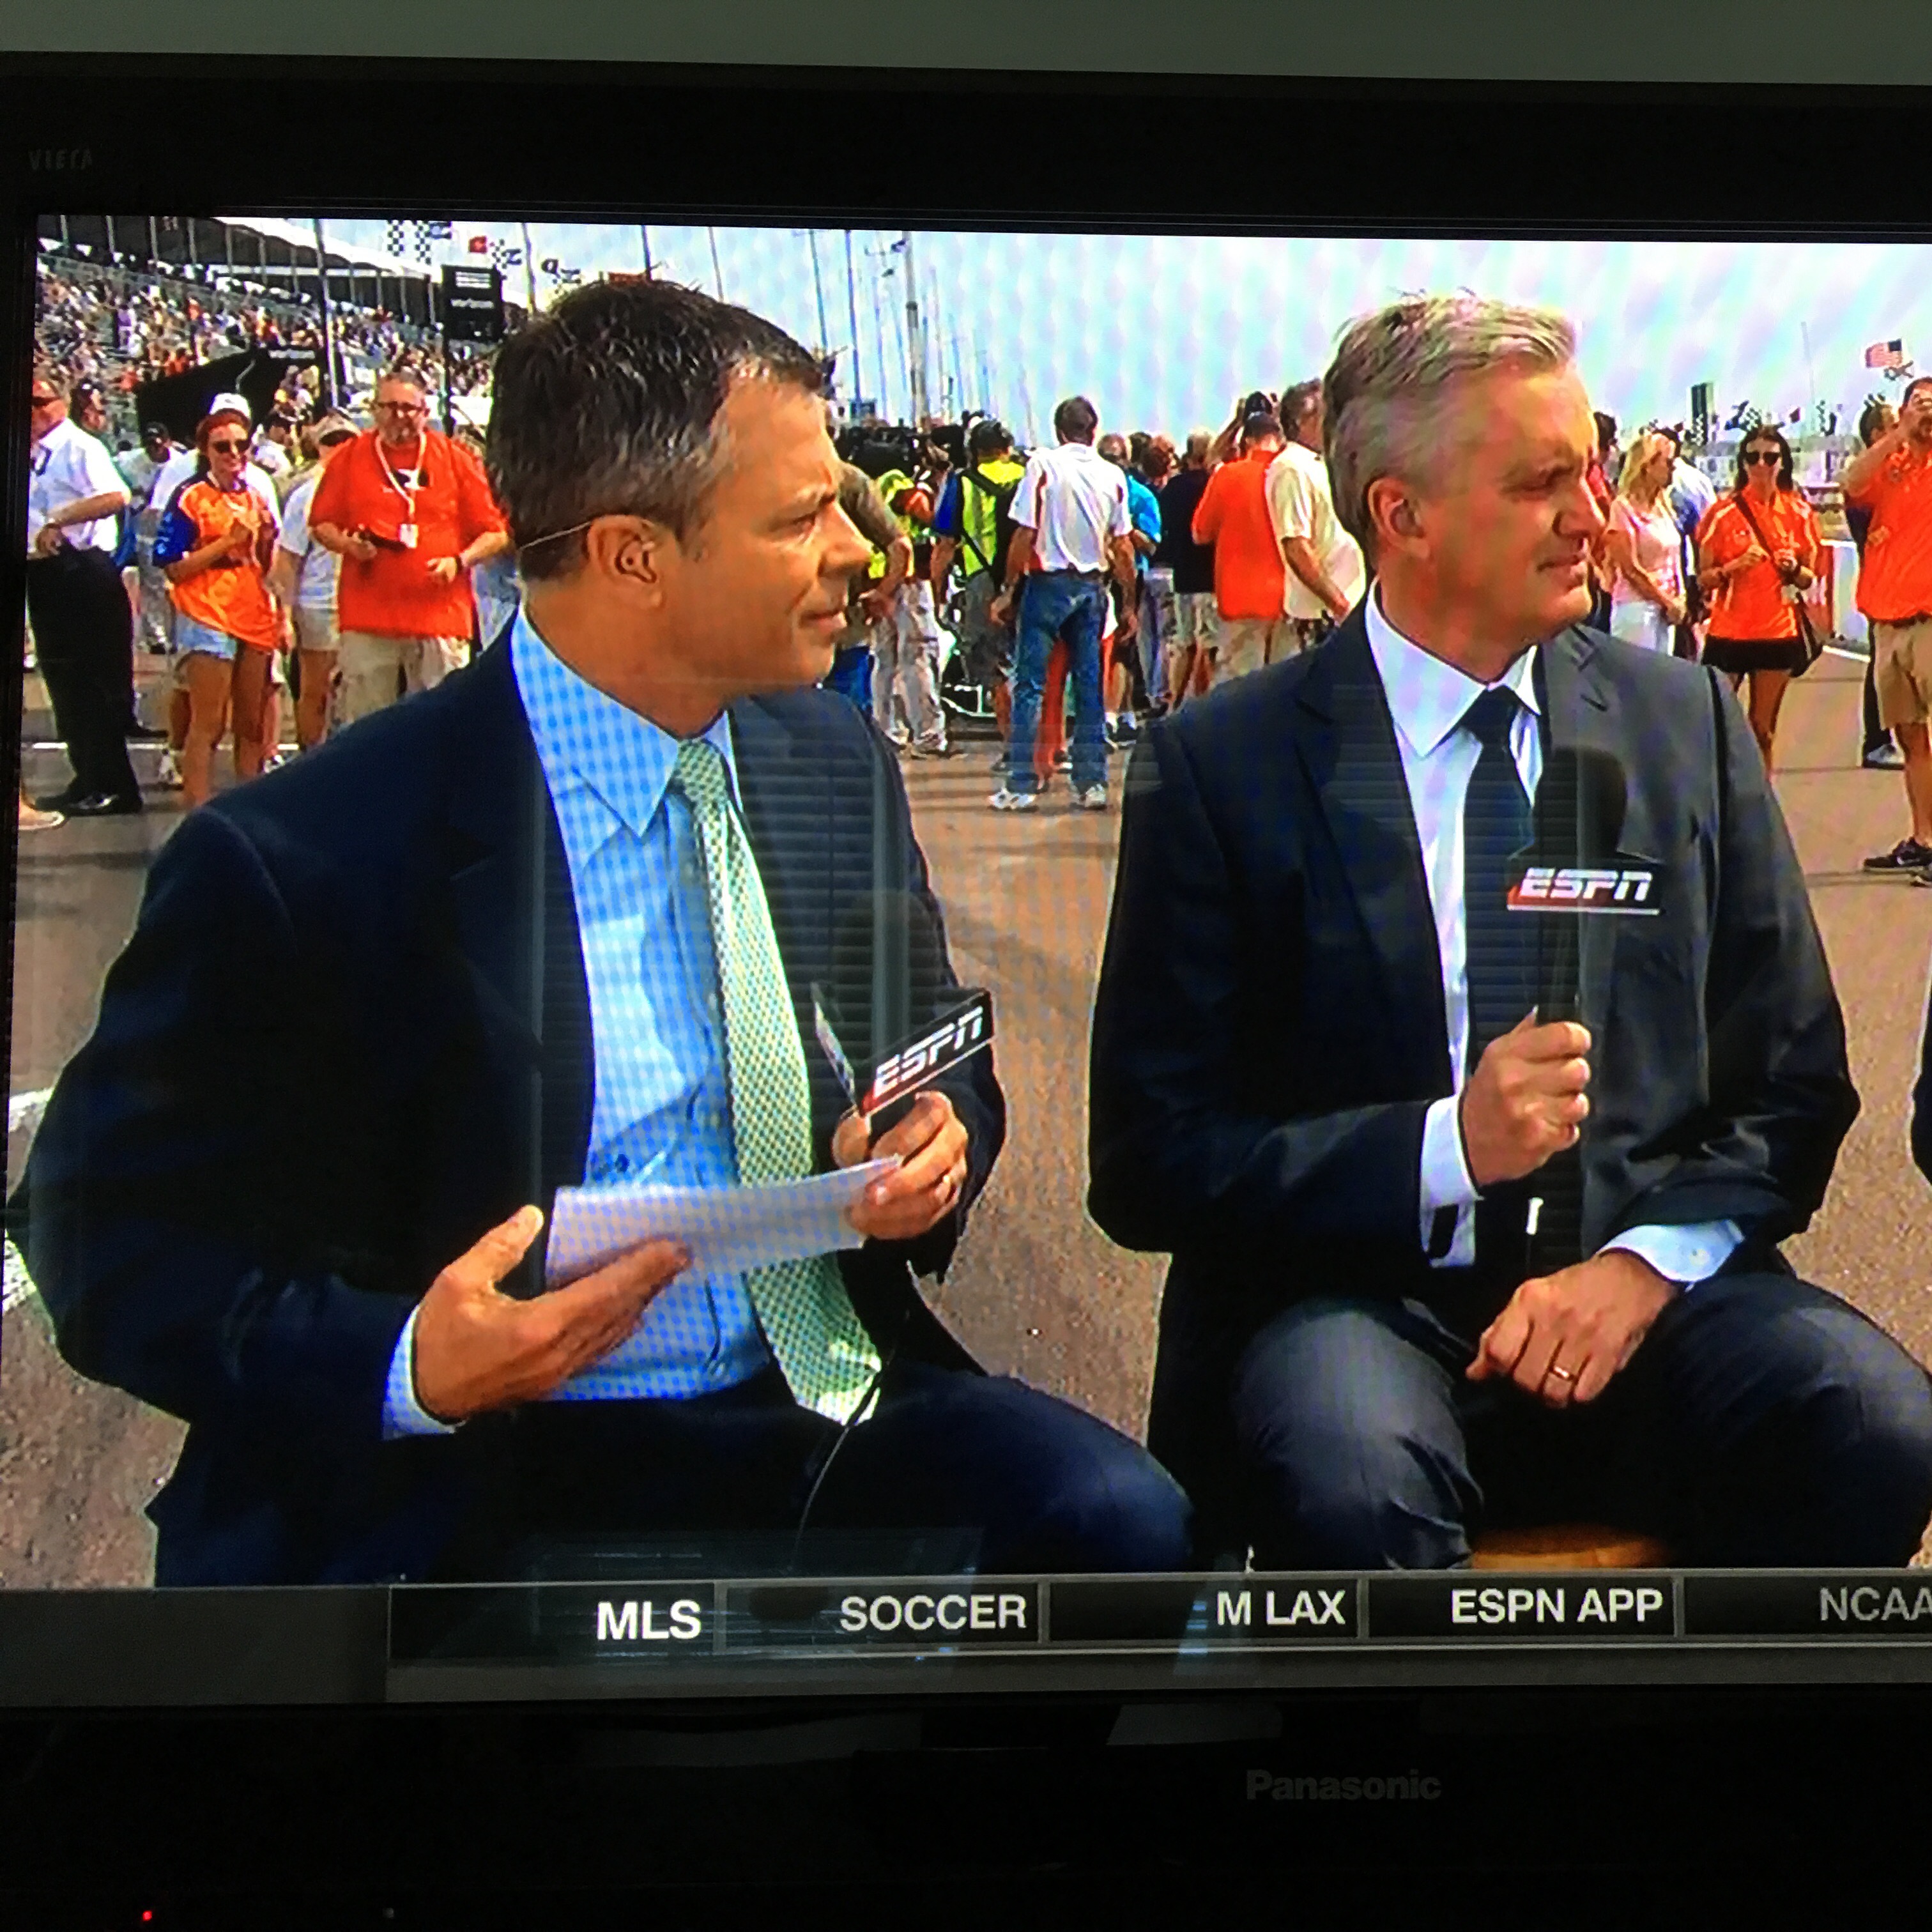
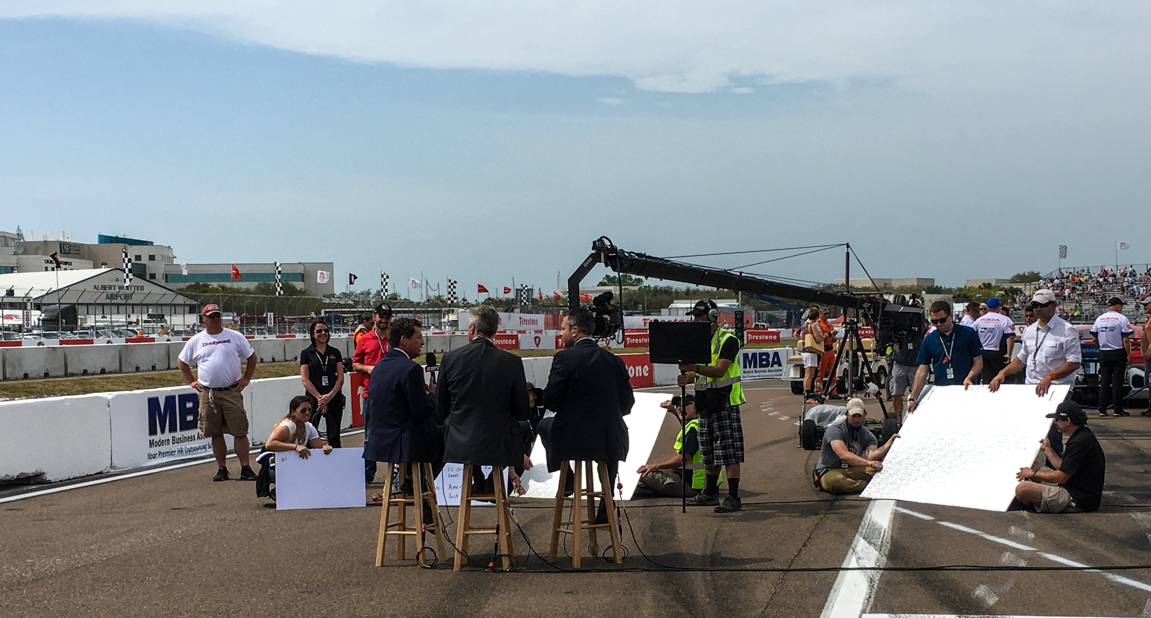
One cool thing were the pit lane monitors they put up every few pit stalls. During practice and qualifying, it allowed us an easy way to keep current on how things were going on track. We were also constantly running in to drivers and owners walking around down there. The highlight of our time in the pits had to be during the IndyCar pre-race, however. For those with pit access, you can go out on to pit road for the grid walk, checking out all the last minute activity going on, this time from the other side of pit wall. It was pretty cool, and we even ended up on camera during pre-race. We’re standing on the left hand side over Allen Bestwick’s shoulder. Next to that screenshot is a pic I took of them a second before:

20160319_145315433_iOSIMG_7519

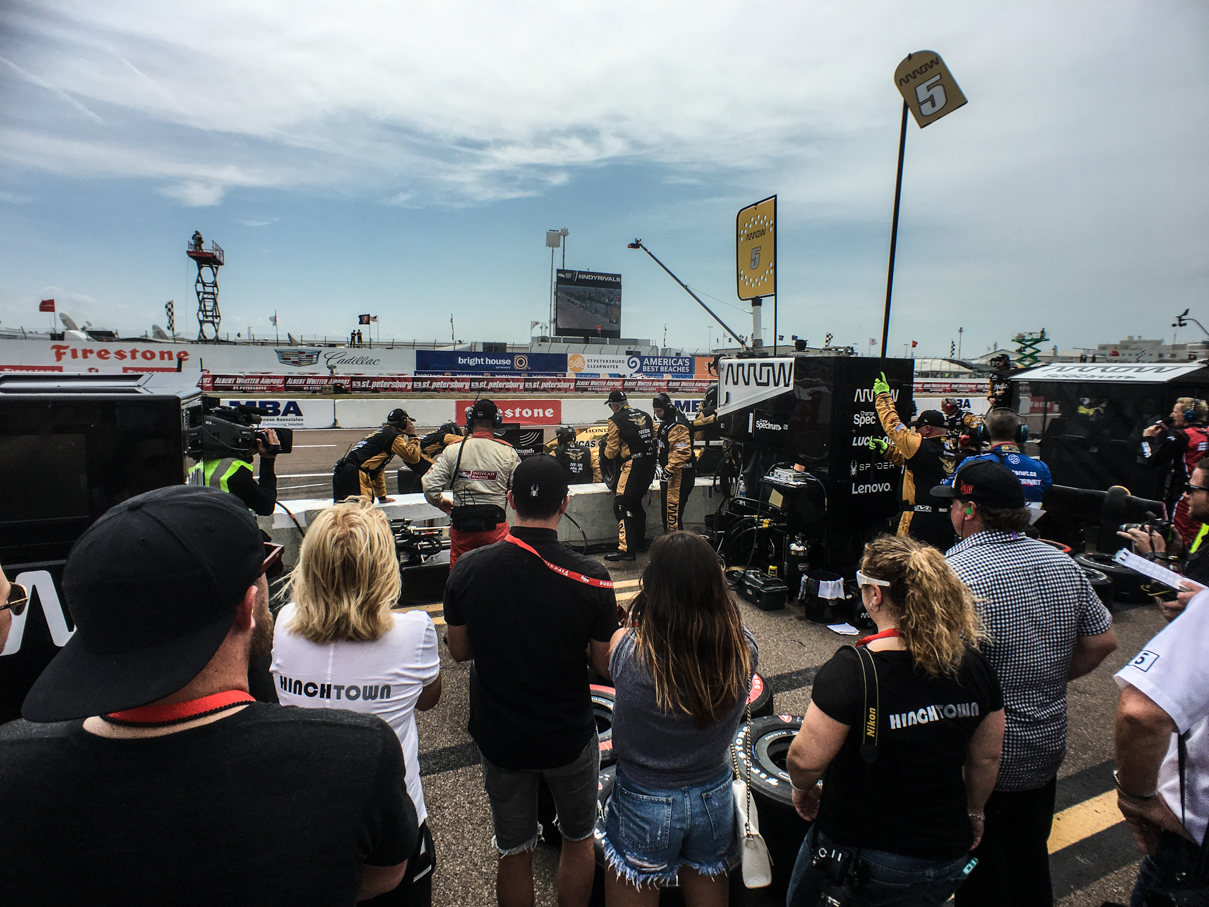
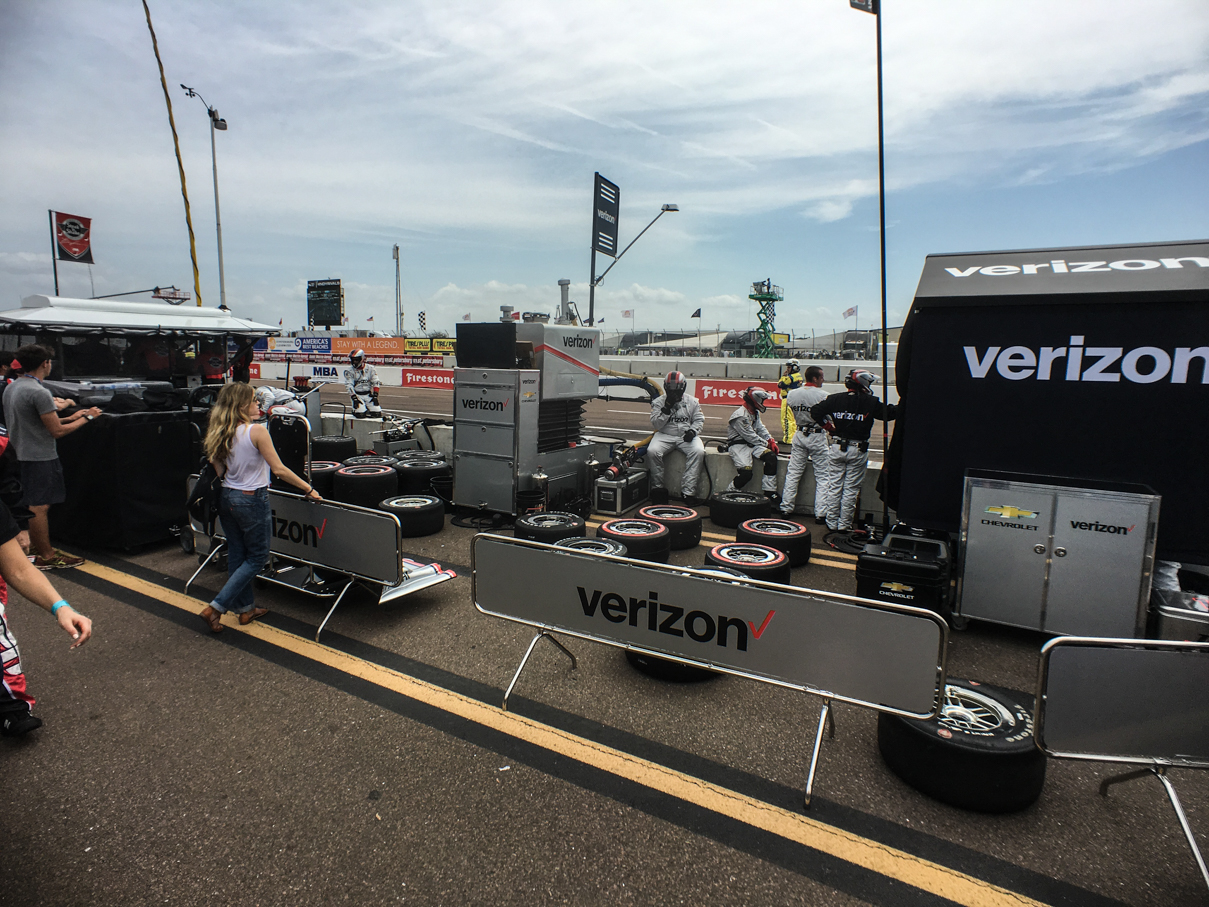
Here are a few grid -walk pictures, as well:

IMG_7480 IMG_7481 IMG_7490 IMG_7494 IMG_7496 IMG_7499 IMG_7503 IMG_7511 IMG_7515 IMG_7516 IMG_7522 IMG_7534

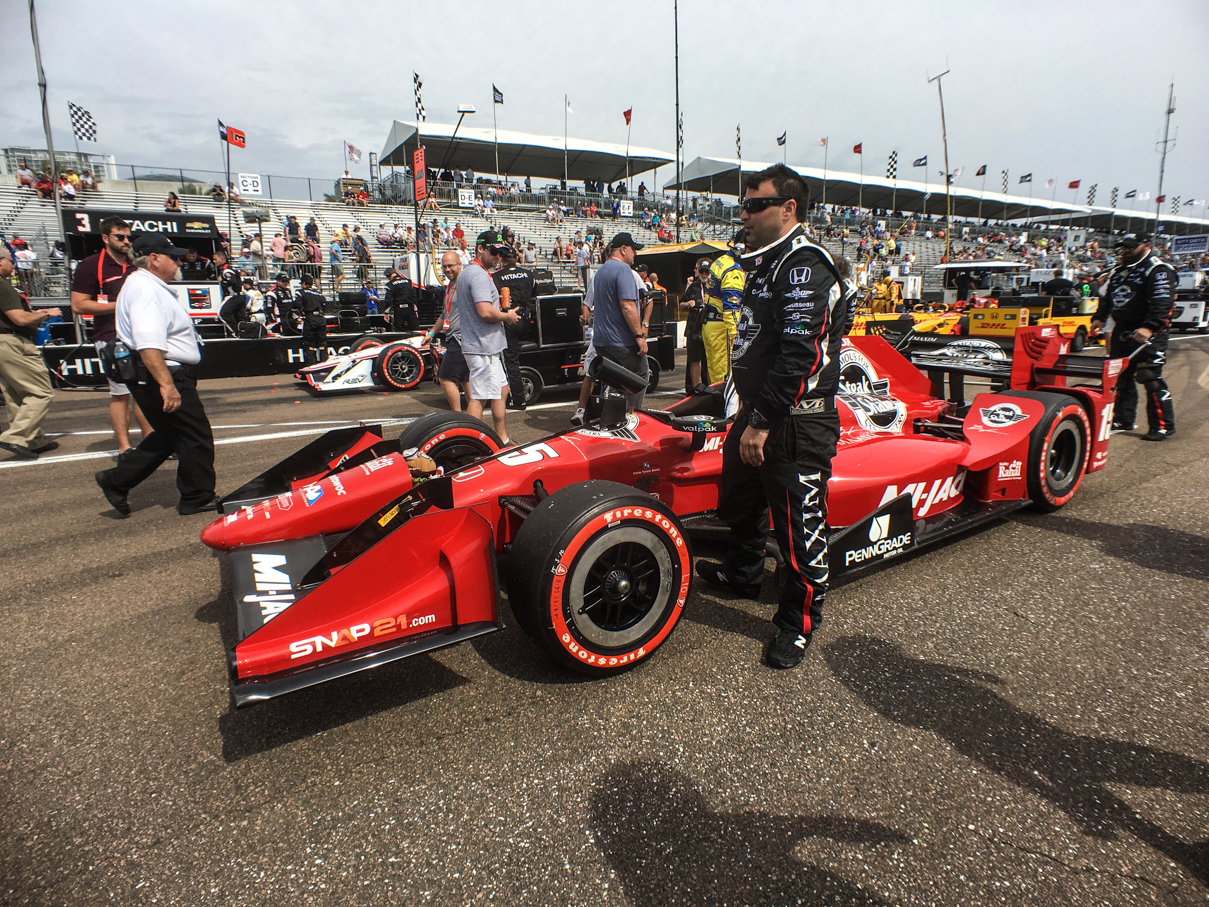
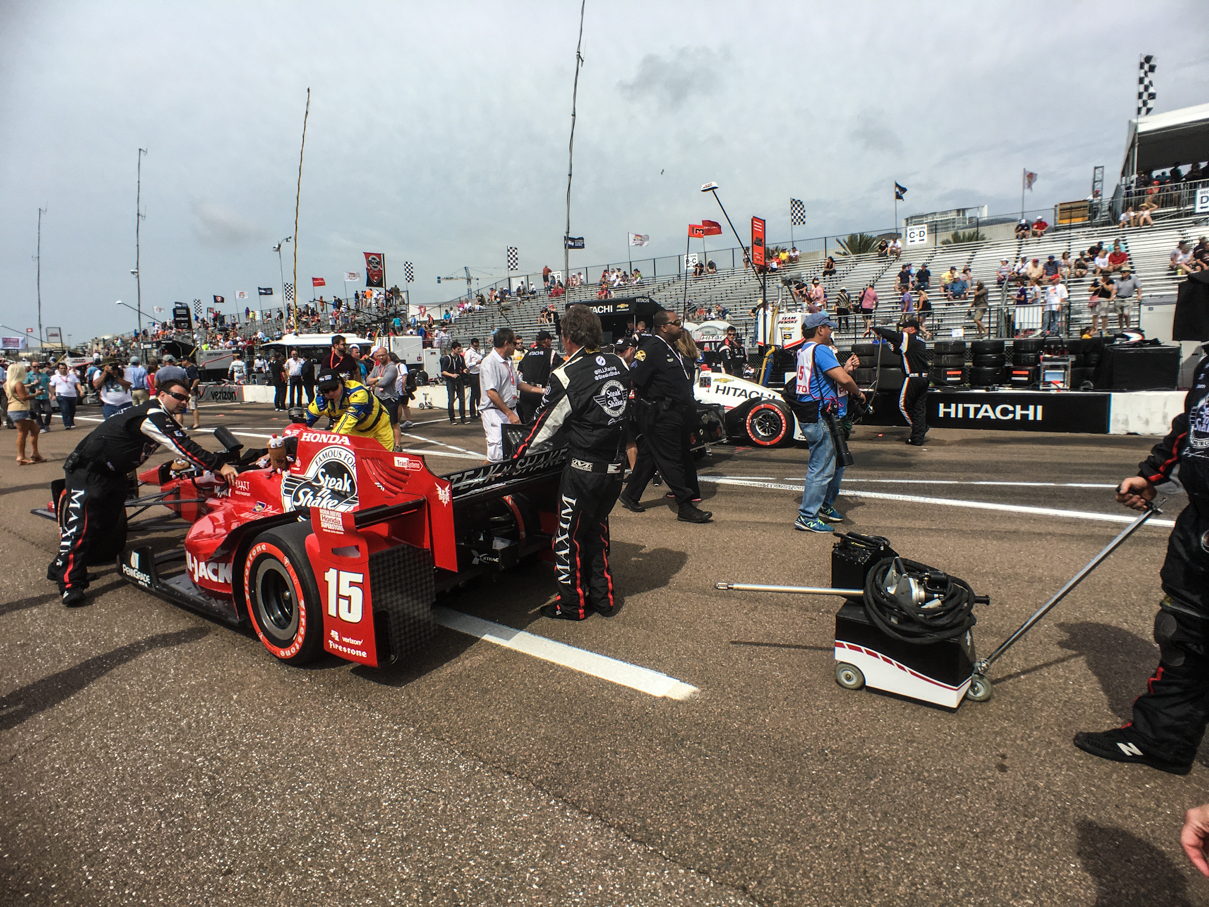
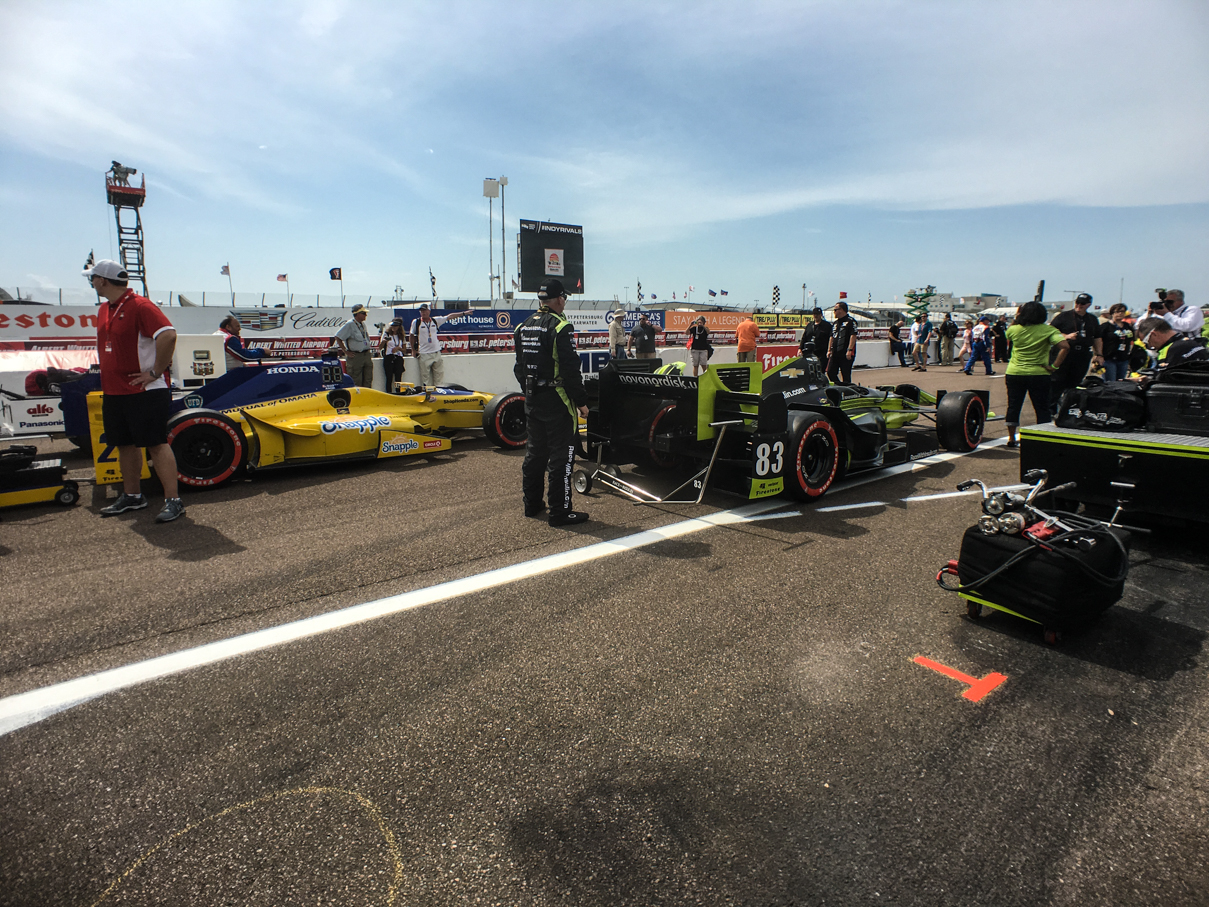
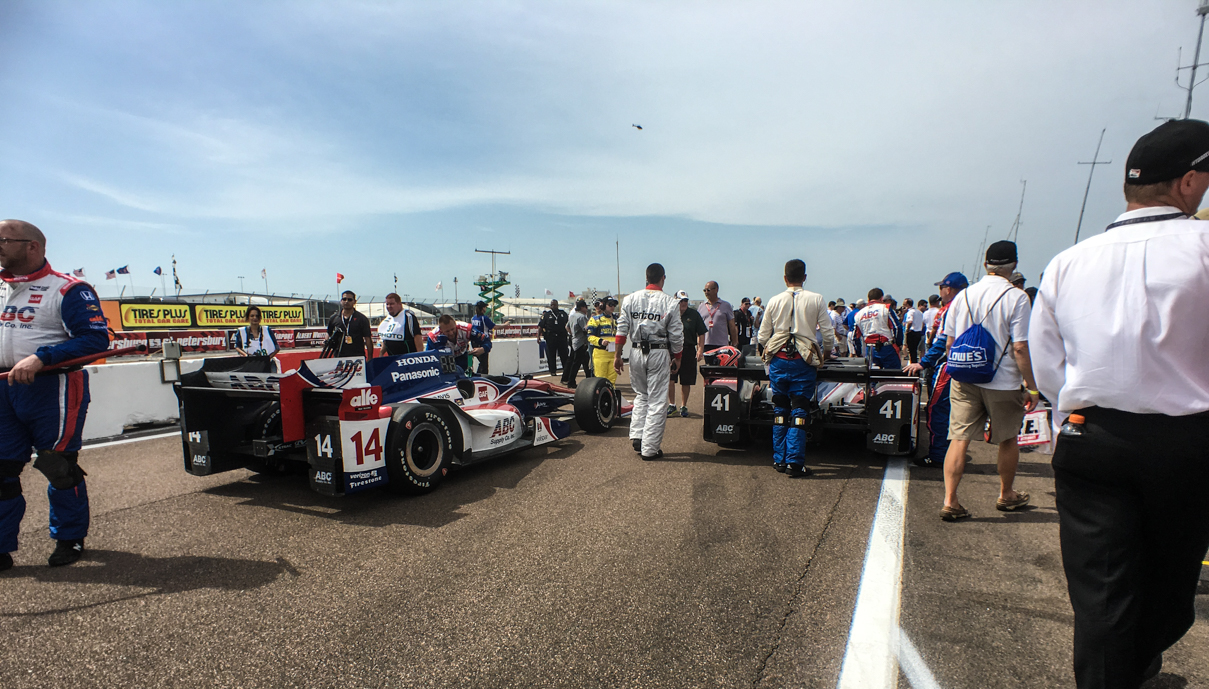
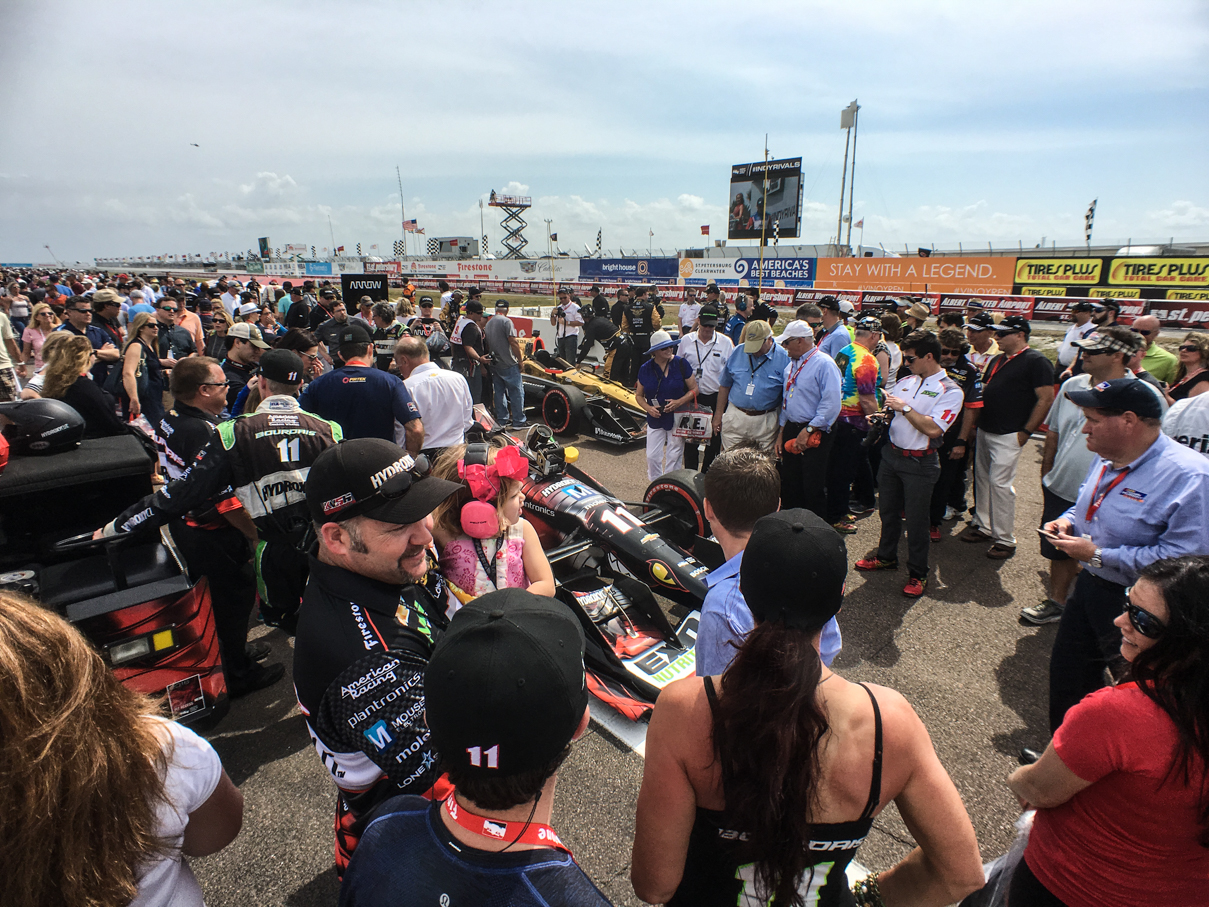
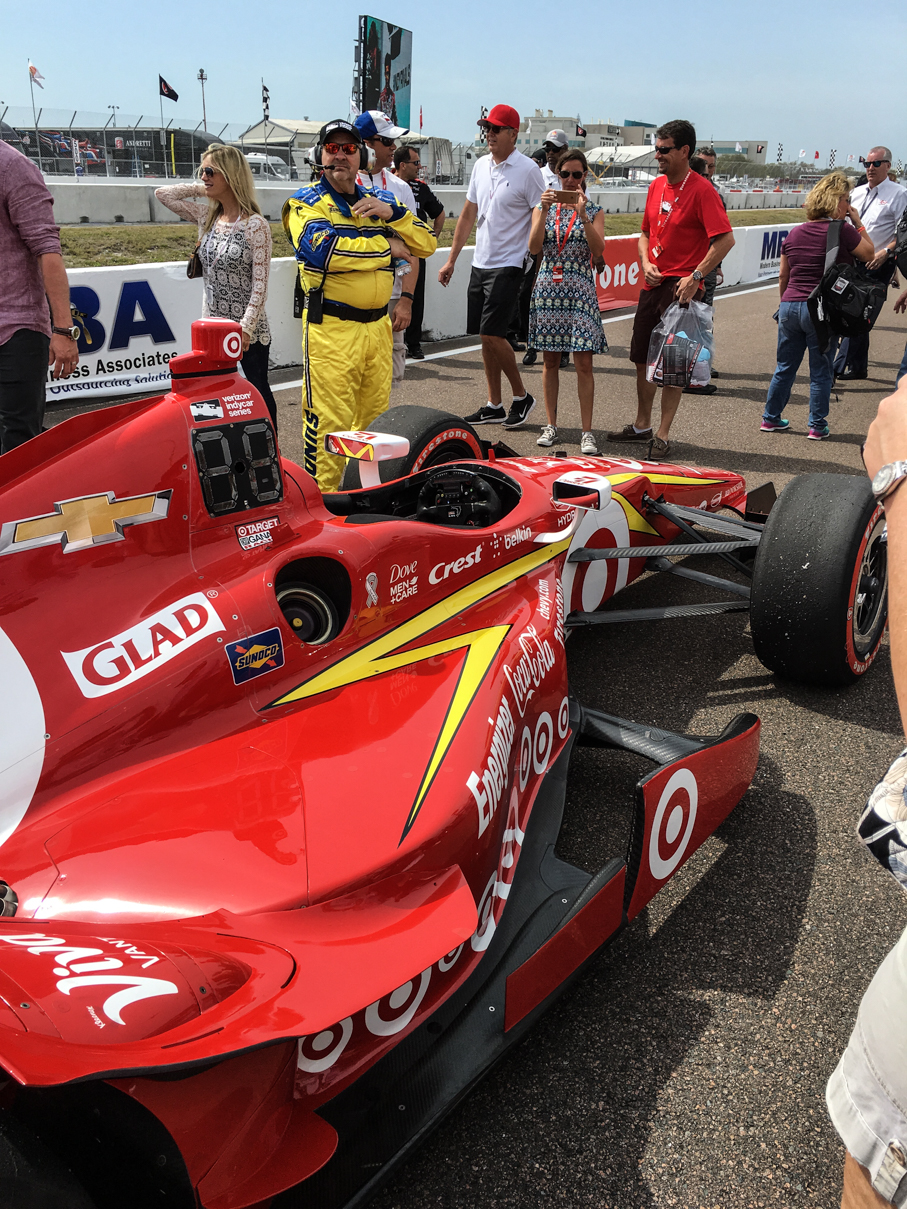
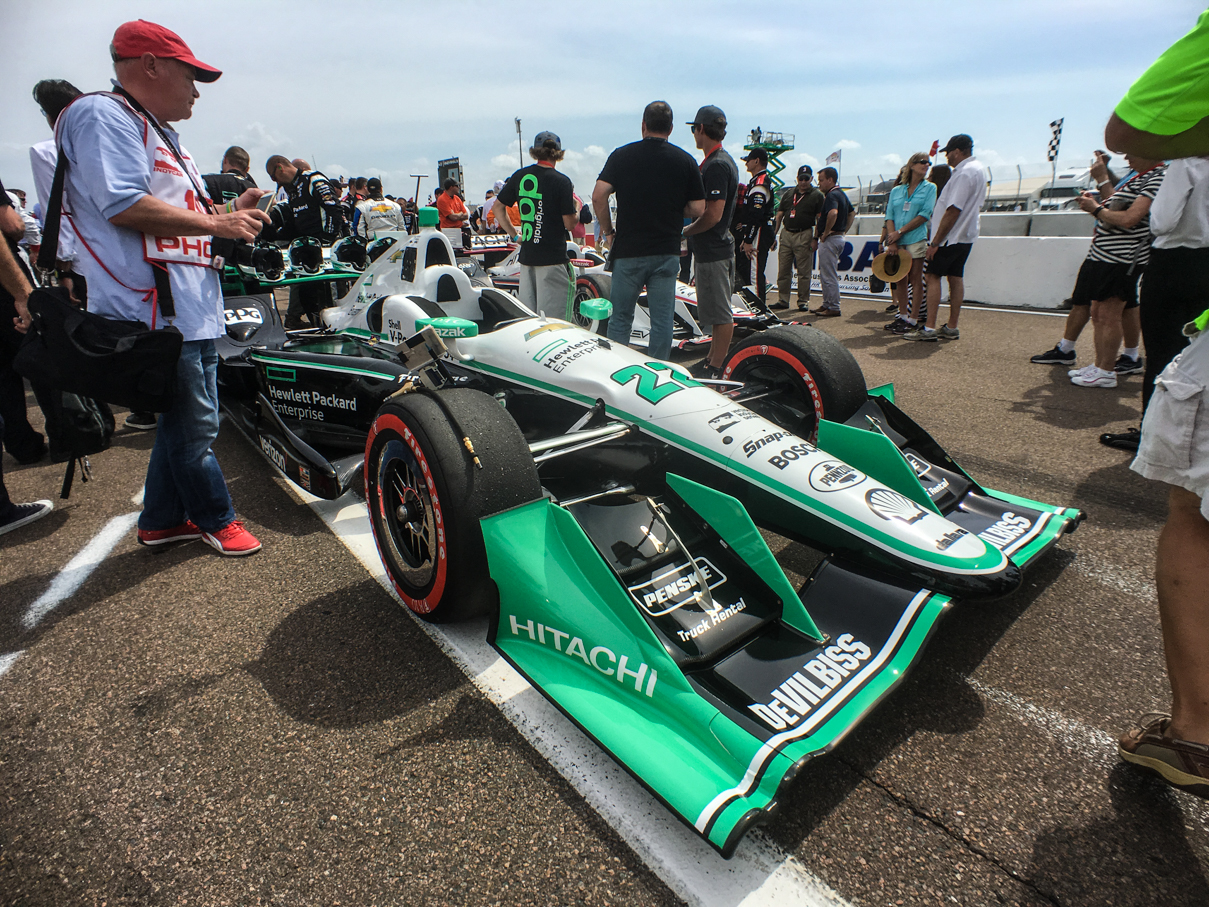
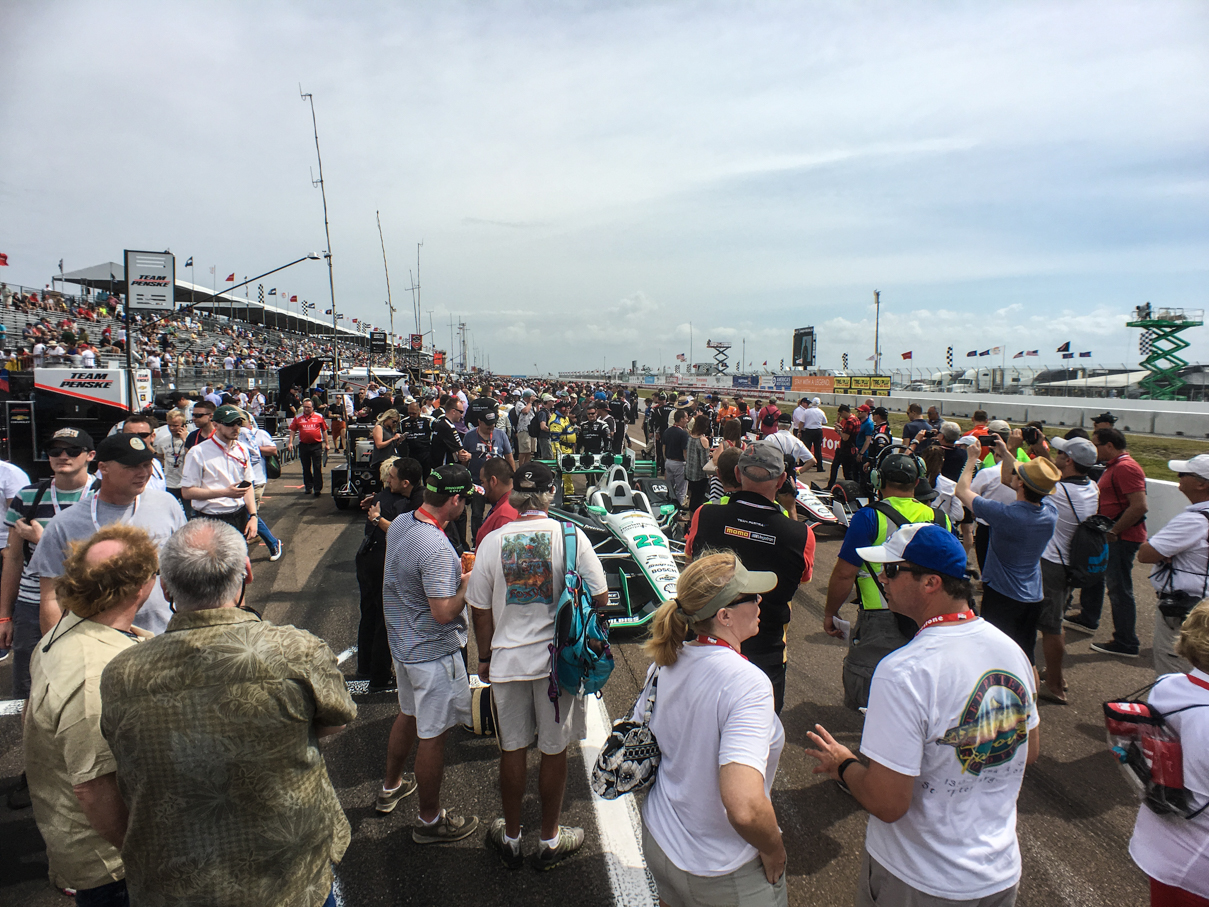
After all of the drivers have arrived following introductions, they start to move out anyone who doesn’t have a team related hard card or a “race mode” tag on their pit pass. Even though we had neither, we did manage to hang out on pit lane for the start of the race and the first few laps before they finally noticed and sent us on our way. Here are a few shots I got prior to getting kicked out of the pits, including one of an early stop by Hinchcliffe after he suffered a cut tire:

IMG_7539 IMG_7552 IMG_7556 IMG_7558

We did head to our grandstand after that, watching the rest of the race from our seats. We had a great view from GS23, but next time we have to figure out how to get hot-passes, as I think we’d have both preferred the excitement of watching all the activity from pit lane!

This is the 3rd different street course we’ve been to together for an IndyCar race (having done Long Beach and Baltimore as well) and it certainly didn’t disappoint. The city and race organizers definitely know how to put on a good show, and should we get the chance next year, we’ll definitely be back. I’d hoped to make the inaugural Boston Grand Prix in September, but I’m pretty sure I’ve blown my racing budget for the year. It was all money well spent though, a truly amazing weekend hanging out with Bayley watching something we both love 🙂

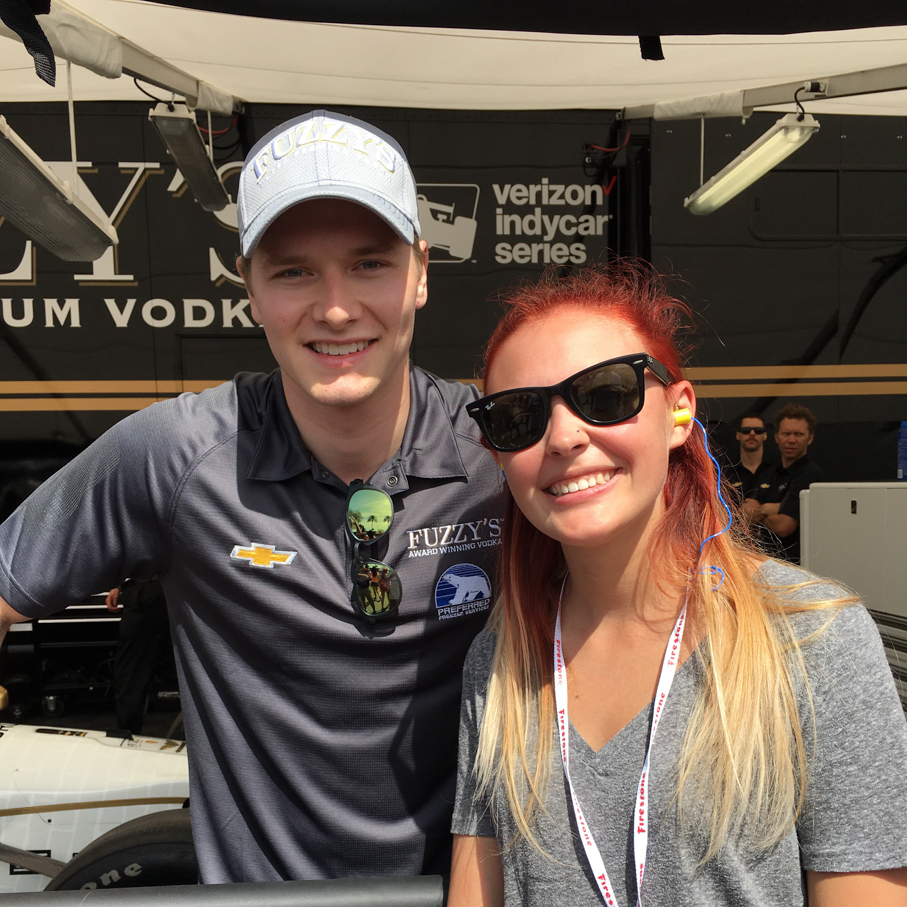
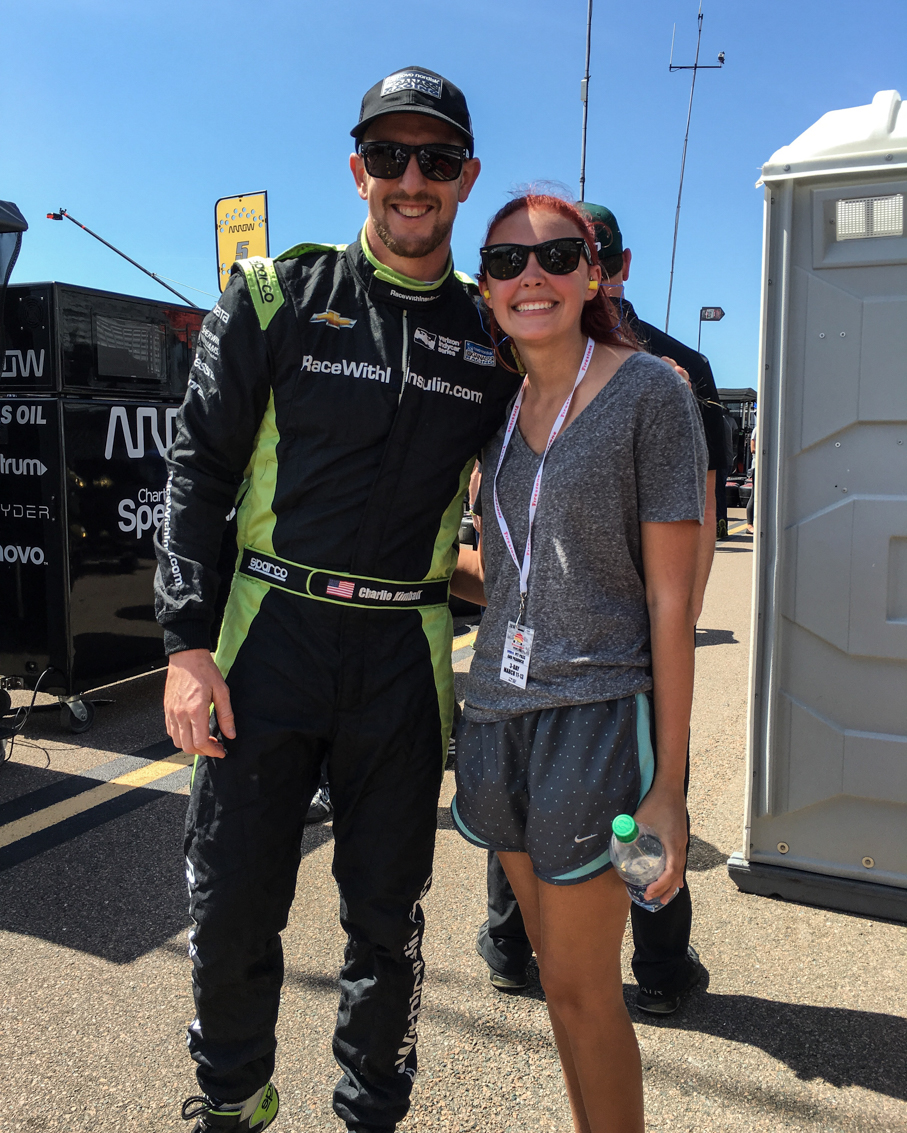
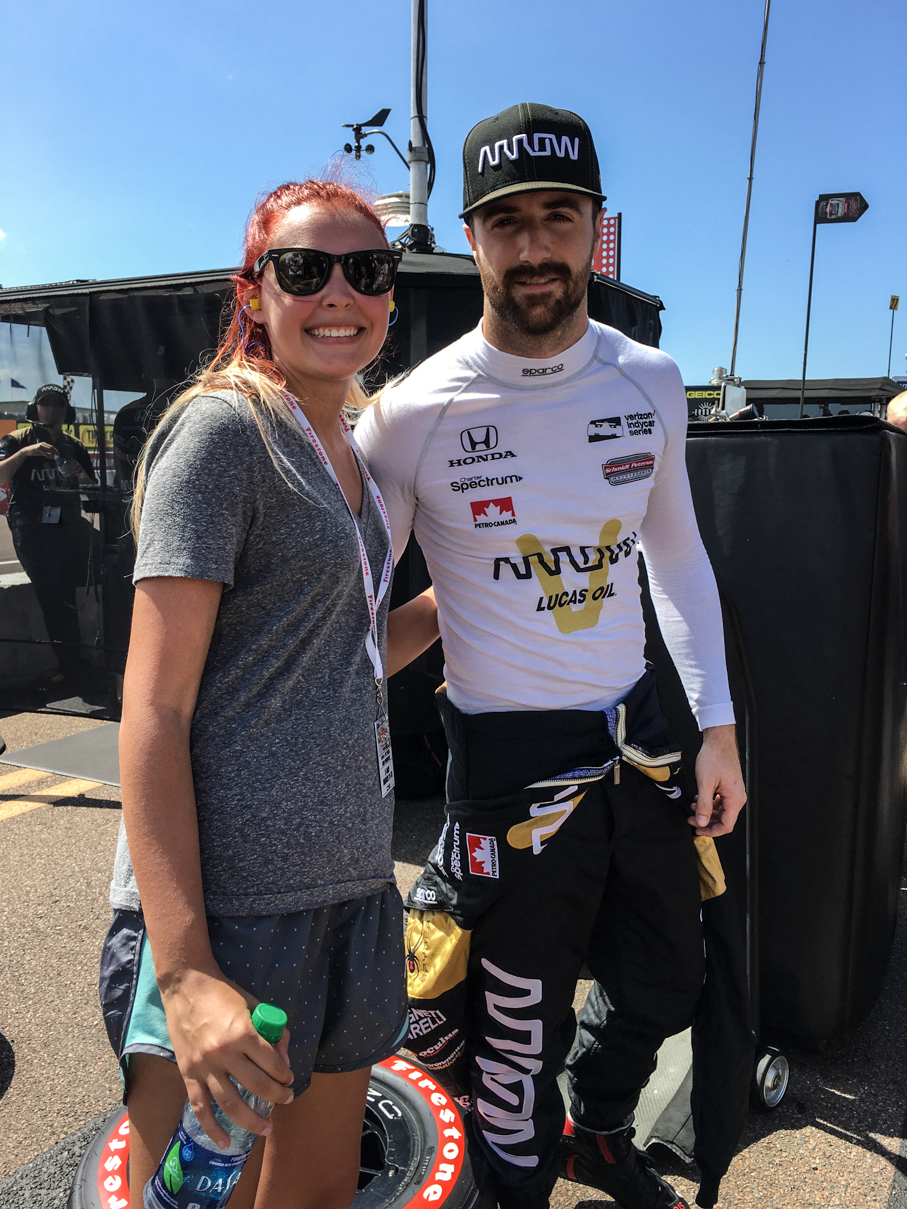
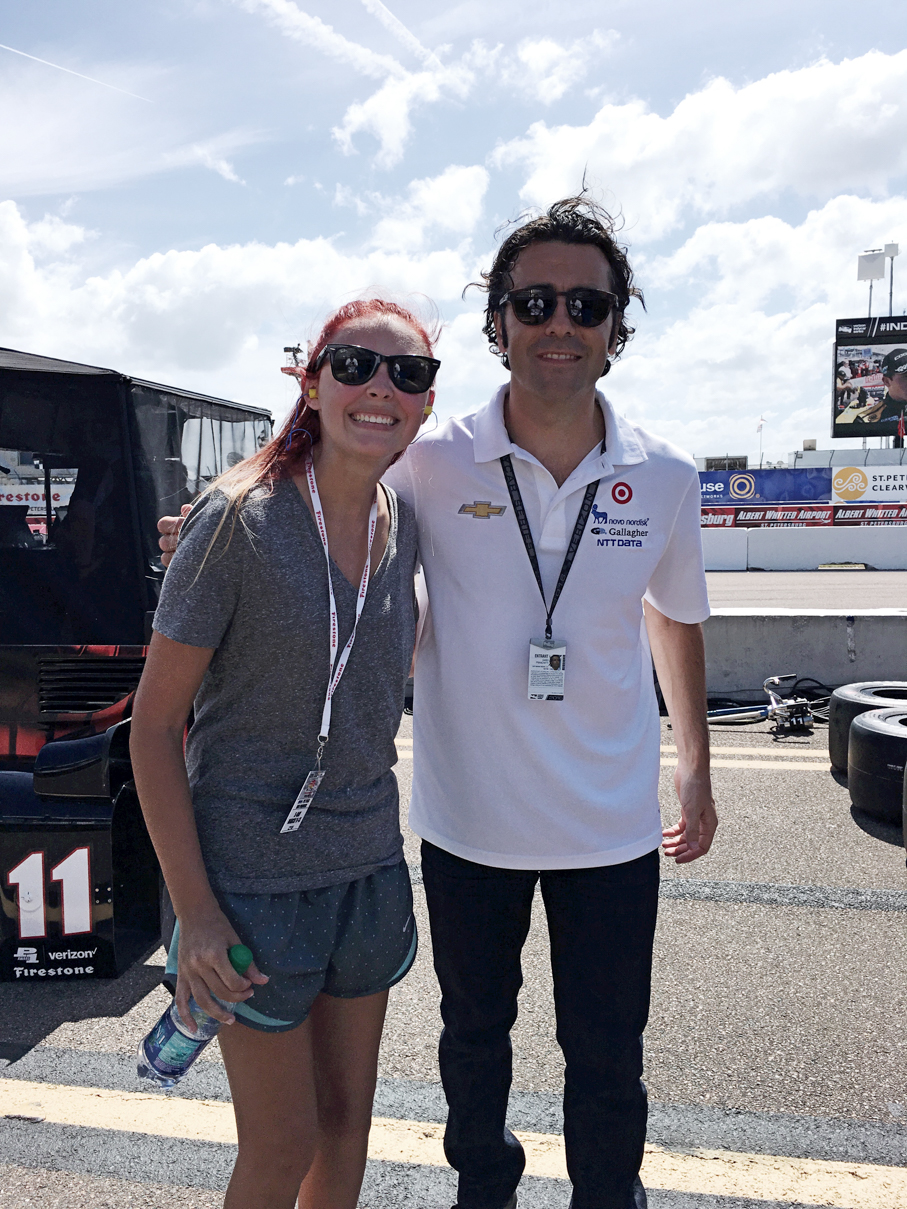
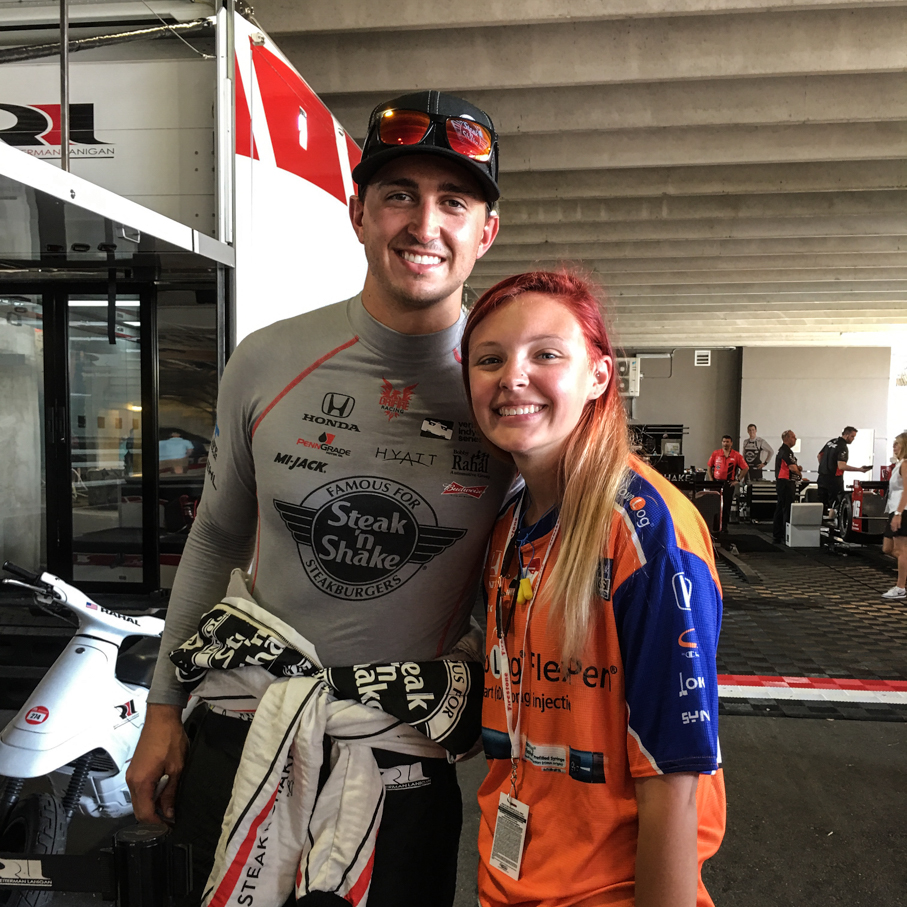
Here are a few shots of Bayley with some of our favorite drivers. For more, including a few video clips, check out my personal Instagram feed and all of the pictures I’ve posted on our SmugMug site, they’re both full of stuff from the weekend.

Oh, and congrats to JPM, heck of a drive to win that race!

IMG_7029 IMG_7035 IMG_7037 IMG_7172 IMG_7426 IMG_7432

iPhone Photography Gear Review

A few months back, I wrote up a post on the new photography gear I’d be using on our November and December cruises and trip to Disney World, and figured it was probably time to take a look back and see how it all performed. Before getting in to it, I should note that I added one piece to it between those two cruises. In early December, Moment finally finished up their phone case for the iPhone 6s Plus, so I was able to try that out on the second cruise and compare it to the rig I used on the first one.

Let’s take a look at the gear I used on each sailing.

November cruise aboard the Norwegian Escape, Disney World over Thanksgiving, and the Roar Before the 24 in January:

DSC02399 DSC02406

December cruise aboard the MSC Divina:

DSC02411 DSC02412

Here’s my take on the individual pieces of each of these kits:

ShoulderPod S1 Grip: I absolutely love this thing. Of all the gear I’m covering here, this was the best money spent. This allows me to get some odd-angle shots in a totally stable way without the feeling that I’m going to drop my phone. As an example, it allowed me to get a couple of my favorite shots using the reflection on the glass of our balcony by holding the phone way over the balcony. At no point was I concerned about this thing falling into the ocean, since I had the S1 to grip on to, and the strap around my wrist:

The S1 does an outstanding job of allowing you to take single-handed shots in awkward positions in a stable manner. Seriously, if you only buy one thing in your quest for better smartphone pics, this should be it.  I’ve had a lot of people on these trips approach me about it, all of whom really liked how it felt when they tried it. If you want to help the blog out, you can pick it up here on Amazon :).

Moment wide angle and telephoto lenses: I have a complicated relationship with these. I really like the wide angle, and keep going back and forth on the telephoto. On the first cruise, and again at Disney, I overused the wide angle lens. For the most part, I was treating it as a permanent attachment, and I know better. I’m in the camp that believes you don’t improve image quality by putting glass in front of glass, which is exactly what adding any lens to a smartphone does. I do, however, love that it allows the camera to see more of what’s in front of it without me having to re-position myself. I tried to make that work in close-up scenarios too often, however, only to see later that it added noticeable distortion to the image, giving it an almost fish-eye look. Not the fault of the lens, more my fault for being lazy and not just removing it and backing up.

I got better at determining when to go with a “naked” camera on cruise #2, so for me, there was definitely a learning curve. I did get a lot of excellent shots with it that would have been a pain otherwise, though. This is especially useful for us as travel agents, as I’m able to get more of a hotel room or cruise cabin in a single shot, reducing the number of overall pictures it takes to be able to show off the entire room. For example, here are two shots of the same hotel room, taken from the same point in the room. On the left, no lens. On the right, using the wide angle. Definitely an advantage to having a wider field of view sometimes.

20151113_021029000_iOS 20151113_021341000_iOS

Moving on to the telephoto, I think my biggest issues were using it indoors. I used it a few times to shoot our general sessions in the main theater on the Escape, attempting to get close-up shots of speakers without having to use digital zoom, and in that setup, with challenging lighting, the shots were no sharper and clearer than those shot using just the built-in digital zoom. Outdoors in the right conditions, this does allow you to gain a closer perspective without the IQ loss that tends to occur when using the iPhone’s digital zoom. In the group of pictures at the end of this post, the shot of Atlantis was taken sitting at the back of the ship using the telephoto lens with no added zoom.

Moment Case:  As mentioned, I didn’t have this until the second cruise, and having it for that only happened because I agreed to give up the one I wanted due to supply shortage. I’d pre-ordered the black/black case on 11/24 with an estimated shipping date of 12/3, but when they finally started shipping on 12/8ish, my order status changed to Back Order. After contacting them, I learned that the system had accepted more orders for that color combination than they could fill, so I could either change to one of the other two options, or wait until some future date when they had more. Reluctantly, I chose to switch to the black/white case, as they didn’t know how long the wait would be.

Up to this point, I hadn’t used Moment’s camera app much, as I prefer Camera+ (and am learning PhotoToaster). Going in to the purchase of this case, I knew I’d have to change over if I wanted to make use of the dedicated shutter button, as it only works with their app. I tried to like it, I really did. I spent the first couple of days after getting the case trying to get used to the app, and even filed feedback on a couple of changes I’d like to see:

  • One thing I like about Camera+ is the ability to edit pics in the app as soon as you shoot. This is something Moment’s app doesn’t have, and the answer I was given was that focusing on the capture side was their priority, with no plans for any editing features since there are so many editing apps out there for people to use. I get it, but it still slows me down when I want to shoot and post stuff fast, so looks like I’ll be staying with Camera+ for now.
  • They currently have no HDR support in the app. Now, Camera+ doesn’t have this on the capture side either, but has the ClarityPro editing built in to allow me to quickly add a similar effect right after taking the shot. They did say this is coming at some point, so there’s that.

There are some general fit and finish things that could be done to make the app look better too, including:

  • A dark theme. Seriously. I hate the white theme. I get that opinions differ, but that’s what choice is for.
  • Connectivity between the case and app seems to drop sporadically, and when it happens, you may not realize the shutter button isn’t working until you’ve missed your shot. If I can’t rely on the hardware button, what’s the point of having it?
  • When the app detects the case, it’d be nice if it would automatically make the on-screen shutter/control buttons smaller (or make them disappear completely) to give the viewfinder more real-estate. Overall, the on-screen controls take up too much space.
  • Too many crashes. This may have been taken care of in some update over the last month or so, but when I was using it on the boat, it crashed on a number of occasions when shooting and reviewing shots in the app. If I can’t trust it, I’m not going to use it.
  • I’d love to see them open up the shutter button connection to other app developers so we’d have the option of using other camera apps with the case.

Even with the above issues, I continued to use the app on the first couple of days on the boat. By day 3, I was back to Camera+ and only using the case to securely mount the lenses. That brings up another point. When not using their case, you have to use mounting plates to attach the lenses to your phone. This really isn’t a big deal, even though a few reviewers have complained about having to stick the plate to the back of the phone. I’ve taken 3 off and have left no damage or residue. It’s really not hard to get that thing off if you take your time. Of the two options for attaching the lenses, it’s the least favorable option, however, as I’m finding that a given mounting plate only lasts for one week-ish long trip. No matter how careful you are mounting and removing lenses, the connection point on the mounting bracket loosens up and you start to worry the lens will come loose and fall out at some point. With the case, no such concern, as that mounting point is a lot more solid than the one on the plate. This means I need to keep at least one extra mounting plate with me on each trip, as I see myself using the first setup more often than using the Moment case. Because of the case’s shape, I can’t really use the ShoulderPod with it either (although I tried), and frankly, I find the S1 more functional than the Moment case.

One other piece of the Moment gear that’s bothering me, the lens caps. Buying them was a no-brainier (frankly, each lens should ship with one) , but it looks like they could stand to be slightly deeper or more rigid than they are, as I’ve had them rub the actual glass on the lens when putting the cap back on, causing smudging in the center of the lens, which in turn meant having to clean the lens quite a bit. I’m sure pressing the center of the lens cap as I put it back on is contributing, but if it were more rigid this wouldn’t be an issue.

The lenses are pretty good quality, imo, and none of the above issues will deter me from continuing to use them. While I’m still learning when to use each in specific scenarios based on what I’ve seen out of them so far, I’ve been able to get some great shots with them under the right conditions, and the wide angle allows me to get more things in the frame of a single shot without having to employ any sort of panoramic functionality. Here are a few samples of shots taken using the Moment lenses over the course of our trips:

IMG_4208 IMG_4193 IMG_4009 IMG_1647 IMG_1540 IMG_1536 IMG_1514 IMG_0844 IMG_0812 IMG_0804 IMG_0773 IMG_0752 IMG_0554 20151120_211925000_iOS 20151119_215042000_iOSIMG_5549IMG_5464IMG_5158IMG_5501IMG_5335

Hotel Review – Disney’s Coronado Springs

For our Thanksgiving trip to Disney World, we’d originally booked a room at Pop Century Resort, one we’ve stayed at in the past, but a few weeks out from this trip, we were able to move the reservation to Coronado Springs for a relatively small increase. Having never stayed there, we decided to give it a try.

Check in was pretty easy here. I’d actually checked in online the day before, and just before noon on our scheduled day of arrival, I got a text letting me know our room was ready for us. Upon arrival, we hit the registration counter, got our keys and some basic information. While the main building lookd fine, one thing that stood out were the lack of Christmas decorations. Jen and I ate dinner at Beaches and Cream that night, and seeing both Beach Club and Yacht Club pretty well saturated in Christmas, were a bit surprised that Coronado Springs had yet to get any love in this area, or maybe it was just so subtle we didn’t’ see them.

After checking in, we headed over to our room, located in the Cabanas section (building 9A, specifically). We’d requested a water view, and got just that, as we had a corner room overlooking the Cabanas village pool. Our room itself was pretty disappointing, especially for a hotel classified as a moderate. Disney really needs to gut these rooms and start over, as they feel like they haven’t been touched in 20 years. We never had an issue with it being clean, it just felt worn and dated. Additionally, one thing we really liked about French Quarter back in May was that there were two sinks, allowing us to get ready faster in the morning. Not so here, as shown in the room pics.

IMG_2681 IMG_2682 IMG_2683IMG_2684IMG_2685IMG_1496

The Cabanas section does have a little beach with a few hammocks hung, which was kinda cool:

IMG_2704 IMG_1513 IMG_2705

After getting settled, we spent some time walking the grounds. There are some cool views here, but if you’re out in one of the farther building groups, like Ranchos (property map), it could be a bit of a hike to get to the main building. Ours wasn’t too bad, but I’d say that we definitely didn’t fill our soda mugs up nearly as often due to the added distance from the main building (vs French Quarter). In addition to the main building, there’s also a large pool area in the middle of the property, referred to as the “Dig Site”. This is actually kinda cool, with a Mayan theme to it, and it’s complete with a pool, play area, sand volleyball court, and cantina.

IMG_2696IMG_2697IMG_2698IMG_2699IMG_2700

Back on the Christmas decorations, we did notice a tree and some wreaths in the lobby on one of our last nights there, so either we just didn’t see them initially, or they didn’t decorate the place until after the higher-end hotels were done. We’d visited a couple more properties as part of our Disney Dining plan dinners, and all of those were pretty heavily decorated, so it kinda felt like Coronado Springs was an afterthought in this regard. Frankly, it seemed like a number of areas of this resort were worn and needed attention. Case in point, there are automatic gates on the road that surrounds the property. As you turn in to Coronado Springs, you can turn left or right to get to guest areas before you get to the main gate. Our building was to the right, with one of the automatic gates right there. In our case, the gate in was never working while we were there, it was stuck in the up position. Fear not, however, the “out” gate was working fine, just to be sure that no riff-raff were able to escape the property without a short delay to wait for the arm to raise. We did see someone working on the gate on day 2 or 3, but he wasn’t able to fix it, as the “in” gate remained up the rest of our stay.

Overall, if we were presented with the same choice in the future, I’d probably opt to save my money and keep the Pop Century reservation. The added cost for this being a moderate just didn’t feel warranted in my opinion. Disney knows they’re going to get guests staying here since it’s got a convention center, and as such, may not be concerned about renovating it. Maybe I’m wrong, but this just didn’t live up to ‘moderate’ standards for me.

Here’s a quick rundown of the good/bad, along with a few more pictures of the property:

(Note – I can’t speak to any of the restaurants here, as we didn’t try any)

Pros

  • Easy and quick check-in, room was ready 3 hours ahead of time
  • Some great views around the property
  • Our housekeeper took good care of our room
  • The Dig Site’s a great place for families to hang out when not at parks
  • Queen sized beds, a “moderate standard” (also mentioned in the cons list)
  • Had close-able doors between the beds and bathroom area so people could get ready without bothering those still sleeping
  • Bus transportation was pretty good, and the hotel is pretty close to all parks
  • Pretty good gift shop in the main building
  • Landscaping well done and kept up nicely

Cons

  • The rooms need a lot of TLC. They look like they haven’t been renovated in a looooong time.
  • The beds weren’t comfortable at all to me. Felt like someone grabbed a bunch of random worn-out padding and jammed it in a queen bed shell.
  • Some of the other buildings could make guests feel disconnected from the rest of the resort due to distance from the main building, but that holds true at other hotels on property, too.
  • I can see where it could get really busy when the convention center is full utilized

And of course, a few more pics:

IMG_2679IMG_2678IMG_2665IMG_2702

IMG_1502

IMG_1508IMG_2687 IMG_2680 IMG_2676 IMG_2673 IMG_2672IMG_2666IMG_2668

Animal Kingdom: Wild Africa Trek

This adventure was part of our Thanksgiving trip to Disney World, and I can honestly say it’s one of the coolest things I’ve ever done at any theme park. We were on the 8am tour on Thanksgiving day, which meant meeting at the entrance to Animal Kingdom before the park opened. Being that it was my birthday present, Jen did an outstanding job of keeping it a secret, even from Bayley. As we arrived at the park, all we knew was that whatever my present was, it was happening that morning, and it would mean getting in to the park prior to the actual opening time. It wasn’t until we walked into the Wild Africa Trek area that either of us began to figure out what we were about to do.

On arrival to the park, we were instructed to wait off to the side until our guides arrived. Once they did, we were led through the park just prior to opening, so just like our Magic Kingdom breakfast at Be Our Guest the day before, we got to enjoy an empty park as we walked to the staging area for the trek.

IMG_1607 IMG_1625 IMG_2873 IMG_2878 IMG_2884 IMG_2886IMG_1627IMG_1609

Once you arrive at the starting point to the trek (right next to the Kilimanjaro Safari entrance), you go through some instruction from your guides, and get suited up for the trek. Things to note here:

  • No sandals.  Closed-toed shoes only.
  • The tour cost does not include park admission, you still must have a ticket for Animal Kingdom.
  • Kids must be at least 8 years old, and 48″ tall. No unaccompanied minors, either.
  • If your health doesn’t allow for long periods of walking over some potentially rough terrain, don’t go.
  • No loose cameras, including phones. If your camera or phone can’t be strapped to the gear you’ll be wearing, you have to put it in your locker.

Those are the basics, but be sure to check the “know before you go” section of their site for all requirements. That last one is a big one that several people in our group, including us, didn’t know going in. I’m pretty sure I was the only one allowed to take my phone, because I had two straps on it that I could use to strap to my gear. If you don’t get to take your camera, it’s not the end of the world, as they take a lot of pictures along the way, all of which are included in the cost. They give you a web site address you can download all pictures from a day or so later.

After they get everyone into their harnesses, go through some basic safety instructions, test out the wireless headsets your guides talk to you on, they give you a short description of what’s going to happen, and you’re off! The tour starts with a walk down the same Pangani Trail all the other guests can access, and you’ll end up getting some funny looks from other guests along the way who have no idea why you have all that gear on. Along the way, one guide is giving you information on the animals you see as you walk, while the other one is shooting pictures of the group. They switch off roles a couple of times along the tour too, so you get to hear from both guides assigned to your trek. Once you get close to the end of the Pangani Trail, you take a little side exit that dumps you off on a closed trail. You then hike along this trail for a while, with your guide talking to you about the area and animals, until you arrive at the hippopotamus pool.

IMG_2919 IMG_2926


Once here, they strap your harness into a support railing so you can safely walk along a ledge overlooking the pool. While here, you’re given a talk by their resident hippo expert while enjoying the view, and while having your picture taken by the guide with the camera.

IMG_2920 IMG_1805

Once complete, you trek a little farther to the start of the ropes course. This is one of the highlights of the trip, as you get to walk over two rope bridges. If you’ve experienced the Kilimanjaro Safari ride before, you’ve driven under the first of the two bridges, and like us, may never have even noticed it. When you get to the first bridge, you’re strapped in one by one, and cross over to the platform between the two bridges. The guide currently shooting pictures actually crosses first, so he/she can get pictures of each person as they cross. The shots of us on the bridge face-first were shot by our guide, and the others were taken by me.

IMG_2942IMG_1637 IMG_1638 IMG_1628IMG_1807 IMG_1808

Once you’re across to the first platform, they stop each group for a quick photo:

IMG_1806

After that, you make your way across the second bridge one by one, and pass over the crocodiles. The bridges are pretty easy to walk across in my opinion, but they can get a little bouncy when more than one person is on. They also don’t mind if you make a quick stop while walking to take a pic or two if you have your camera on you, just don’t stop for long periods and hold everyone else up.

IMG_2957IMG_2959IMG_1648 IMG_2967

Disney’s attention to detail is quite evident on the bridges, too. Even though the bridges are perfectly secure, and there’s no danger of falling, they make the planks along the way look worn and brittle. Nice touch 🙂

Once across, you walk to a ledge overlooking the crocodile pit and strap in to another support railing while listening to the croc expert and having your picture taken with them.

Wild Africa Trek 108

After you finish up here, you shed your harness, as you no longer need it, and hop into a safari truck for the next part of the expedition. Your truck joins the same path the regular Kilimanjaro Safari trucks are on, with the occasional deviation on to side paths the regular trucks don’t take. These side paths allow your group additional time to see some of the animals, and in some cases, allow you to get closer to animals than the regular path does, depending on where the animals are that day. When the trucks stop for these closer views, you can also stand up to get better shots. We got lucky with the giraffes, with several of them congregating right next to one of these side paths. Our truck pulled up next to them, and while our guides gave us good information on them and answered questions, we got to be pretty close and get some great shots.

IMG_1682

Once we finished up there, the truck headed up to a building sitting on the savannah. We’d seen this on past safari trips, but until now had no idea what the purpose was. For the trek, it actually gets used as a 30 minute rest stop, giving you time to relax and enjoy some food specially prepared by the chefs at Tusker House. All this as you enjoy some spectacular views, complete with binoculars to use. While there, the guides will also take pictures of you in various poses, and you obviously have the opportunity to take some of your own pictures.

IMG_1684IMG_1683IMG_1636 IMG_1809 IMG_1810Wild Africa Trek 175 IMG_1811 IMG_3048

There were also a coupe of short rain showers during our stop, which caused some of the animals to run for cover. I can’t say I’ve ever seen giraffes running so fast!

Once your time at the camp is up, you load back in to the truck for the ride back to the drop off point, which is the same platform the regular Kilimanjaro Safari trucks drop off at. You then follow your guide back to the Wild Africa Trek entrance where you pick up whatever you placed in the lockers before heading out into the park to enjoy the rest of your day.

The whole trek is about 3 hours, and it’s worth the time and money in my opinion. Getting to see things from a more behind-the-scenes perspective in a small group setting, while getting a ton of useful information was a blast. The rope bridges and brunch at the private safari camp are icing on the cake, and totally justify the cost, in my opinion. Our guides were great, too, we can’t thank them enough for an outstanding morning!

Wild Africa Trek 199

Enjoy a few more pictures from our trek, and when at Animal Kingdom, consider giving this a try!

IMG_1613 IMG_1813 IMG_1814 IMG_2897 IMG_2934 IMG_2951 IMG_2991 Wild Africa Trek 001 Wild Africa Trek 100 Wild Africa Trek 101 Wild Africa Trek 102 Wild Africa Trek 104 Wild Africa Trek 168

Roar Before the 24

Last weekend I decided to take a very last minute drive down to Daytona for an event I’ve never attended, the Roar Before the 24. For those not familiar with it, the Roar is a 3 day test at Daytona International Speedway for those teams competing in the season-opening Rolex 24 at Daytona, which Bayley and I have attended twice, including last year. Being unable to attend the 24 this year, I needed a racing fix before she and I head to the Grand Prix of St Petersburg in March, so late last week I decided I’d give the Roar a try.

IMSA and the speedway put in a lot of effort to ensure people have a good time here. The speedway hosts Scout Days, where Scouts and their families can purchase tickets allowing them to camp in the infield, fish in the lake, and take in the various activities the Roar itself offers. Pretty cool stuff, but what about the rest of us? Well, for $15 per day (or free if you already have Rolex 24 tickets), you get to:

  • Park in the infield
  • Have full garage access to both the CTSC and WeatherTech paddock areas
  • Take guided tours of the garage
  • Participate in fan forums
  • Watch the on-track action during

So basically, you get a lot of the same benefits you can get for the 24, but for a lot less money. Sure, there’s no actual race going on, and unless you’re a Scout you can’t stay overnight, but frankly I had a blast while I was there. I spent the vast majority of my time in the WeatherTech paddock, with some walking of the infield thrown in. I can’t speak to how the fan forums or garage tours were, as I skipped both. I actually meant to check out the fan forum, but totally forgot about it while walking the paddock Saturday afternoon.

Some tips for those who go in future years:

Parking

When driving into the infield, come in through the turn 1 tunnel. Personally, I like that tunnel better, and it puts you closer to better parking. I came in this way Sunday morning, and ended up with a front row parking spot not far from where the Porsche car corral normally is during the 24. Here’s  clip of some of the on-track action while I was standing in front of my car on Sunday:

You can still get to that area if you come in the turn 4 tunnel, I just like the turn 1 entrance better. I did come in turn 4 Saturday morning, and ended up parking over by all the driver and crew rental cars. I only know this because I encountered drivers coming and going from the area more than once Saturday, including Dion von Moltke and Bruno Junqueira, which was pretty cool.

Garage

Enjoy the garage access. Seriously. Some of the best times to be in there were when the cars were heading to and from the pits, and while they were on track. Sure, seeing them all in their garages being worked on between practices is cool, but the other times I mentioned above were great as well. Watching a line of cars drive right past you while heading out to the track is really cool, and you never know what you’ll see while walking around in there while practice is underway. Teams come and go as they need to make major adjustments on their cars, and every now and then you’ll run in to a driver or team owner down there too. Here are a couple of clips of the cars coming and going from the garage.

Keep your head on a swivel when in the garage. This applies for any event, to be honest. The teams have a job to do, and they won’t hesitate to move you out of the way so they can get things done. During the more busy times, hearing the horns on their carts was a pretty common thing, and occasionally you’d hear someone getting yelled at as a moving race car was headed towards them while they weren’t paying attention. Seriously, keep track of your surroundings and stay out of their way. Want to know how easy it is to get caught up in the action? Check out my clip of the Rahal BMWs leaving the garage. I’d been recording the Vettes in the garage next door heading out when the first M6 departed. That wasn’t a big surprise, it was when the other one was pushed out to my left, which I wasn’t expecting. Fortunately I was able to (I hope) stay out of the way for it, but there was some initial surprise as the wing of the 25 suddenly came in to view right next to me :).

Food and drink

Just like the 24, you can take your own food and drink in. I completely forgot to bring my cooler with me, so I ended up buying food and drink at the track Saturday. The prices aren’t NFL-diculous, but still, I could have saved a few bucks and avoided some lines by stocking up before arriving.

Cameras

Keep at least one camera at the ready at all times. I didn’t take any serious gear this time, I just kept my iPhone gear and GoPro handy, and frankly, enjoyed using the GoPro to capture the cars. I picked up the 3-way arm for it Saturday morning, and while I liked having the additional reach, it allowed for more camera shake than I liked, so maybe I’ll pick up an arm with a gimbal for St Pete. I was also burning through battery in both pretty quickly, so had to recharge them both with my portable charger a few times on Saturday, so be sure to keep one handy. Also, if you’re bringing gear to try and get good shots of the cars on track, bring a step stool so you can get a clean shot over the fences. I used one during our first trip to the 24 in 2012, but forgot it last time and again for the Roar, and was pretty mad at myself both times. Sure, I could have left the track and gone across the street to Target to pick one up, but leave the track? Seriously?

Enjoy the facilities!

Don’t just stay near the fan zone and garage, get out and walk the infield. I walked out to speedway turn 2 on Saturday and took in some of the action on the high speed turn, then walked the lake back over to the boardwalk club. There are some great spots to enjoy the action all over the track, so don’t limit yourself to one location. My Microsoft Band claims I walked 13.1 miles on Saturday alone!

Tickets

One thing I learned the hard way, get your tickets far enough in advance for them to arrive before you go. I didn’t have much choice here, since this was so last minute, so I ordered online with will call pickup as my only choice. For Saturday that was fine, I got there shortly after 8am, and the will call window was open, so I picked up my ticket and headed in to the track. I’d originally only ordered my Saturday ticket, as I wasn’t sure if I was going to drive home that night, or wait until Sunday. Well, I’d decided to stay for Sunday, but couldn’t go ahead and buy my ticket at that point, as will call was the only thing open, and I didn’t want to wait until the regular ticket office opened at 9am. Guess what? I had to Sunday morning. I’d gone ahead and ordered online for will call pickup Saturday night, but on Sunday, will call doesn’t open early, so I had to wait until 9am to get my ticket and head in. Sure, it was only an hour delay, and the WeatherTech cars weren’t on track yet, but I like to get inside as early as possible :).

I think that about covers it. I really did find the weekend worth the 13 total hours of driving I did to and from Daytona, as the Roar ticket is a heck of a value, even if it is just testing. Getting to see the new Ganassi Racing Ford GT was a pretty good bonus too, that thing is an absolute demon (in a good way 🙂 ).

Enjoy some of my favorite pics from the weekend, and if you can make it out to the Roar and/or the 24, do it, you’ll have a blast!

IMG_5399IMG_5114IMG_5113 IMG_5158 IMG_5161 IMG_5169 IMG_5189 IMG_5192 IMG_5201 IMG_5203 IMG_5207 IMG_5245 IMG_5335 IMG_5436IMG_5407 IMG_5464 IMG_5493 IMG_5299IMG_5501 IMG_5508 IMG_5531 IMG_5534 IMG_5535IMG_5536 IMG_5577 IMG_5604